
DIY Holiday Gifts with Cricut ExploreAir 2 and Infusible Ink / Personalized Hanukkah Pouches
The following post is sponsored by Cricut. All opinions are my own.
We all know 2020 has been a bust and that social life is nonexistent right now. A big tradition in our family is our annual Hanukkah party. Sometimes we invite a ton of people and sometimes just a few but we always have one or two big celebrations during Hanukkah.
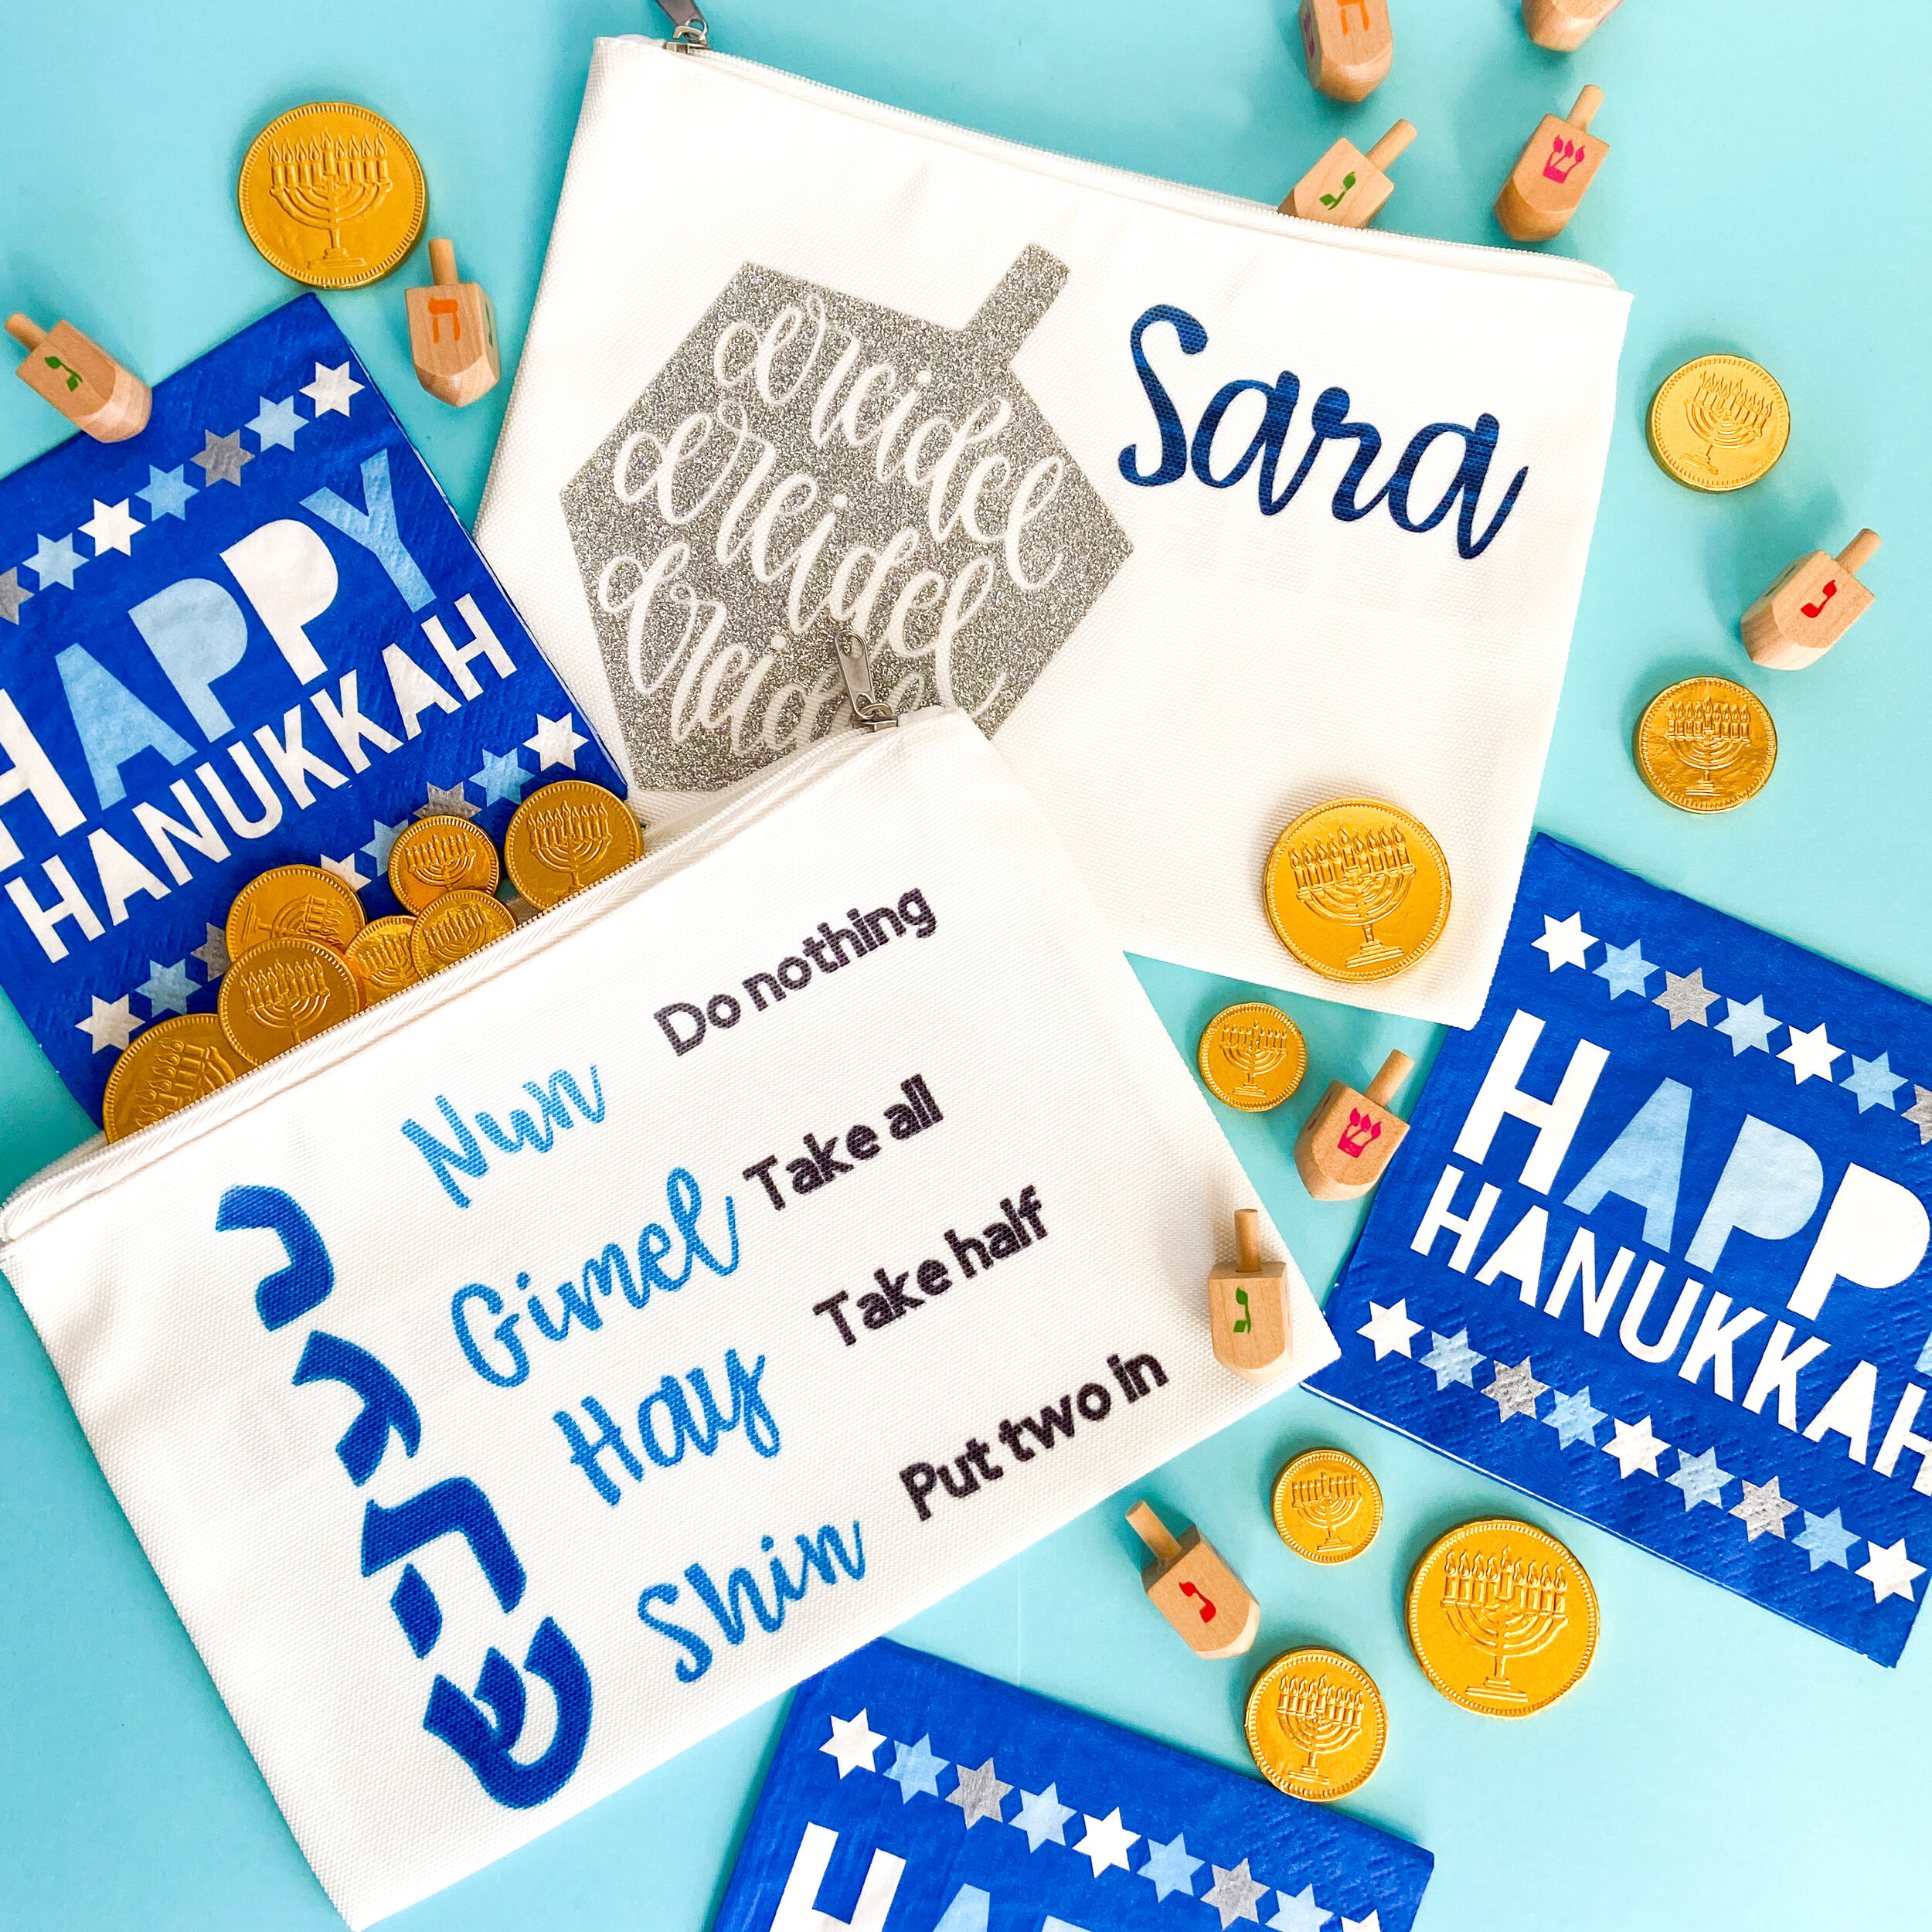
This year, for obvious reasons, we had to cancel any type of celebration. My kids are really sad, so I came up with the perfect solution! Their favorite part of our party is always playing dreidel with their friends, so we’re sending them personalized Hanukkah pouches and we’re going to FaceTime with them and play!
These pouches are so easy to make, just a few mins and you’re done, because who has time to spend too much time crafting while the kids are doing distance learning. Do not be afraid of all the steps, it’s really easy!
Materials you will need:
Dreidels
Chocolate Gold Coins
Hanukkah Pouch Template (On Cricut Design Space)

Step by step Tutorial
Step 1
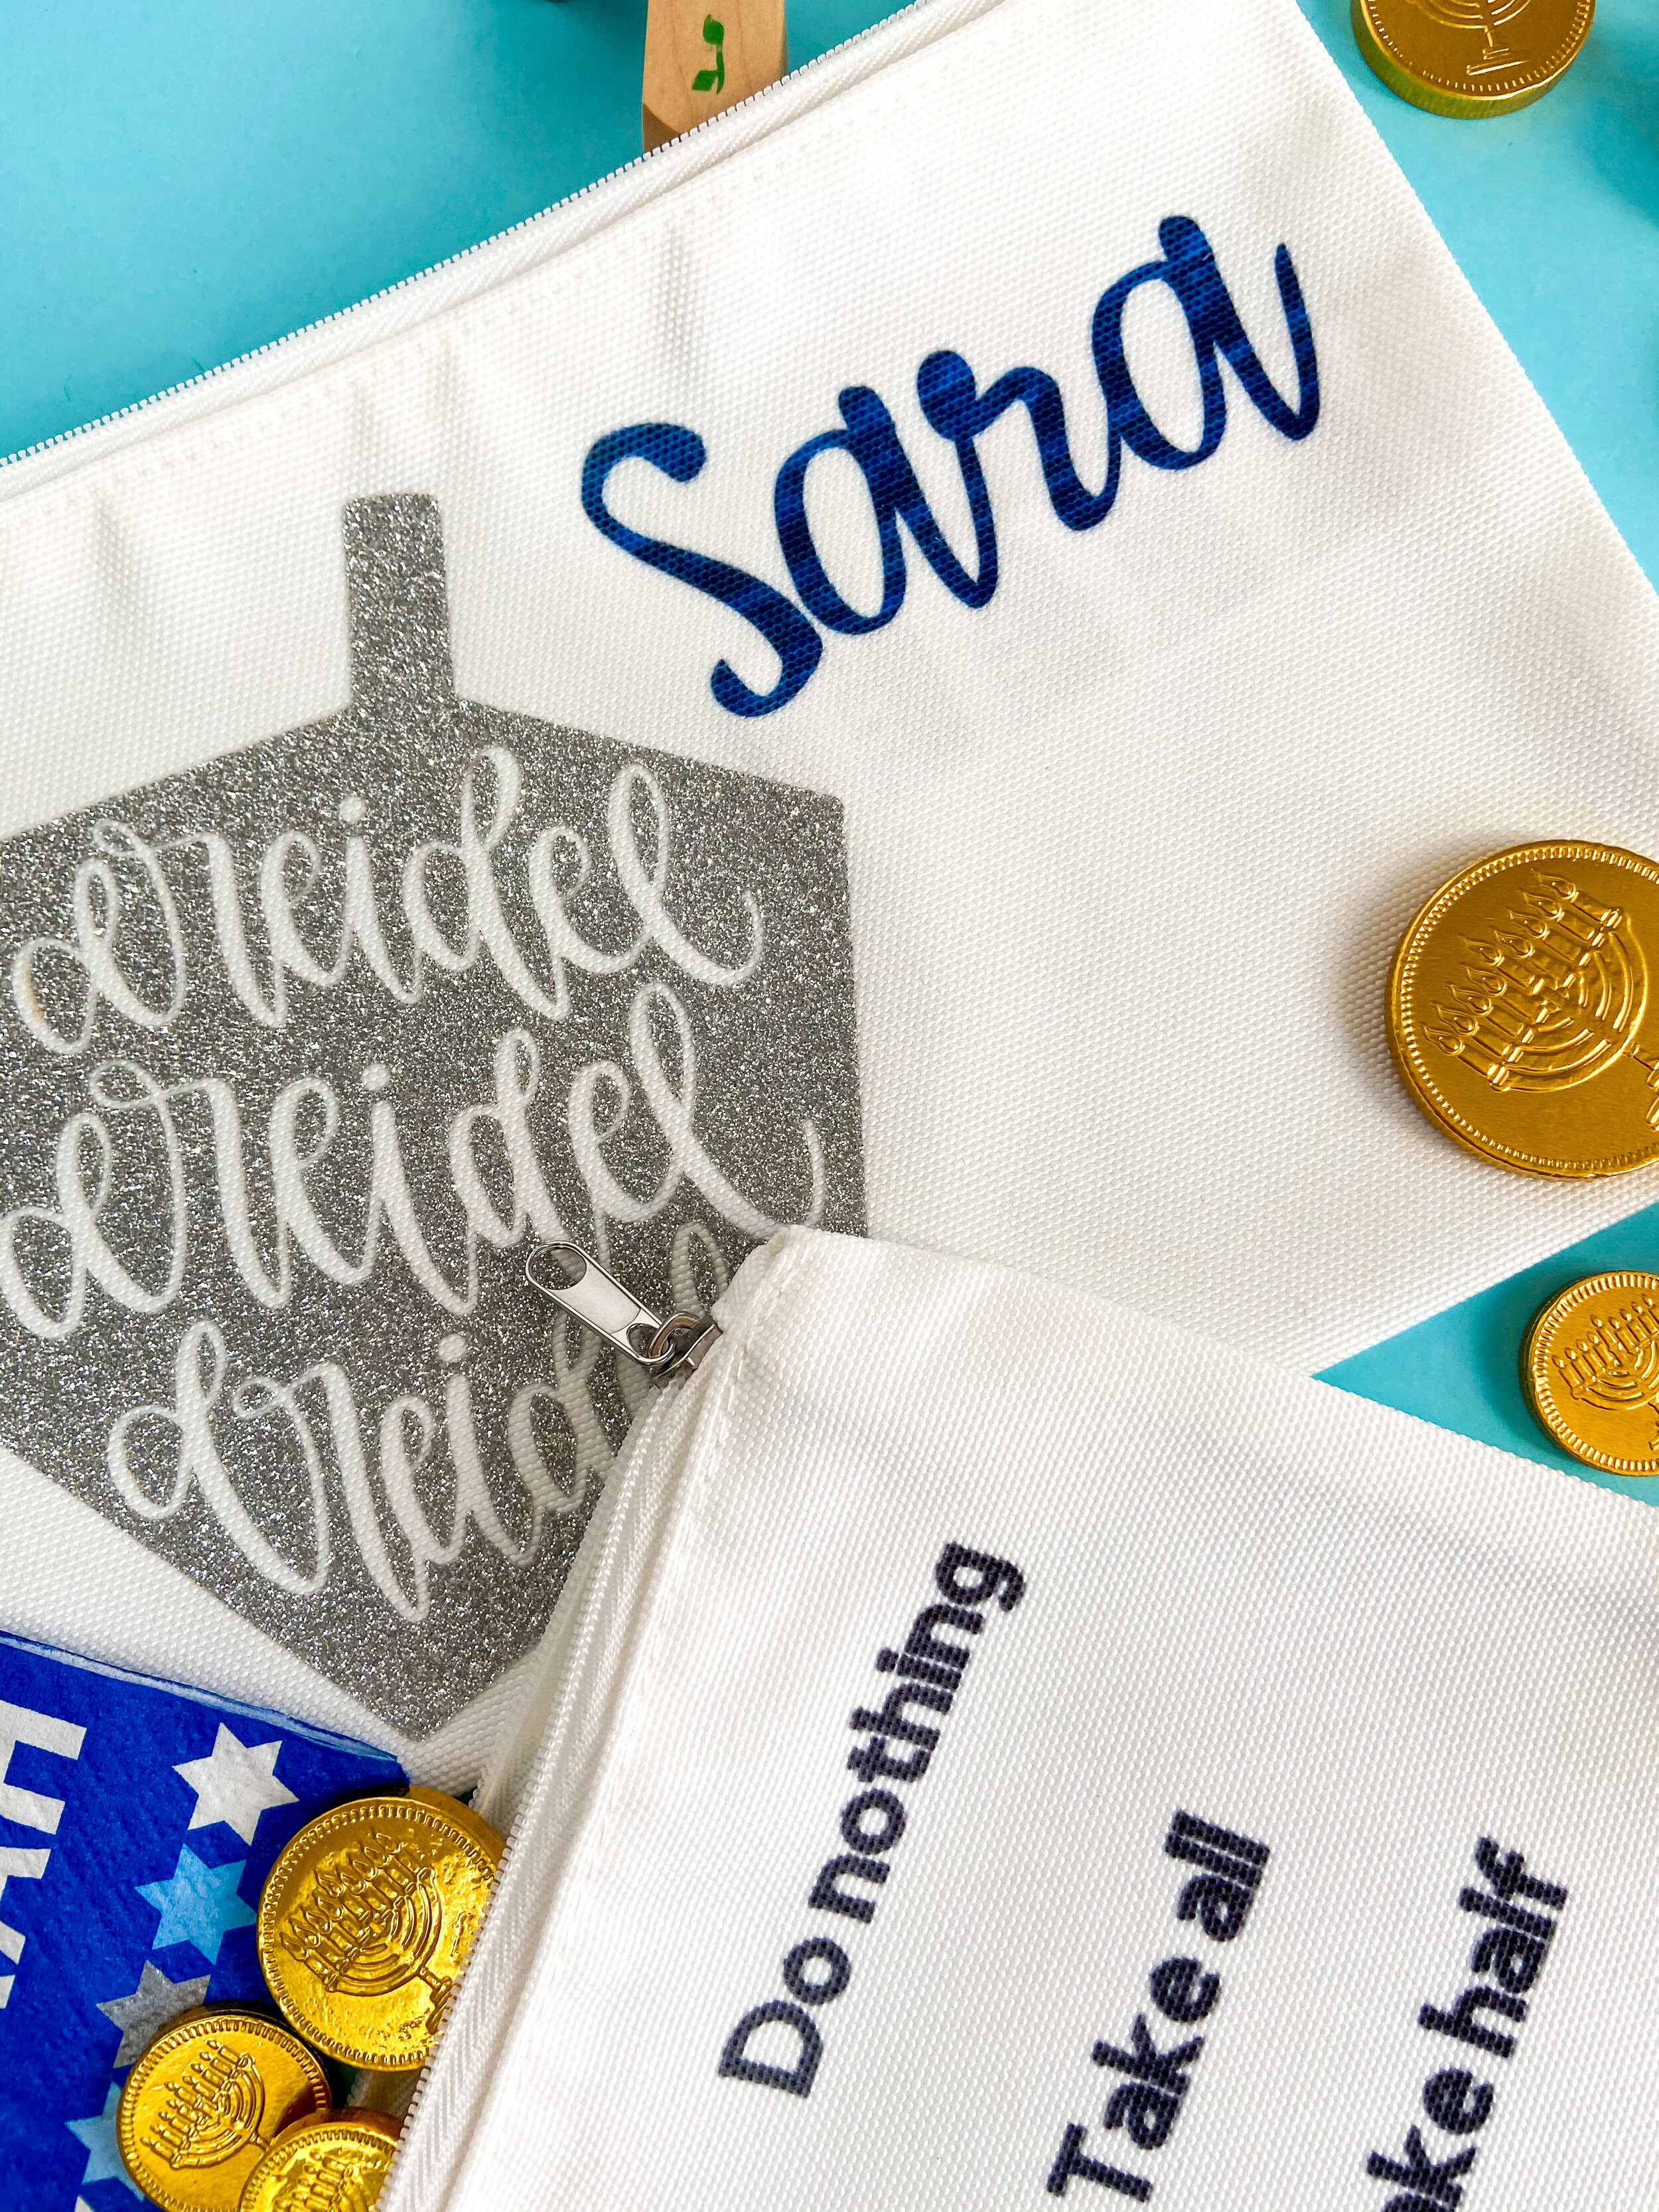
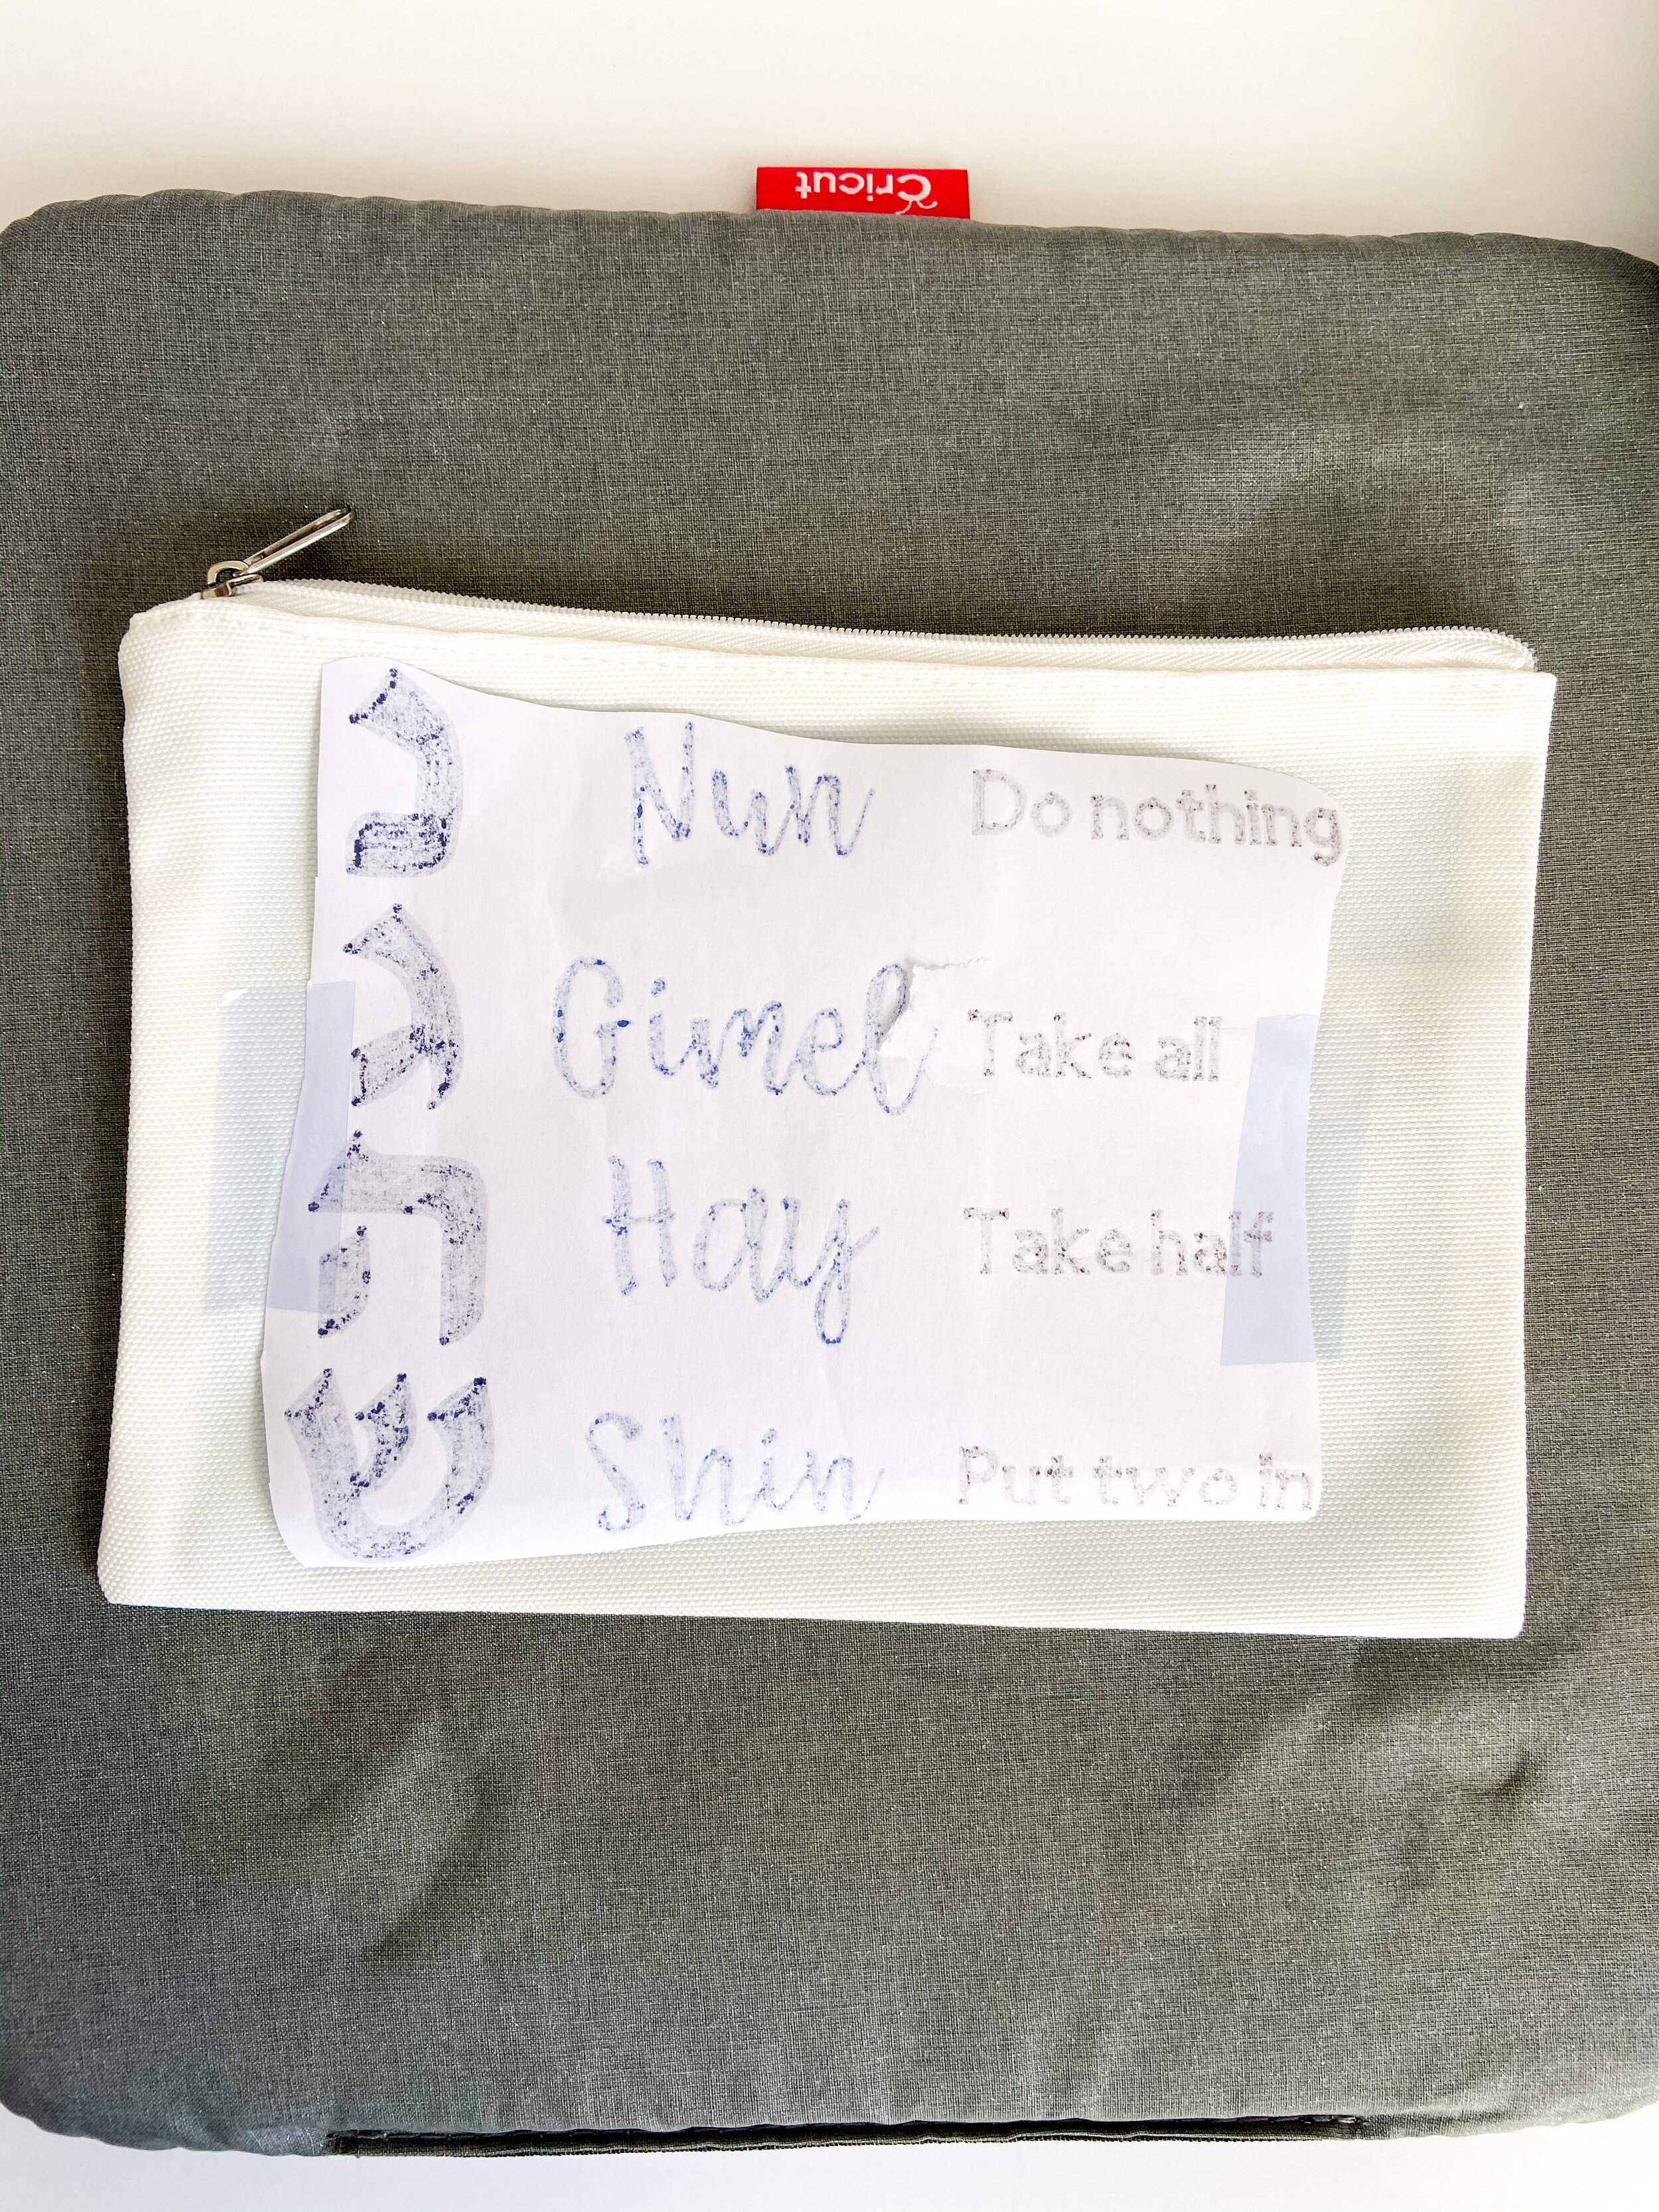
You can find the link to this design on Design Space with the link above. Customize it with the name of your choice.
Step 2
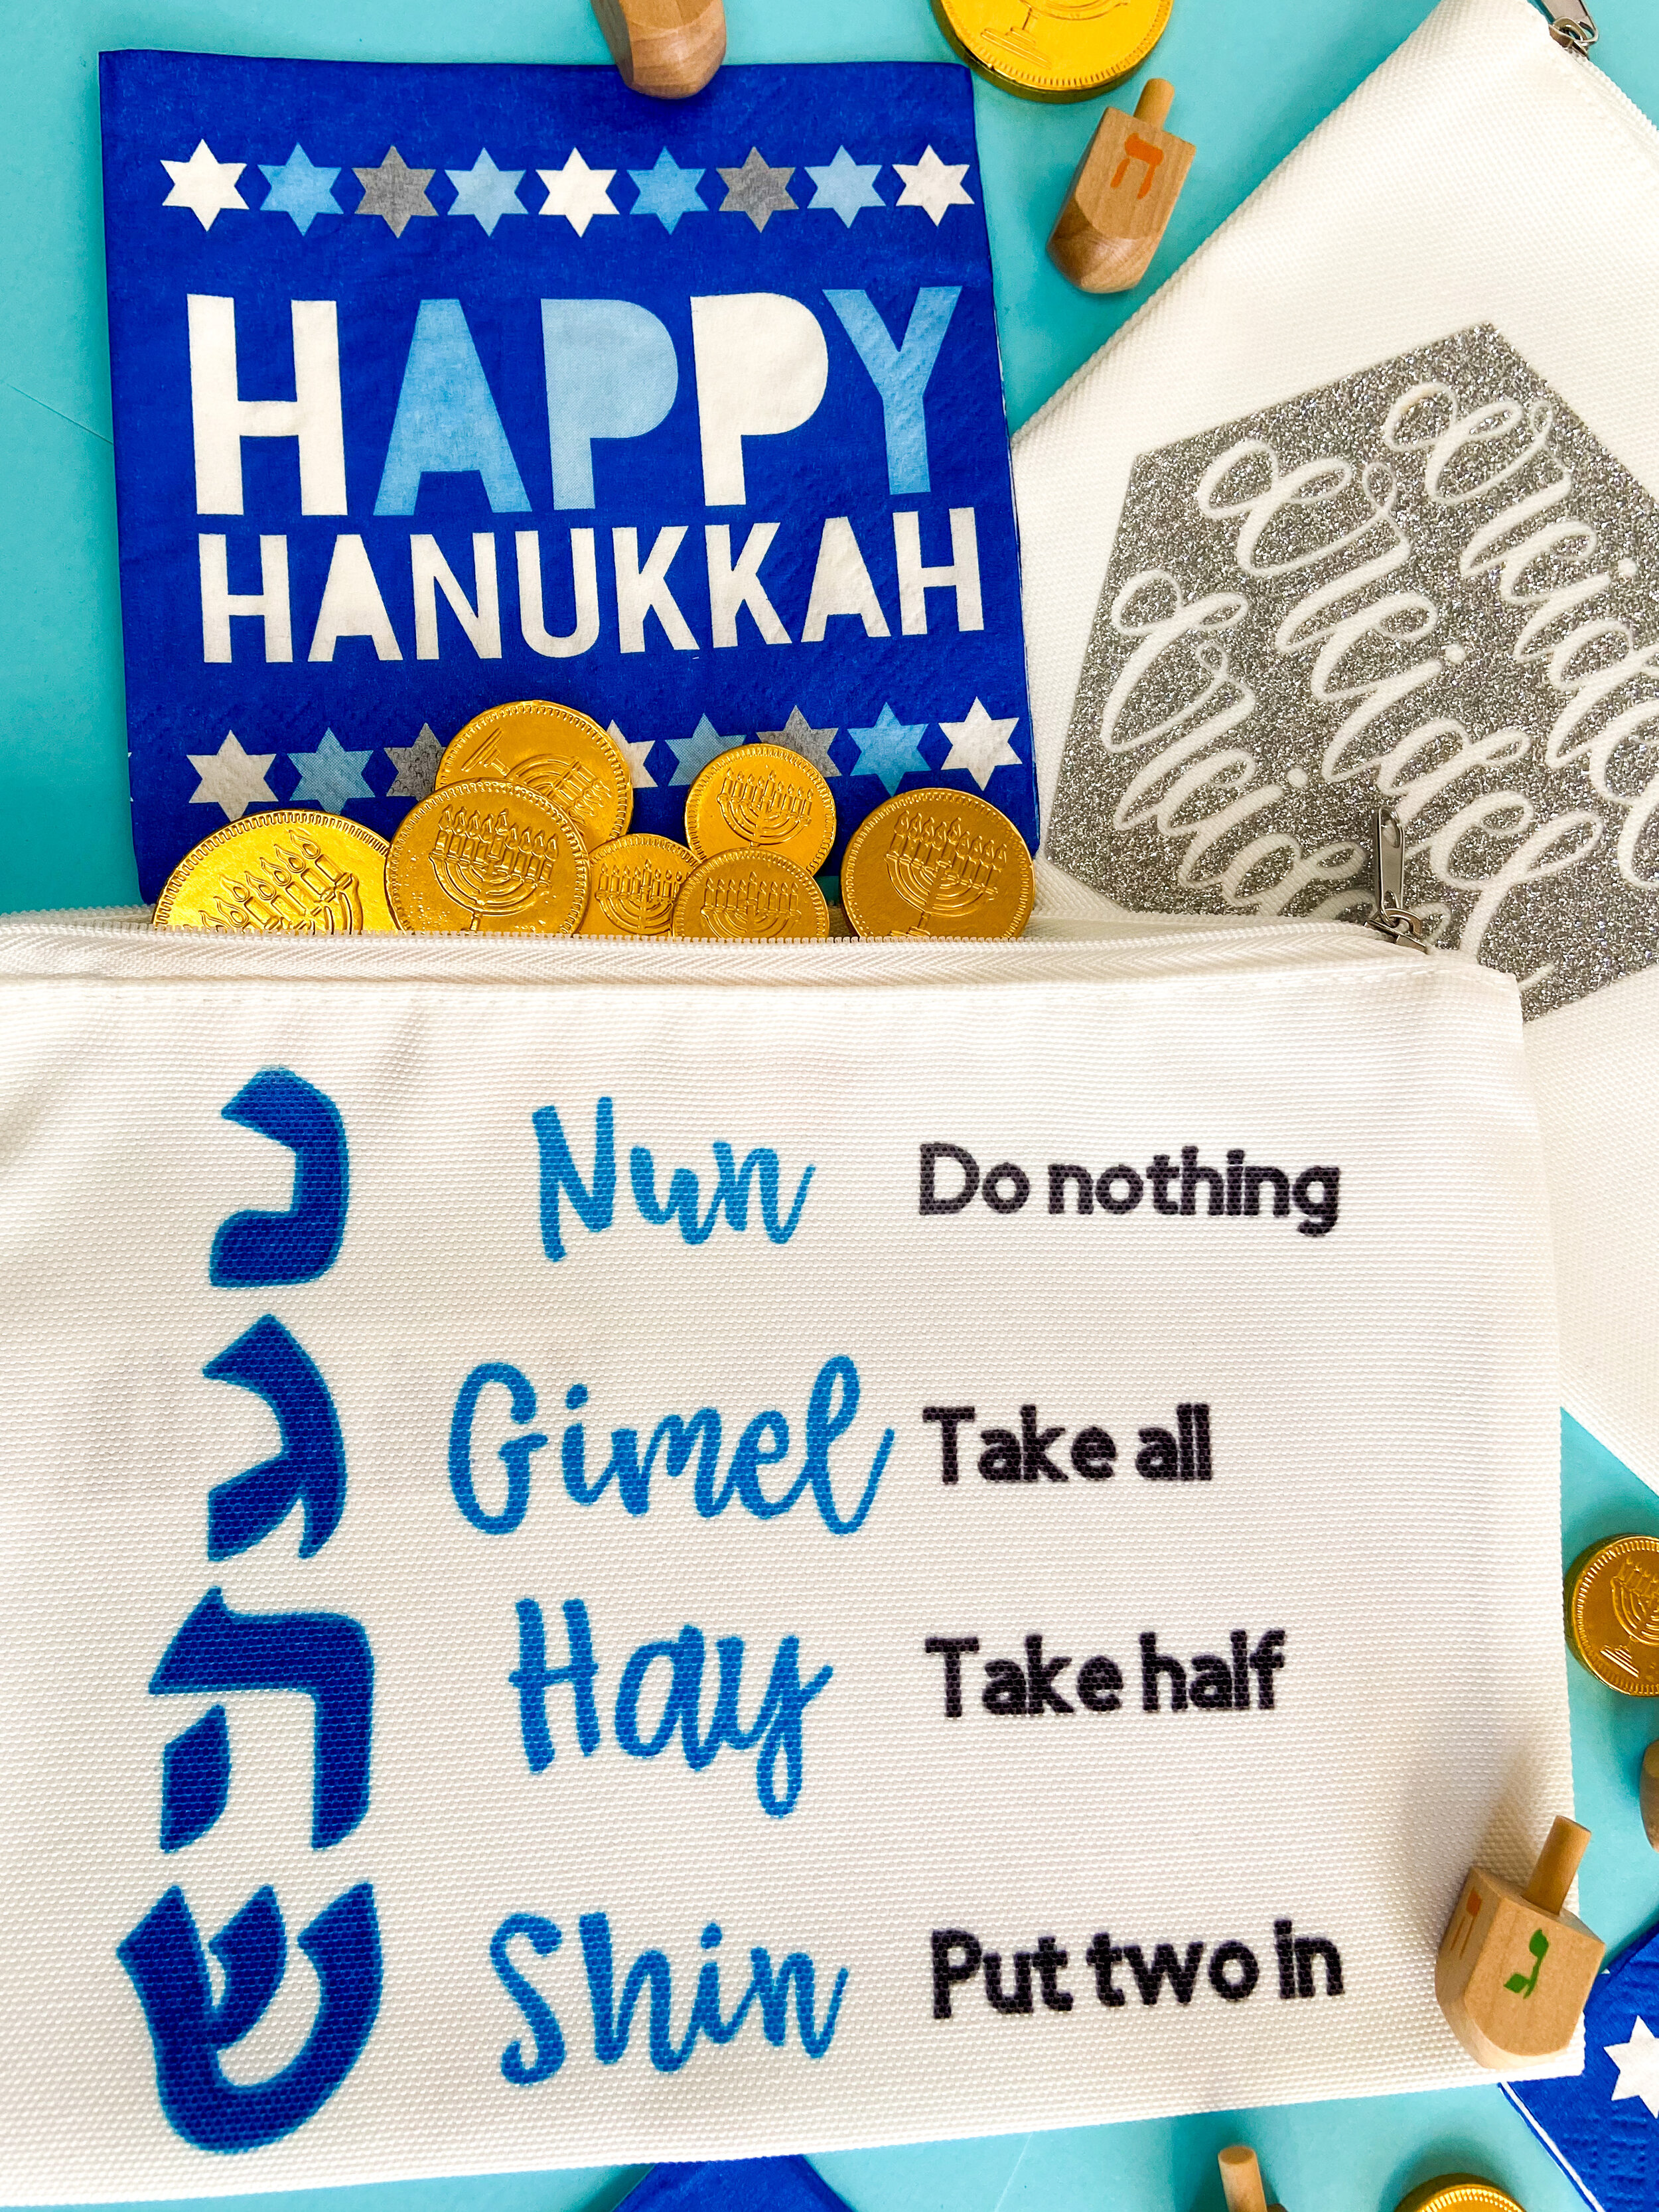
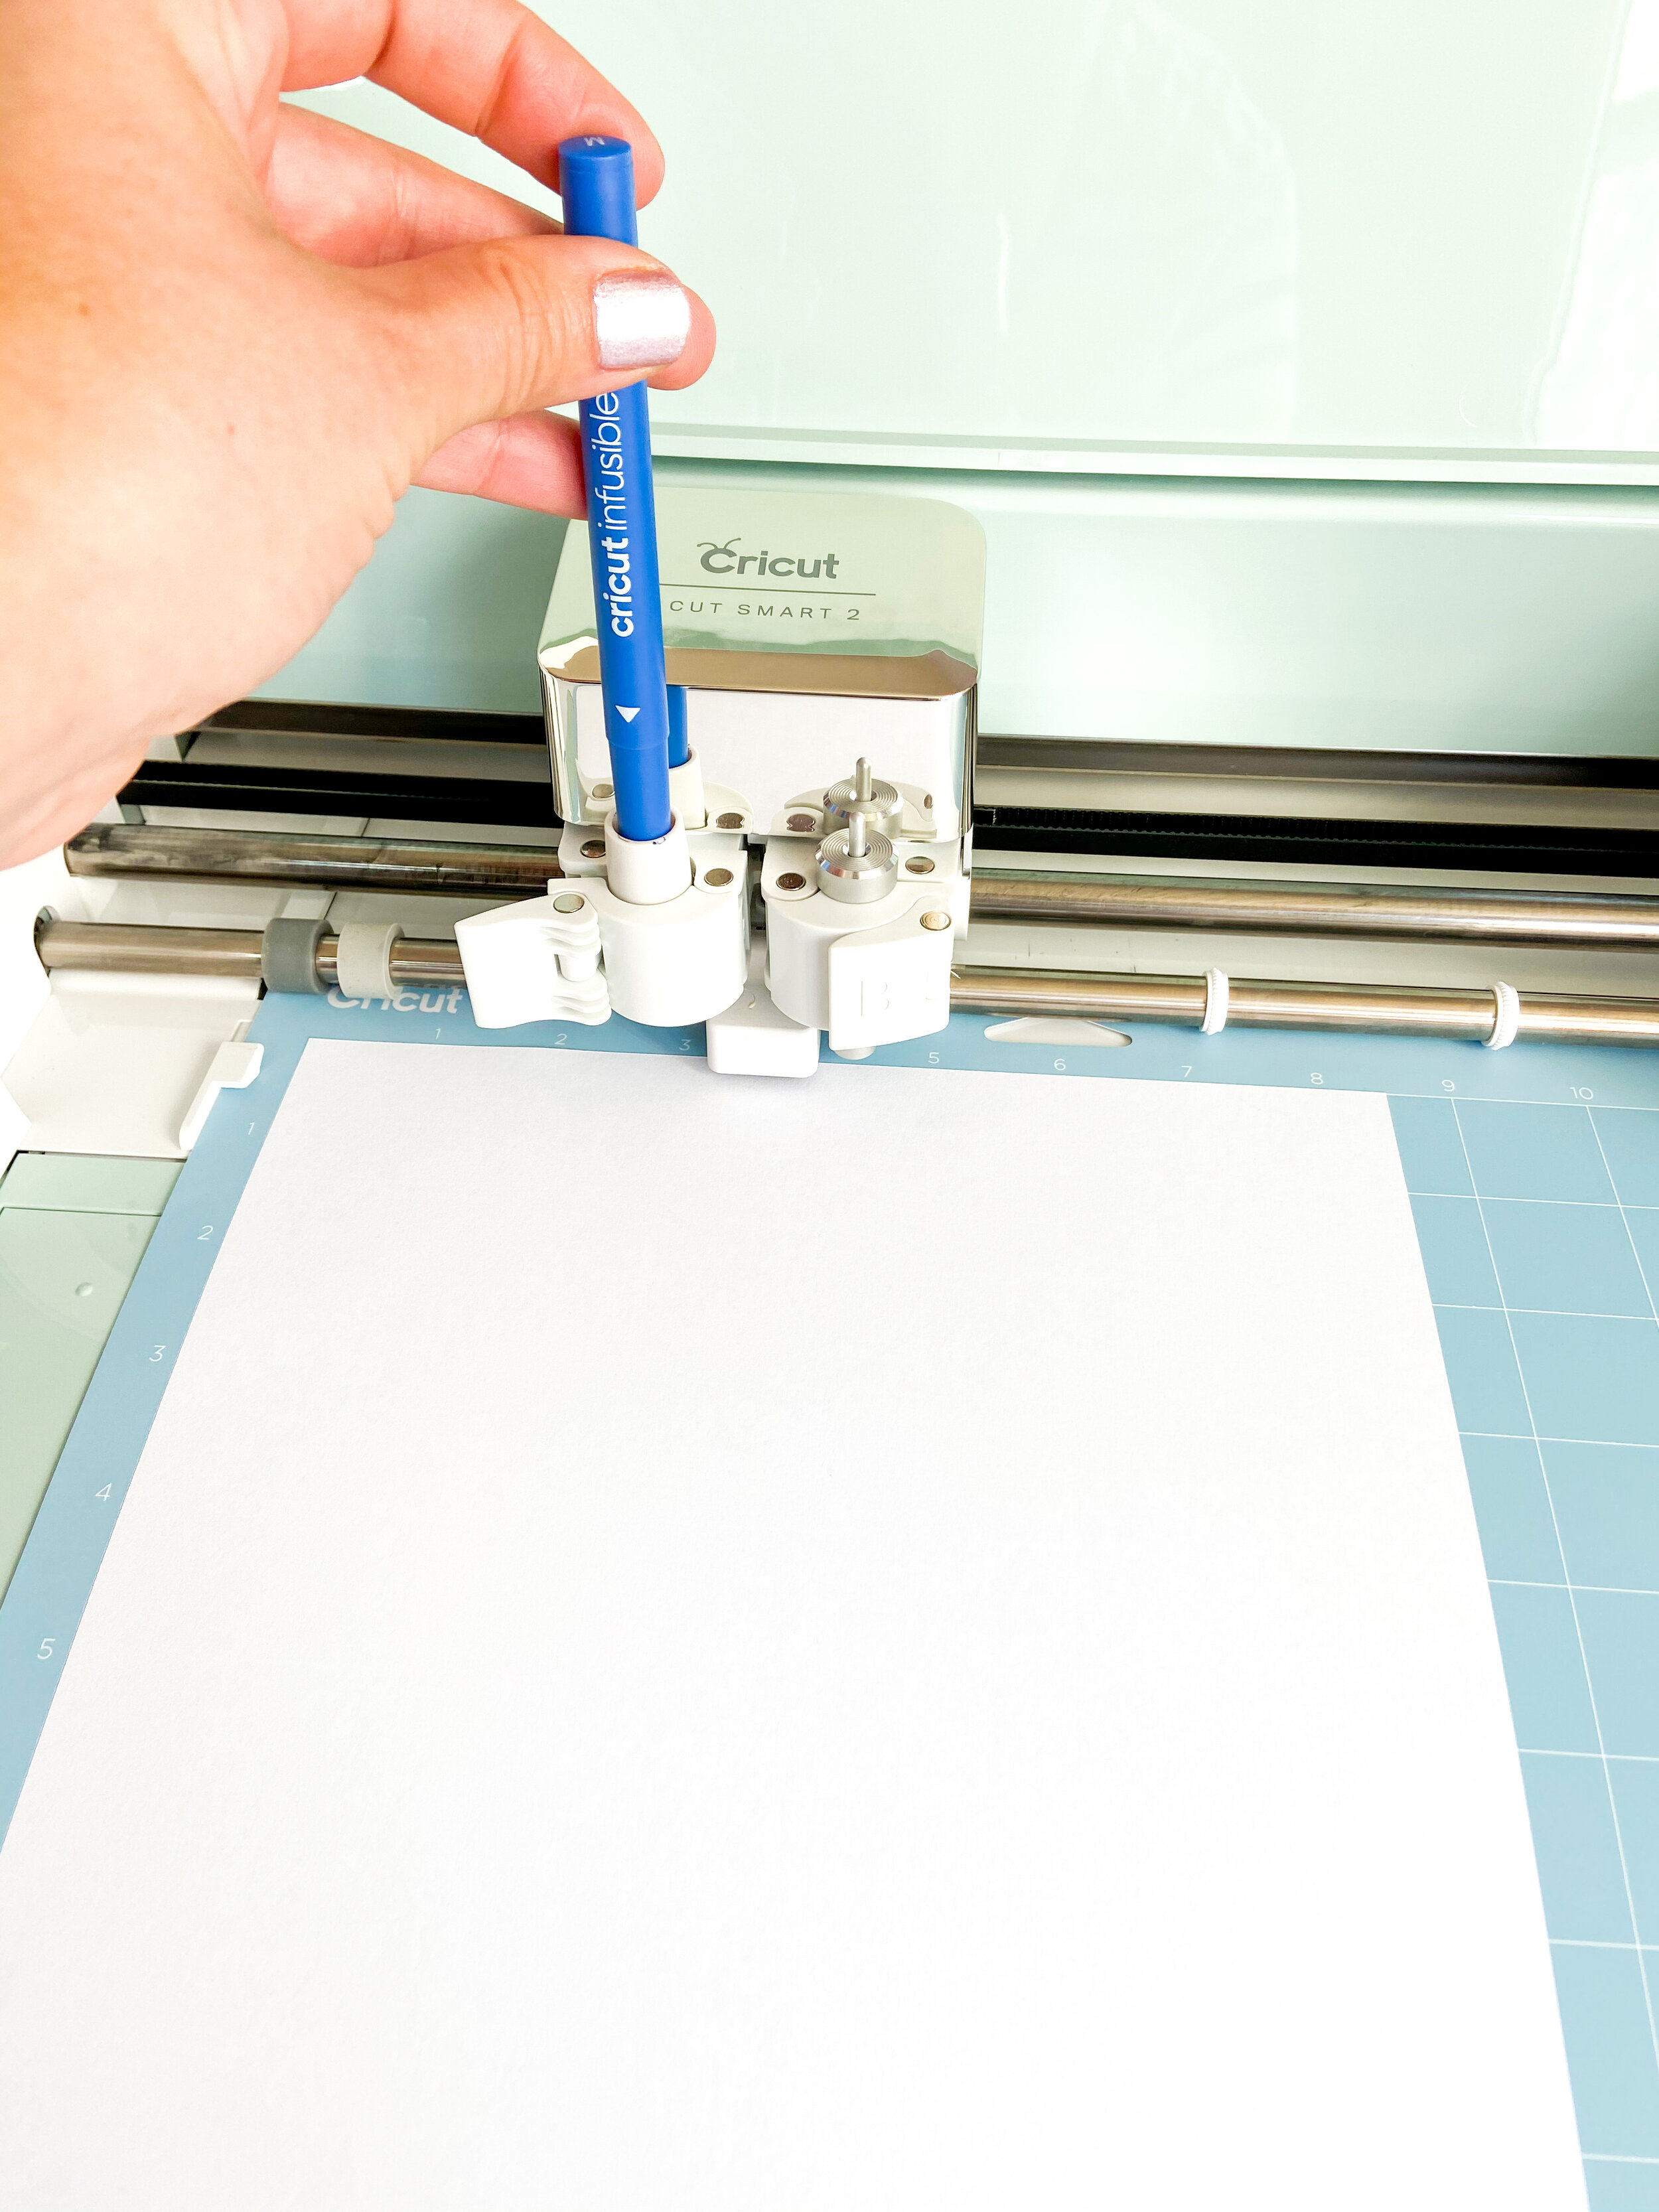
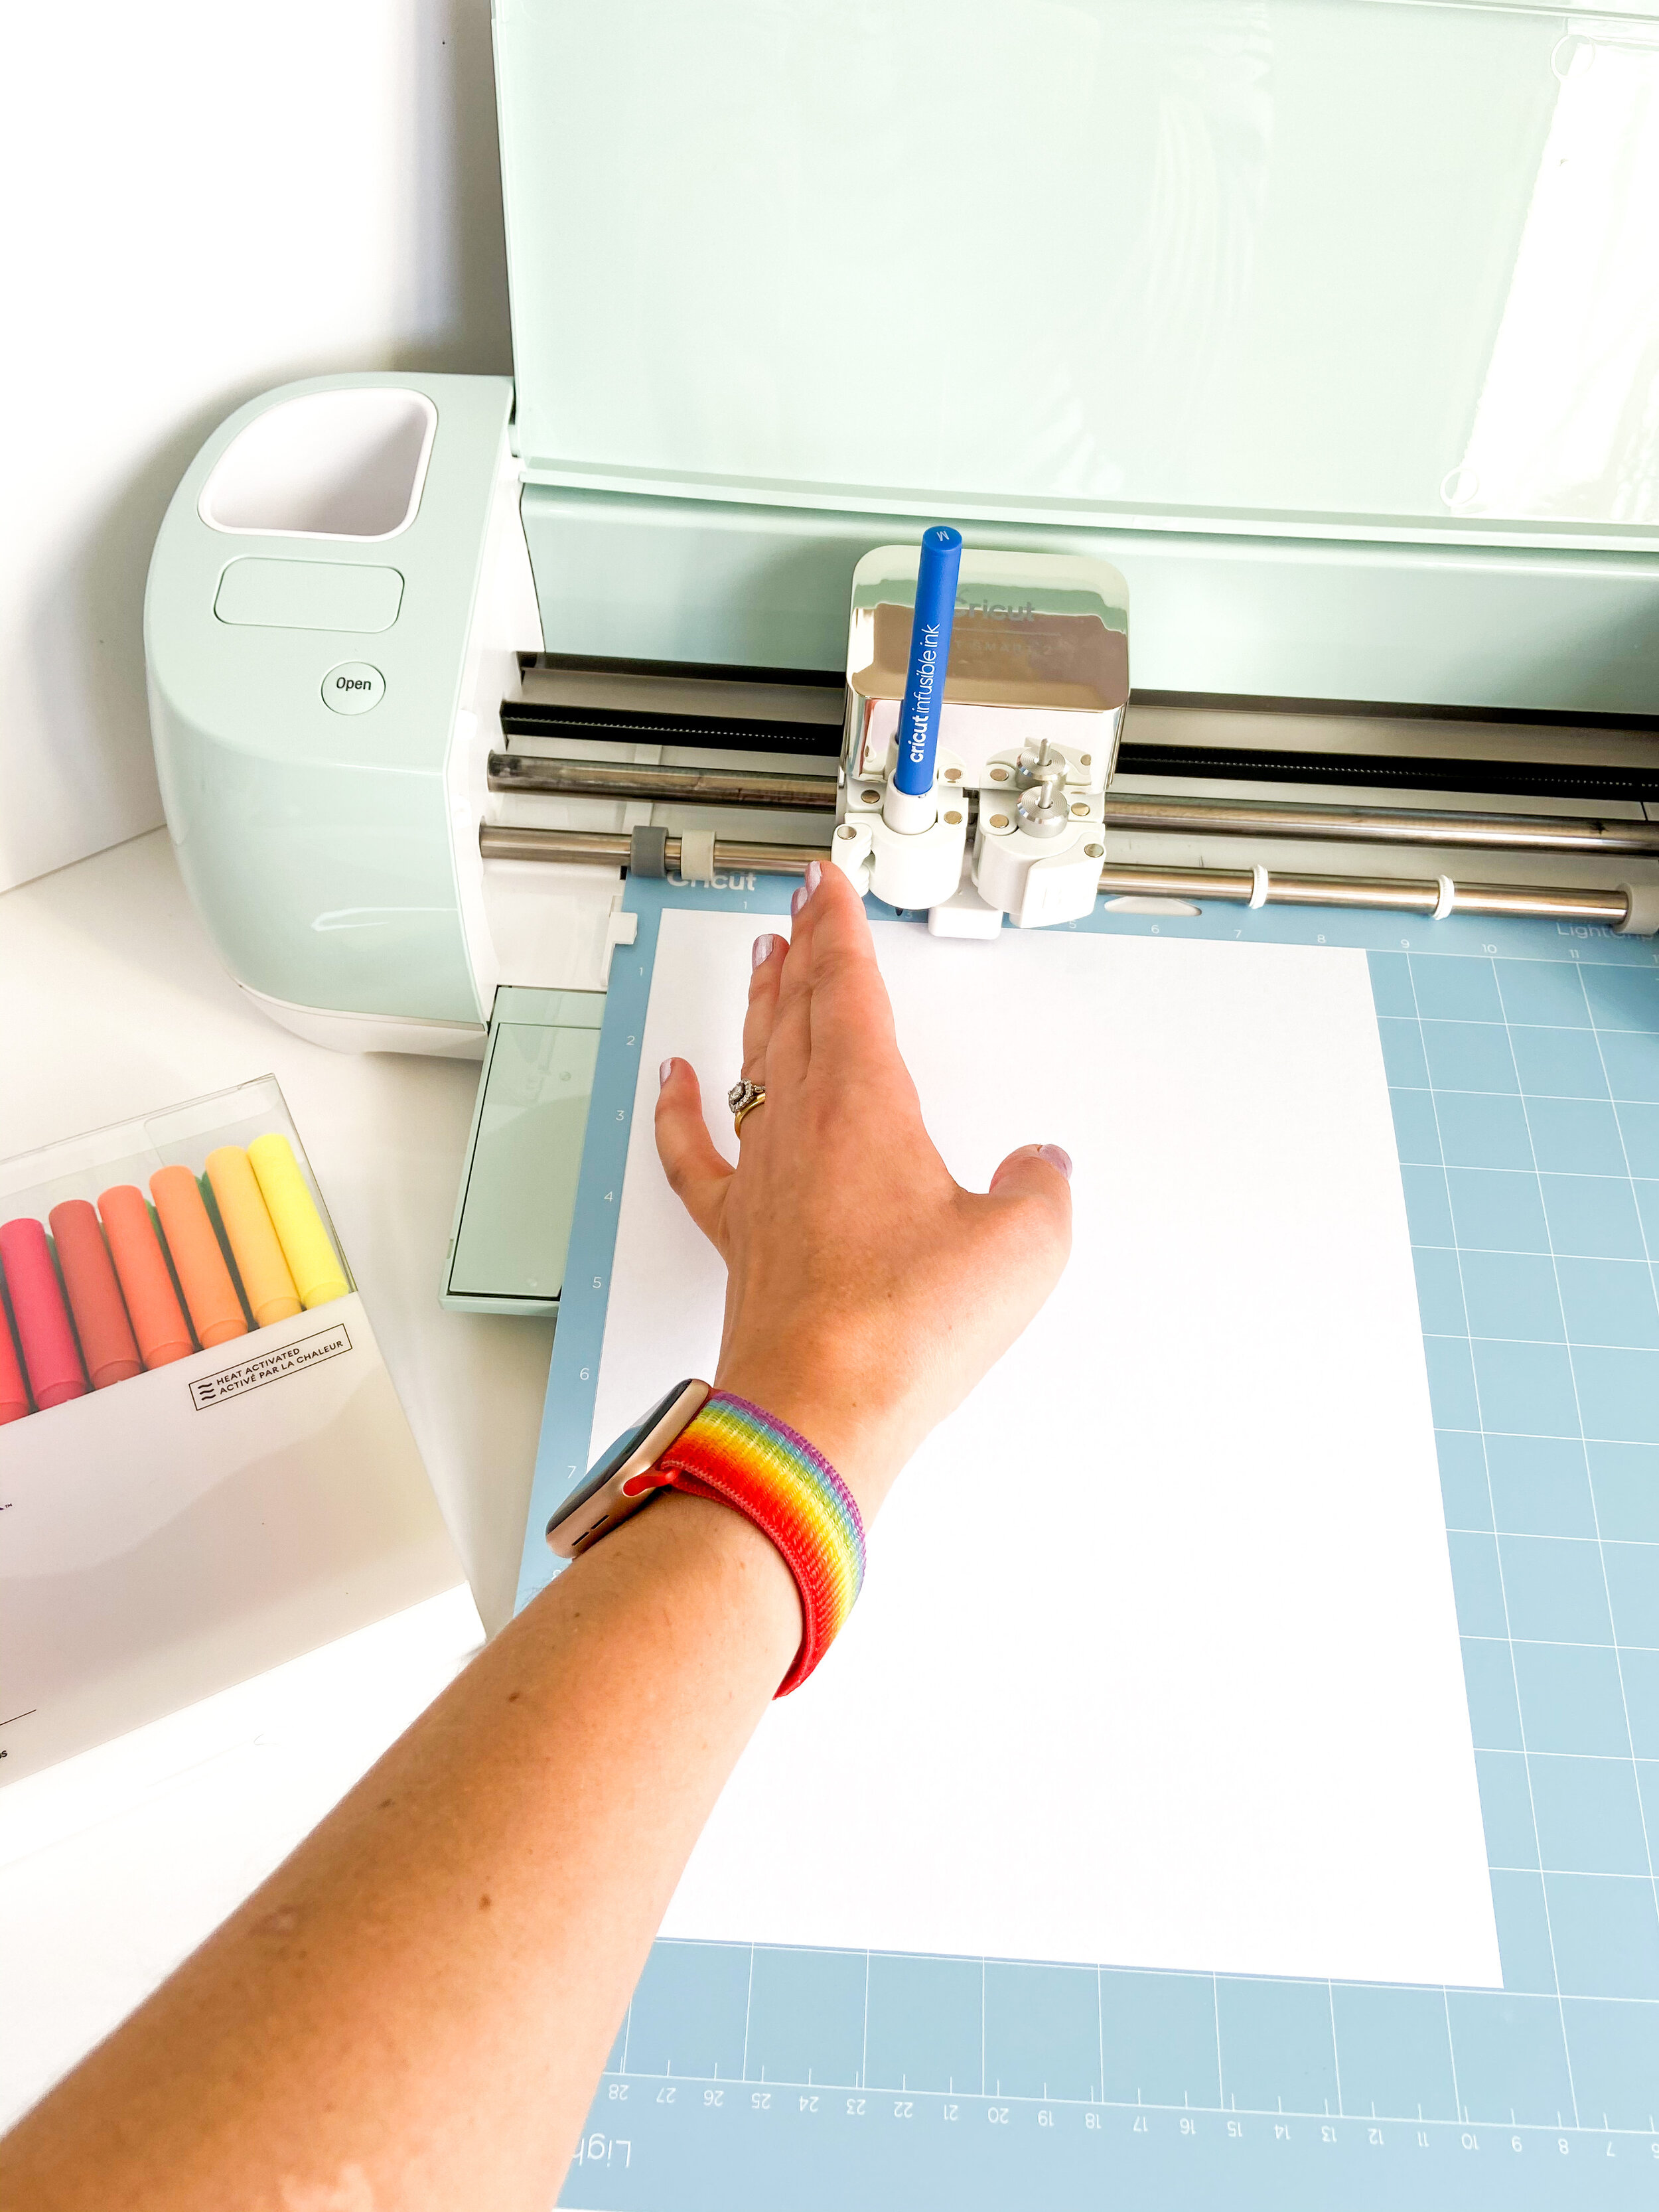
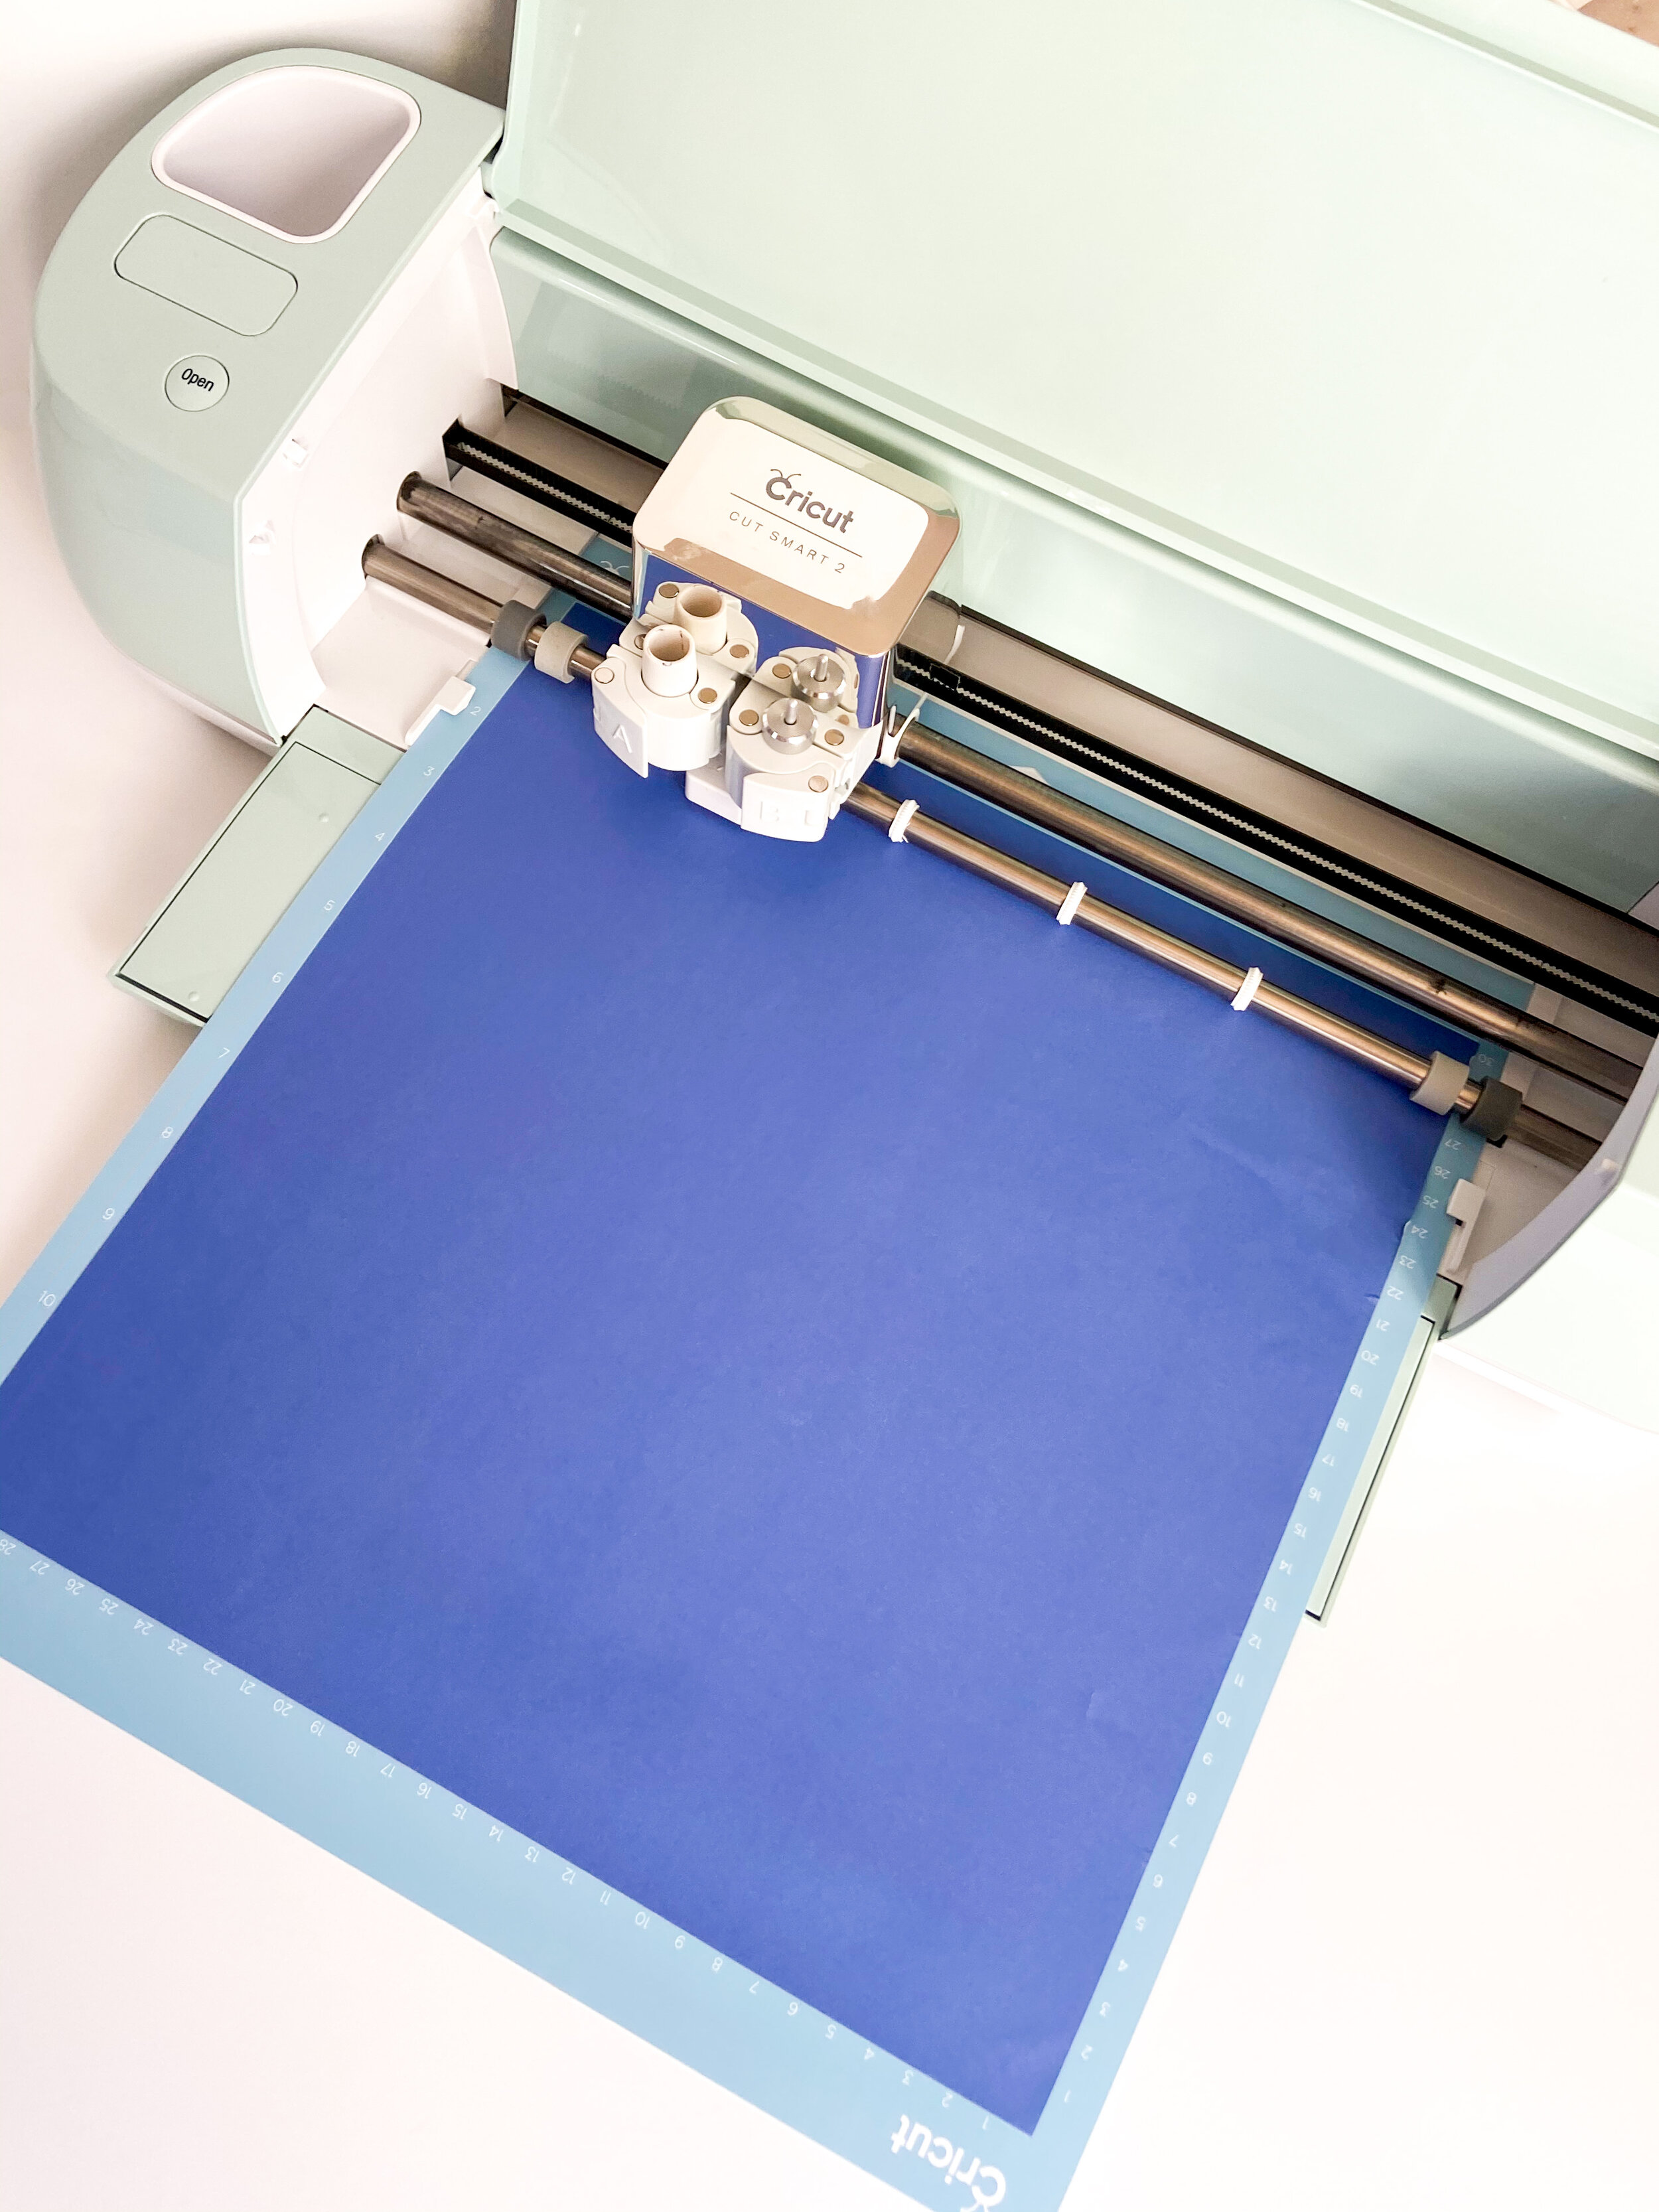
I like to make the back firs, which is where the instructions for the game are. For that, I used Infusible Ink markers and pens. You could also use Infusible Ink transfer sheets, but I wanted different colors and to do it all at once.
When you use the pens, the machine will stop and tell you when to change the color. I used markers for the Hebrew letters and pens for the rest.
When you’re putting your pen/marker inside the clamp (A), you need to push it hard until you can’t see the arrow on the pen anymore and then close the clamp. Don’t be afraid to push, I know this from experience, ha!
You have to use regular copy paper for this step. Set your material to copy paper and use your light grip mat.
Do not forget to mirror the image!
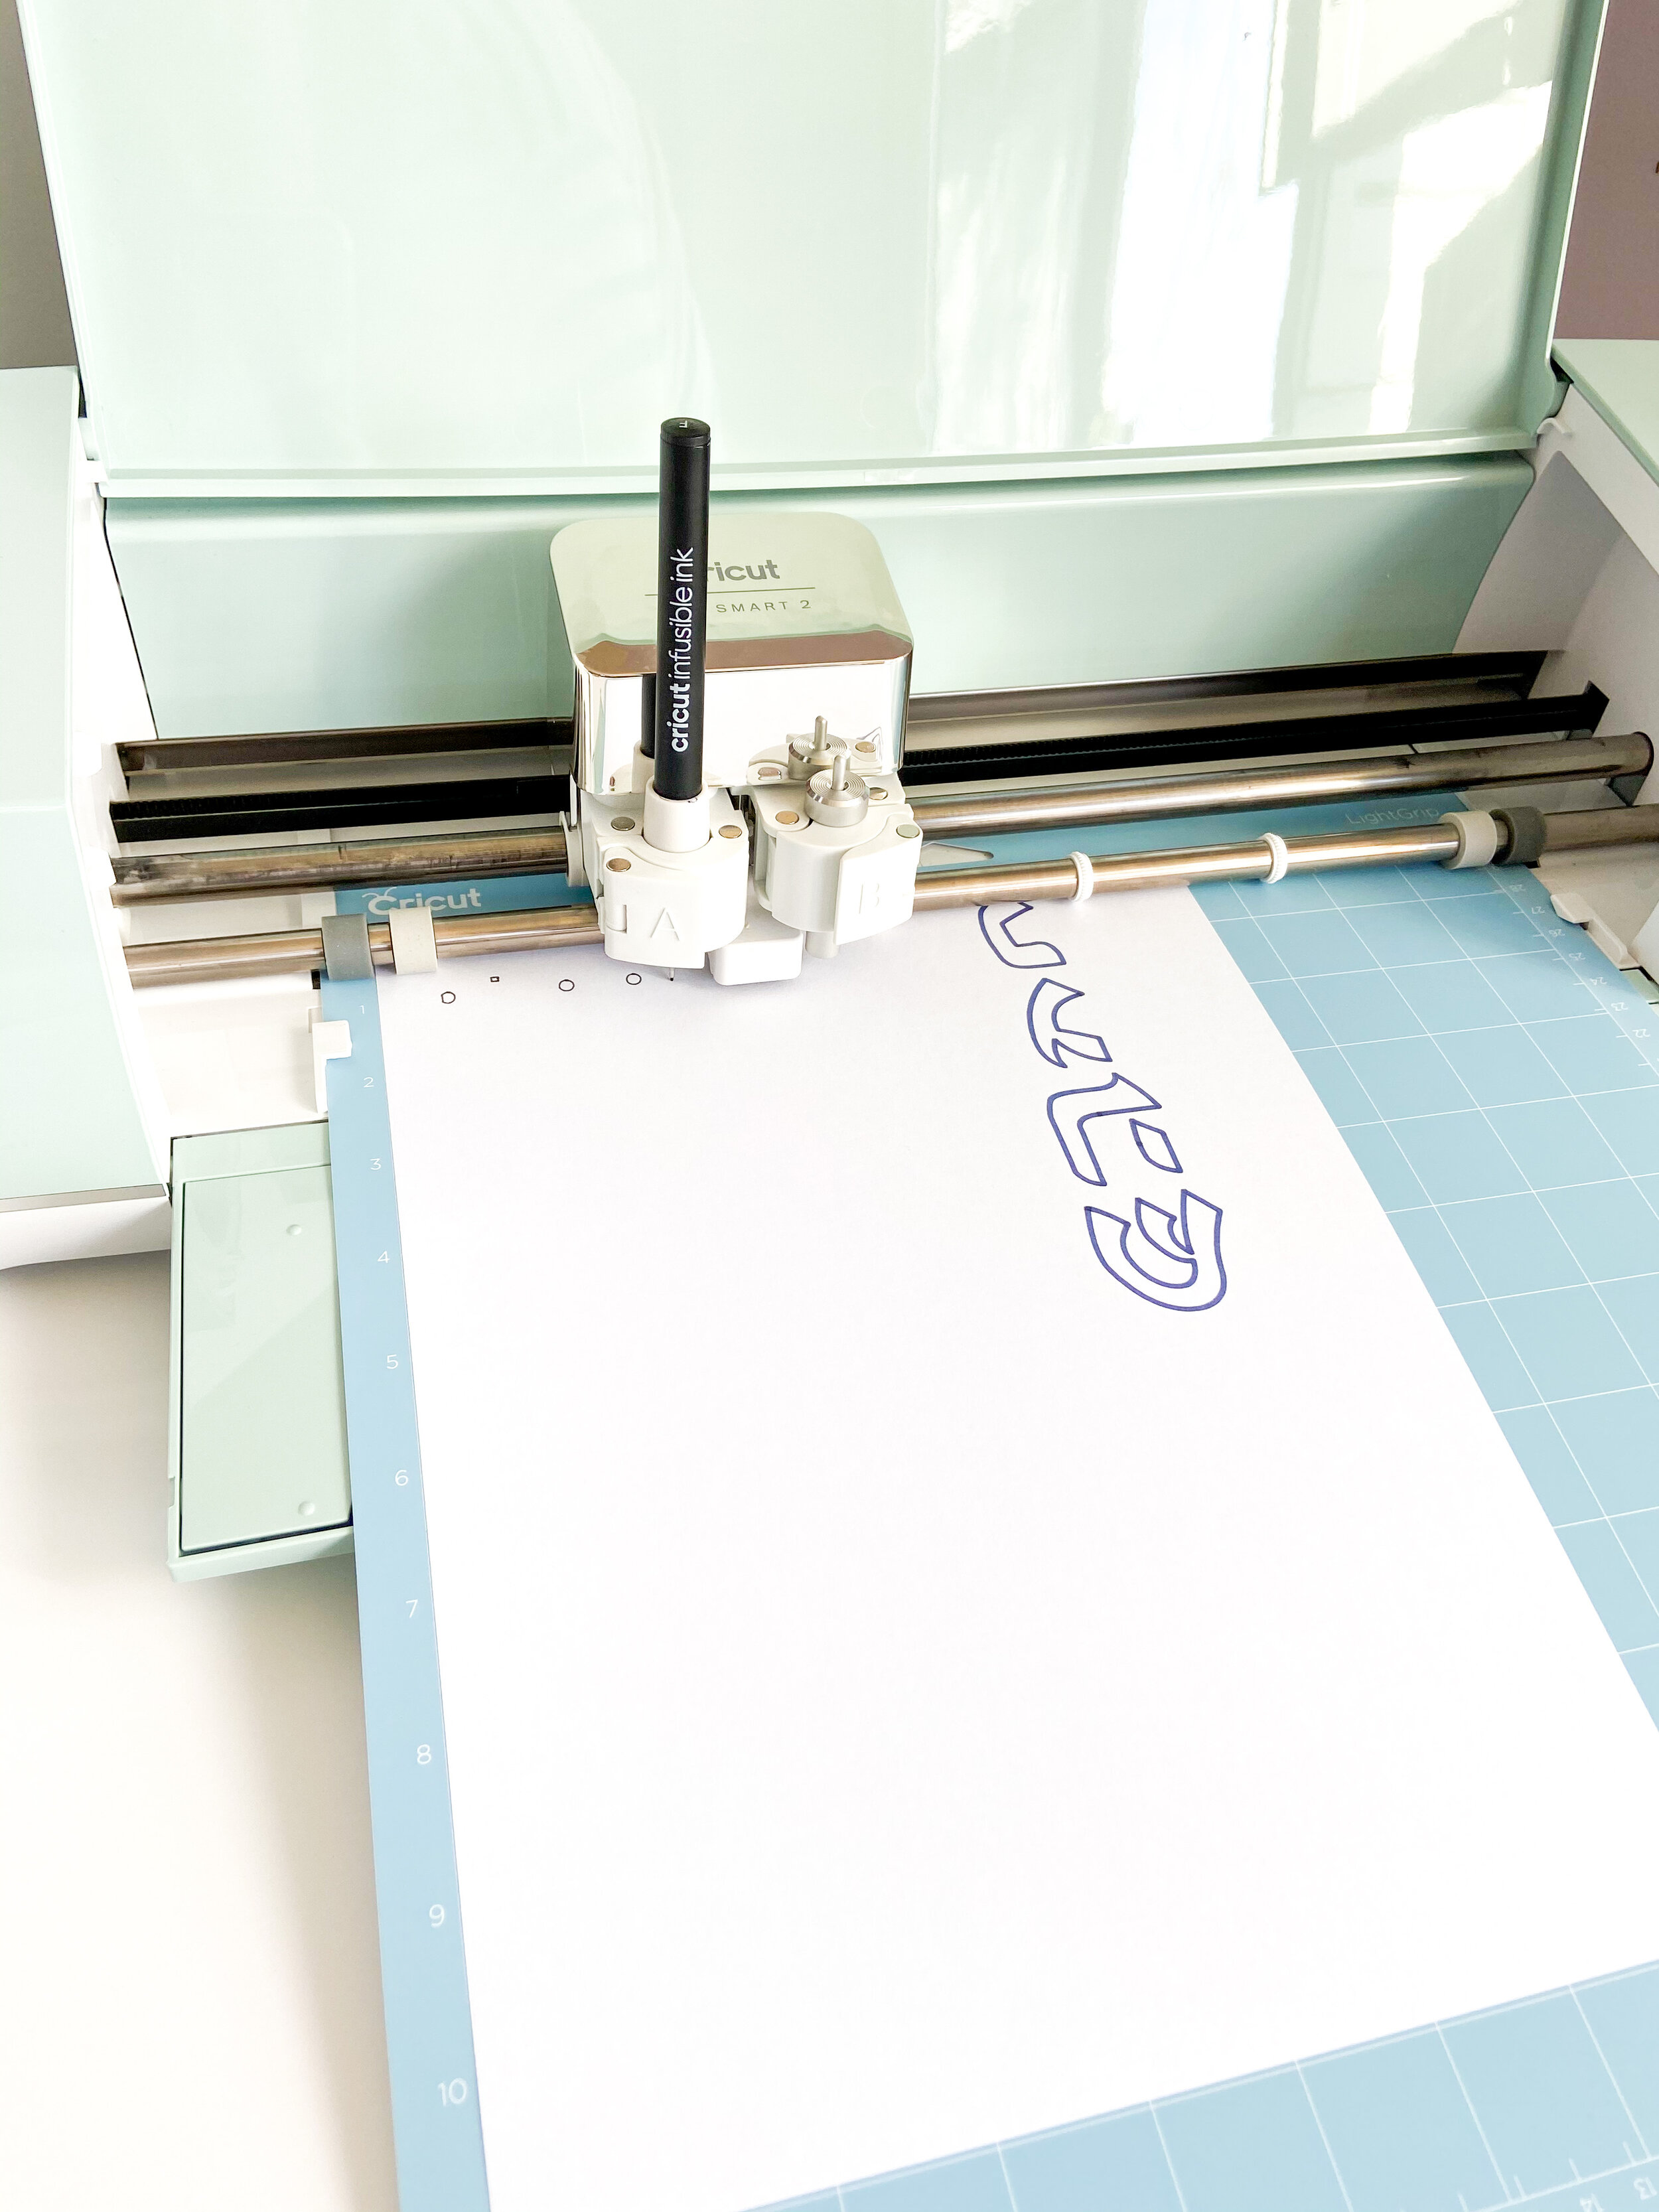
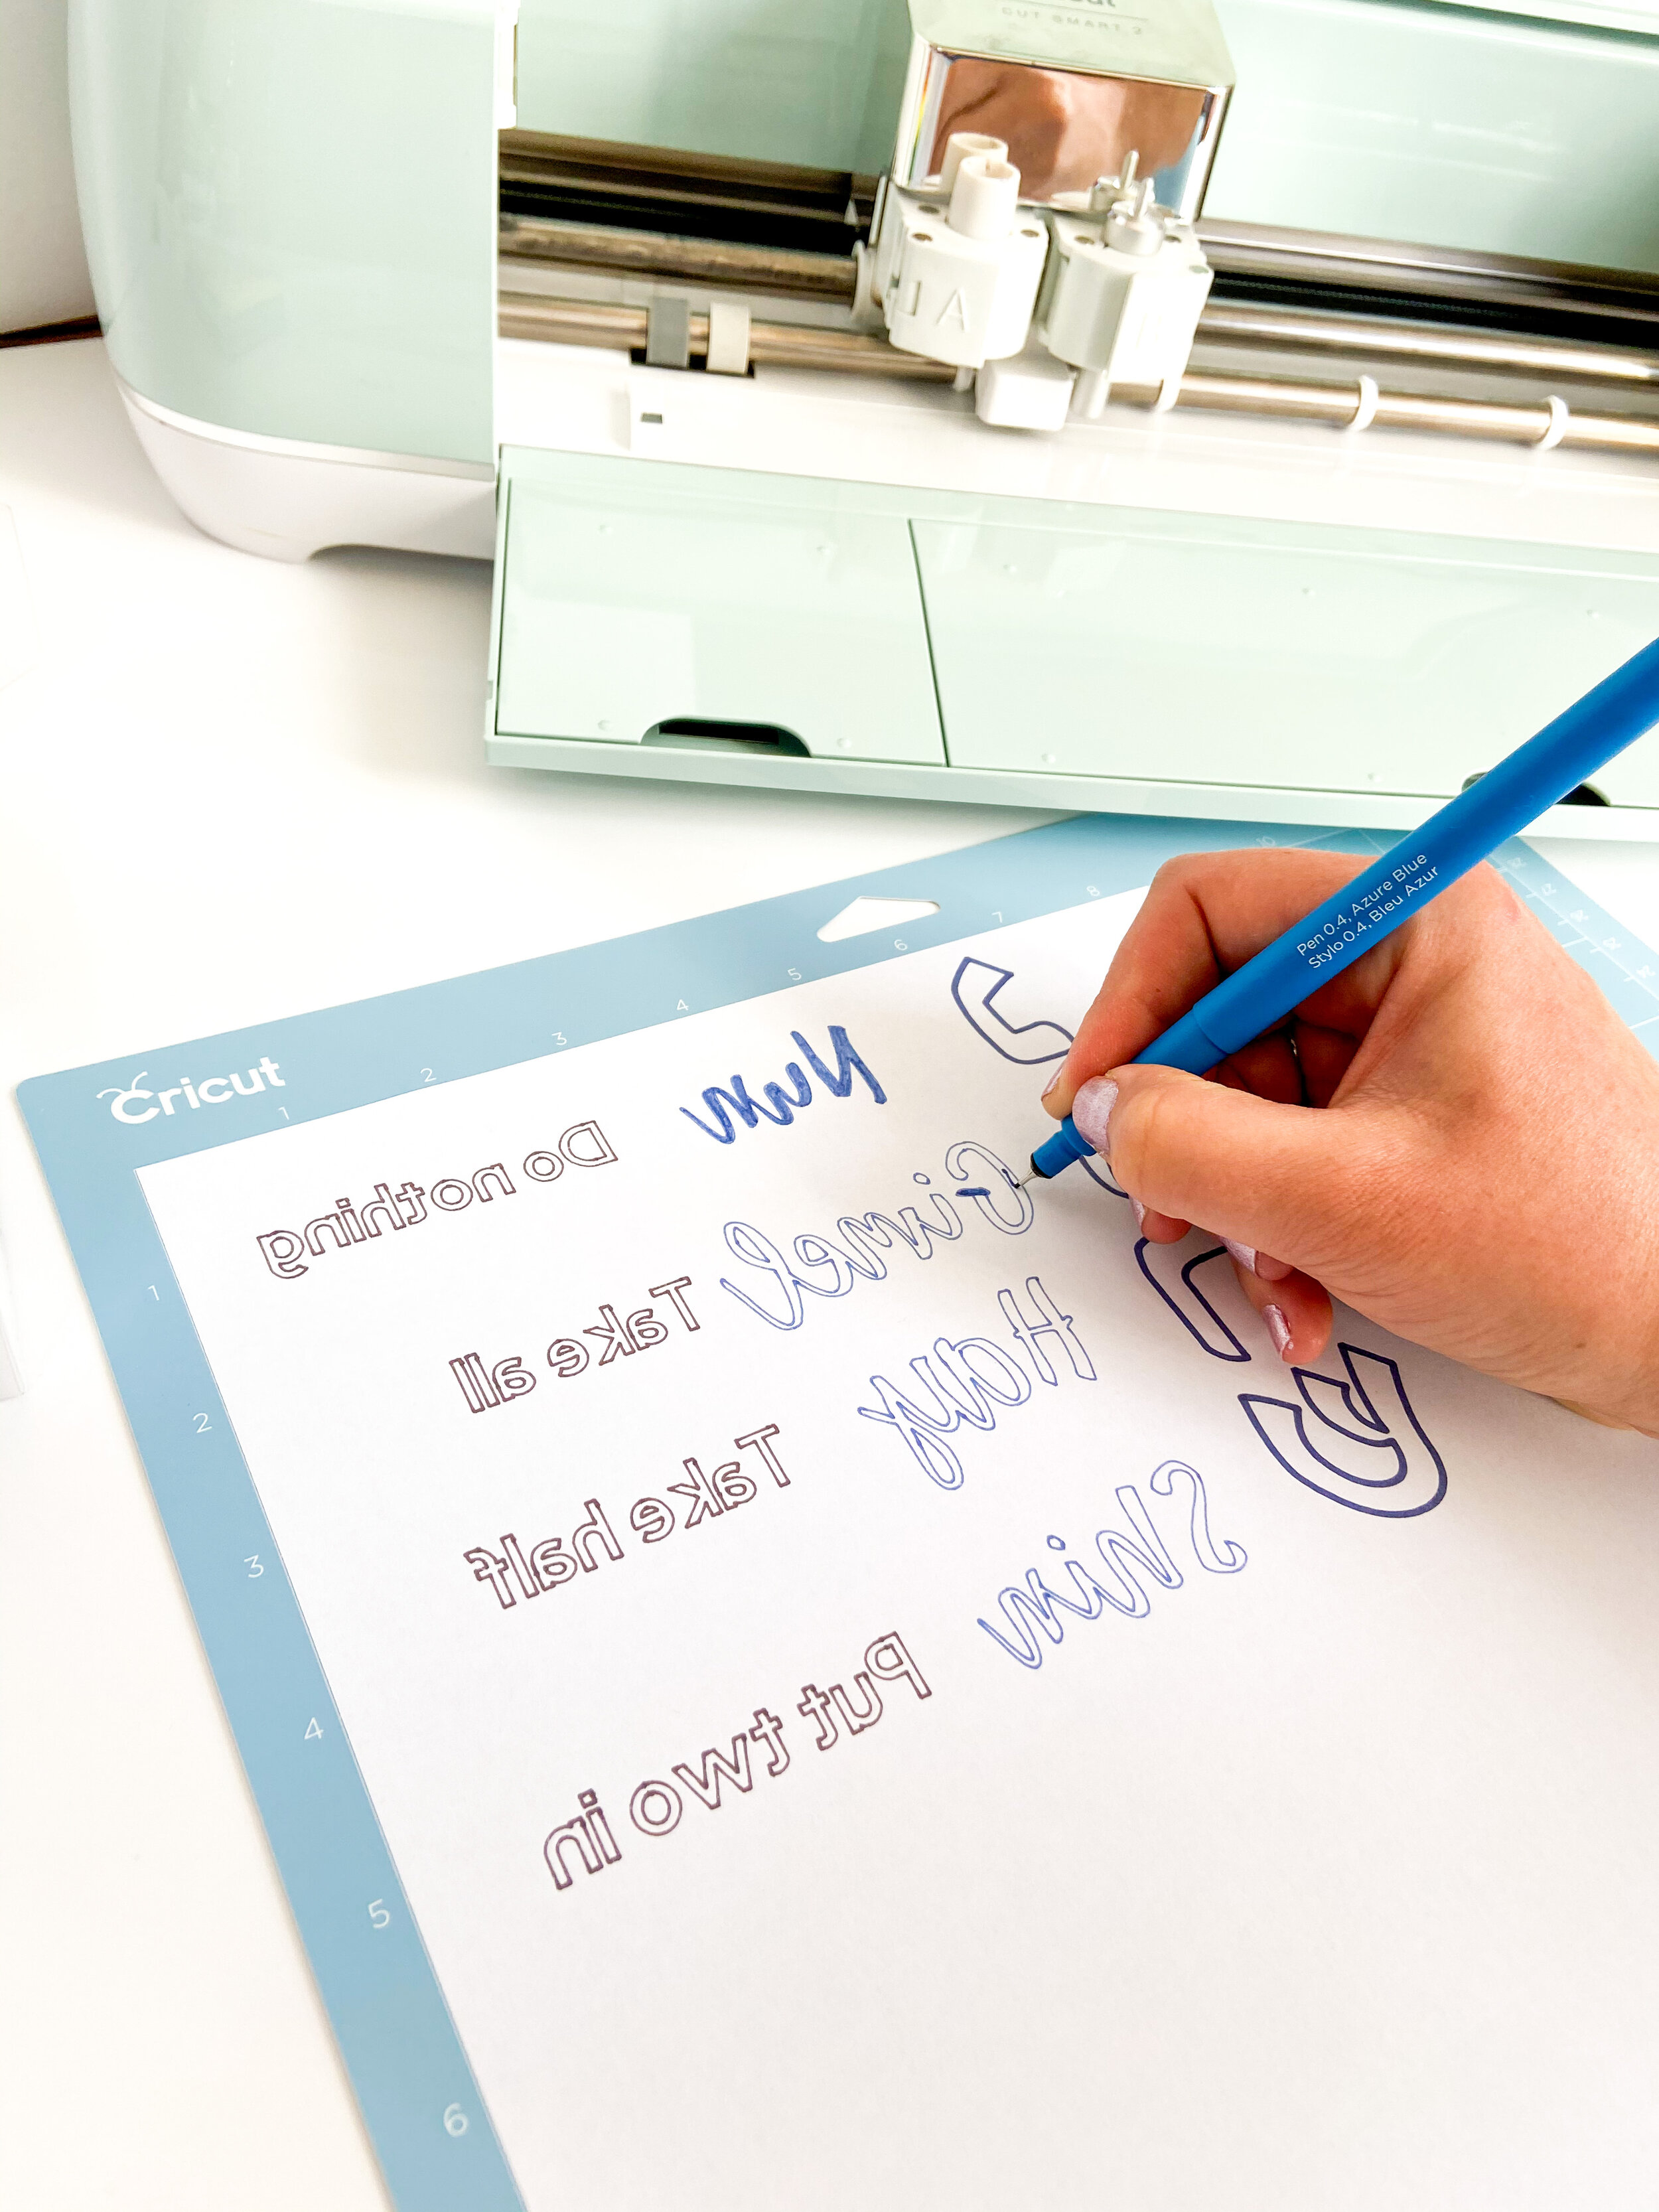
Step 3
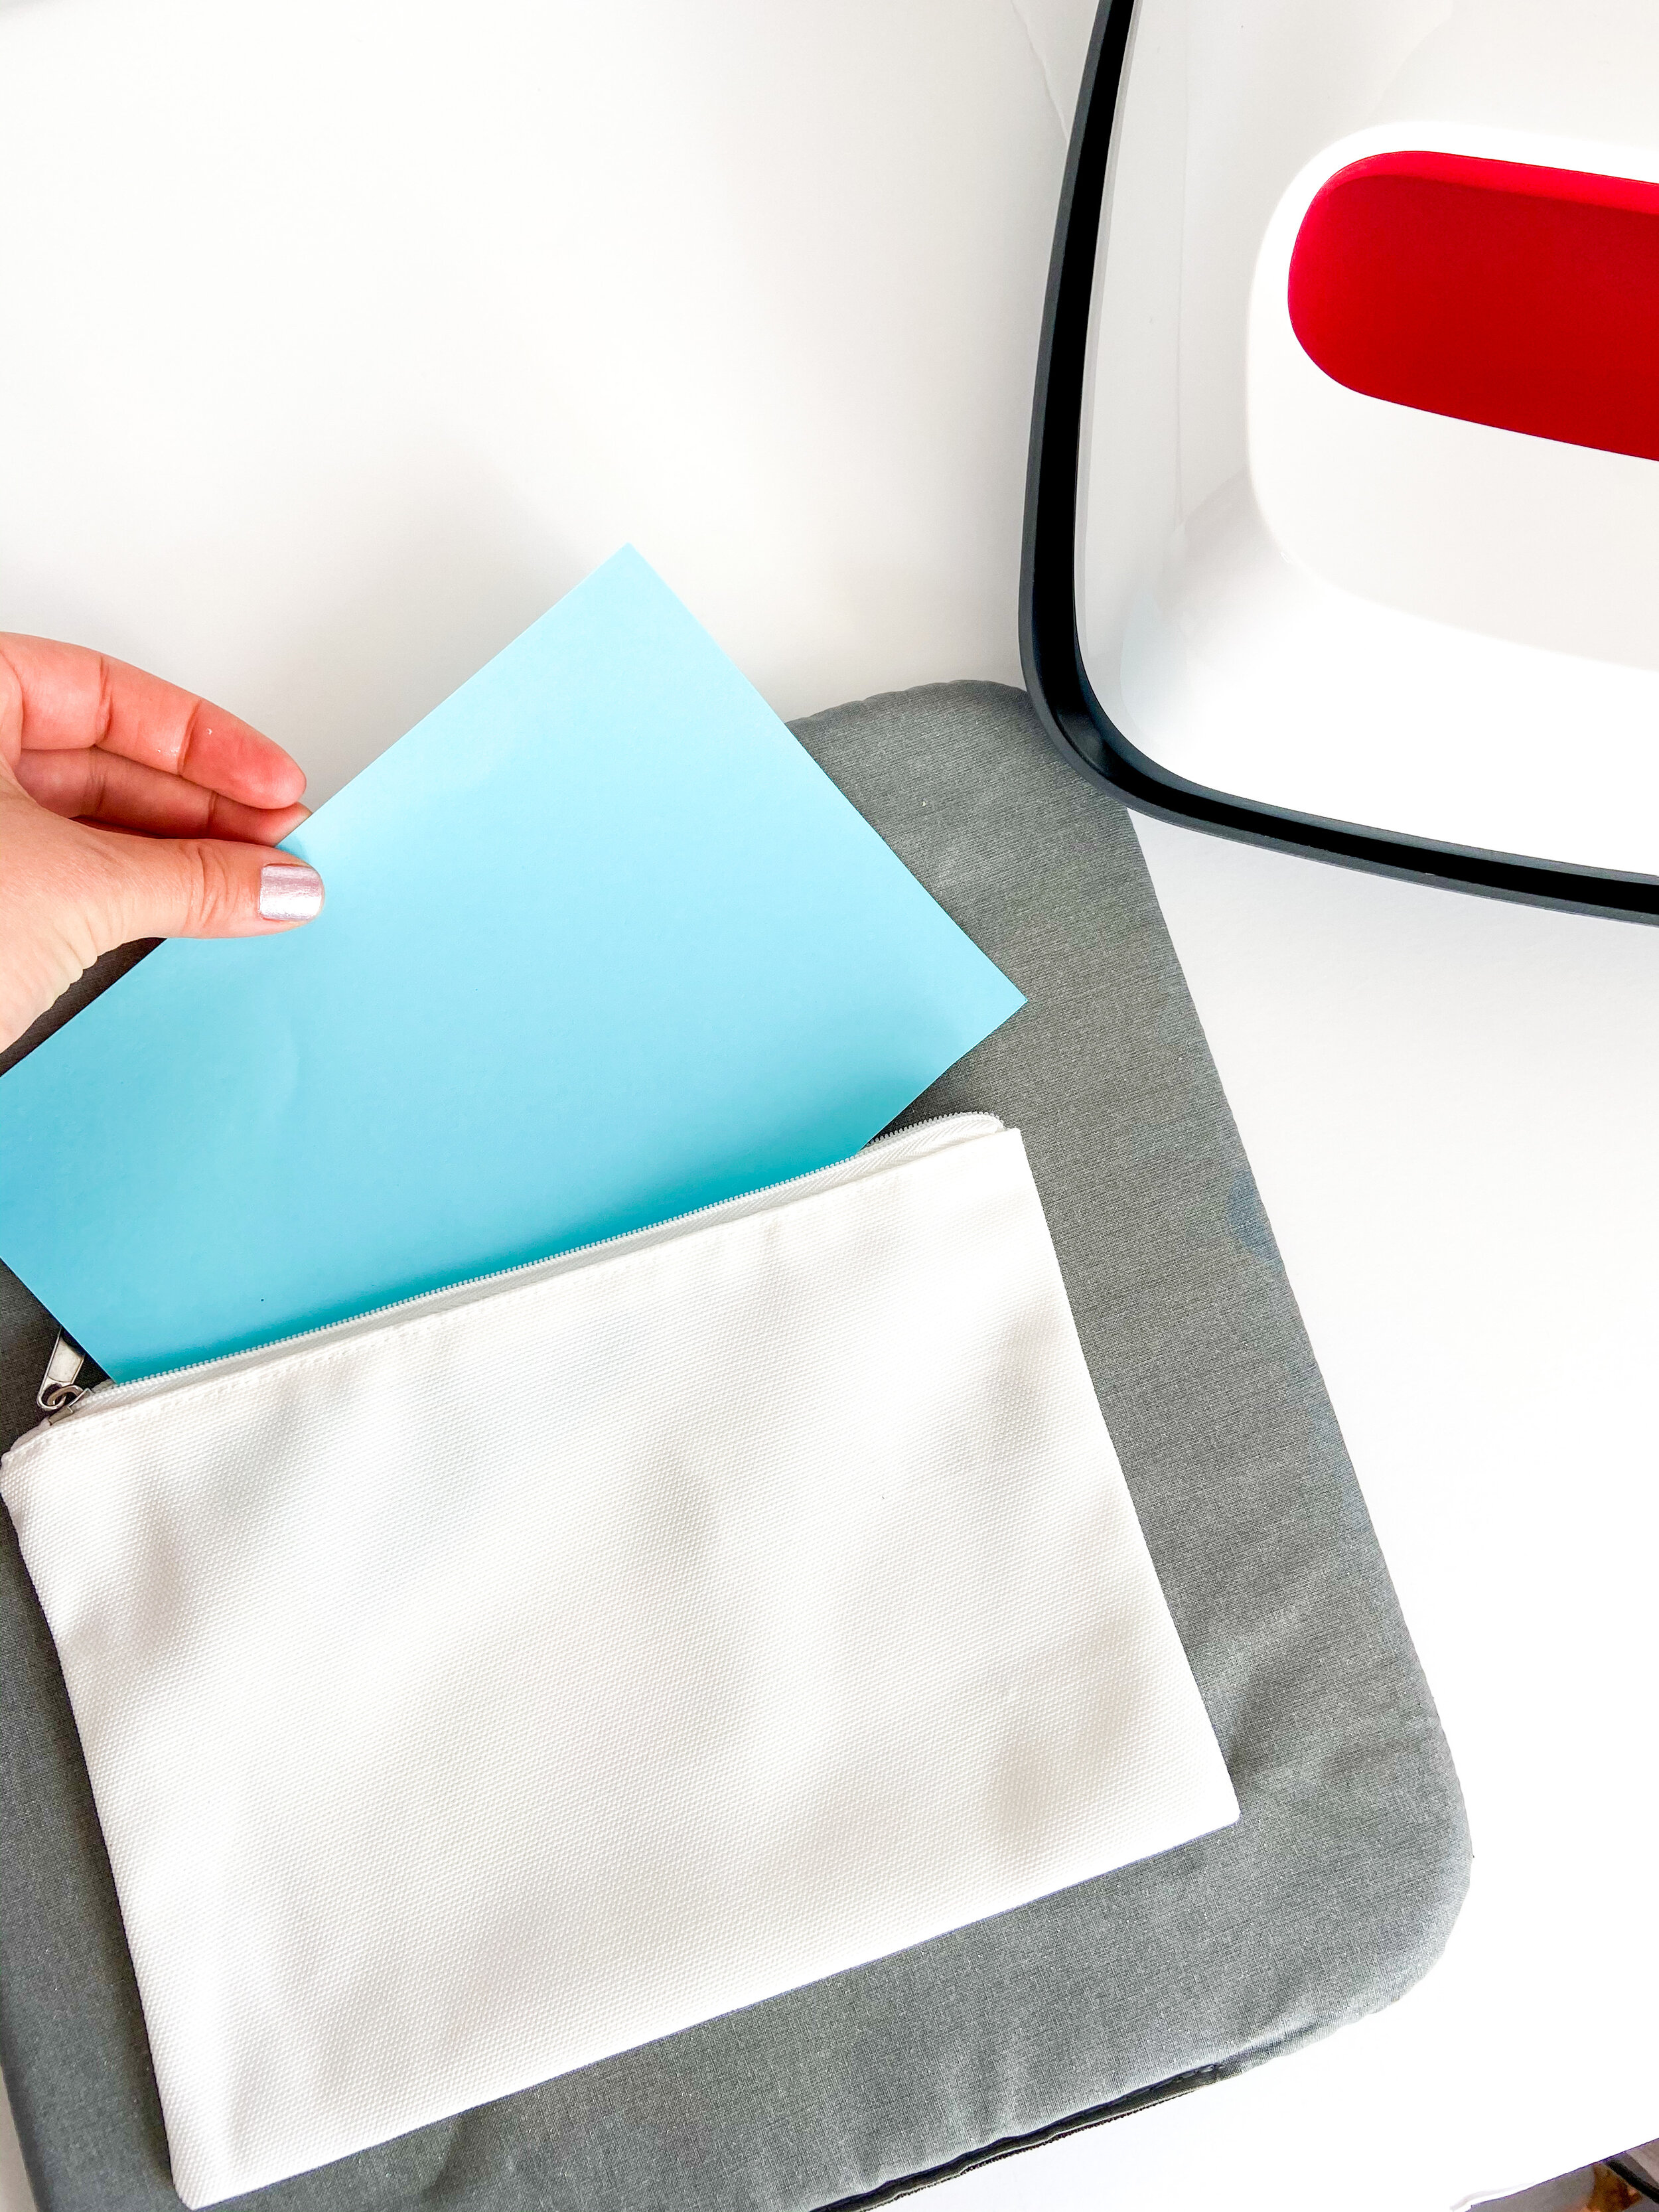
After your machine is done, you will need to fill the letters by hand. This step takes a bit longer but it’s just like a coloring sheet. Make sure to fill in the letters when your paper is still on the mat to make it easier.
Step 4
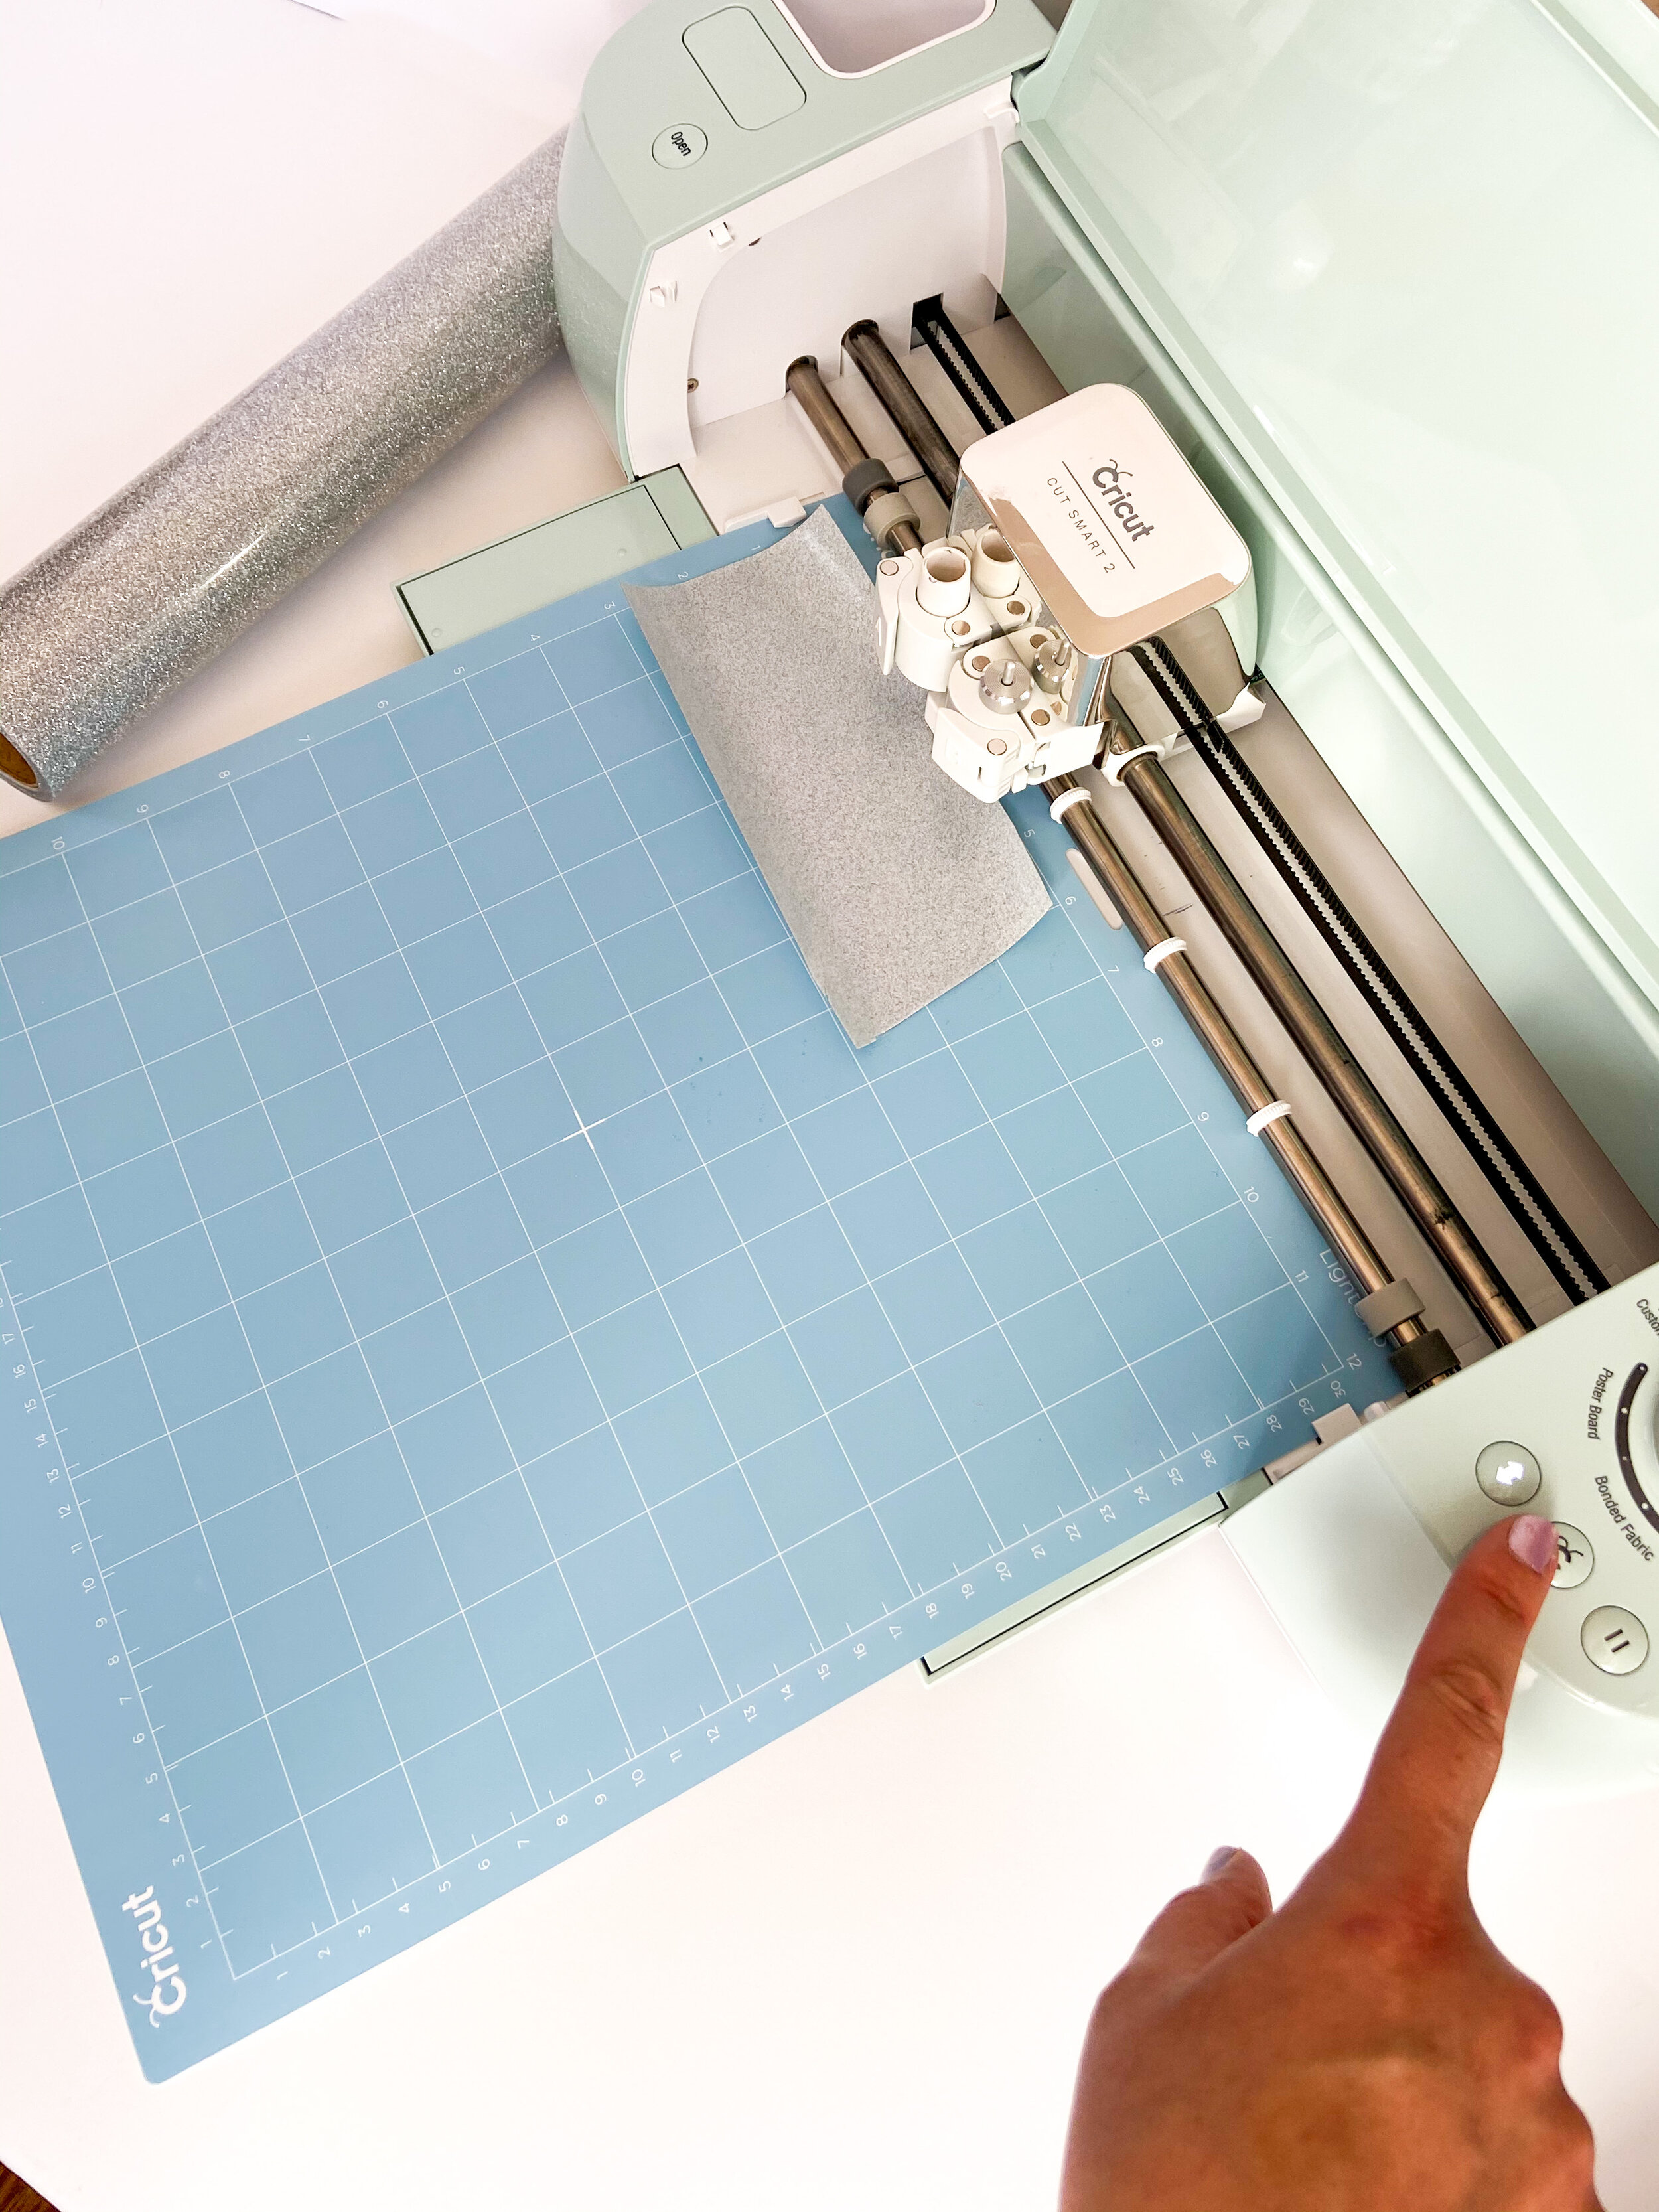
Cut the rest of your design. For this I used Infusible Ink Transfer Sheets for one part and Iron-On for the other. Have fun with it and mix colors and materials.
Again, don’t forget to mirror your images before cutting!
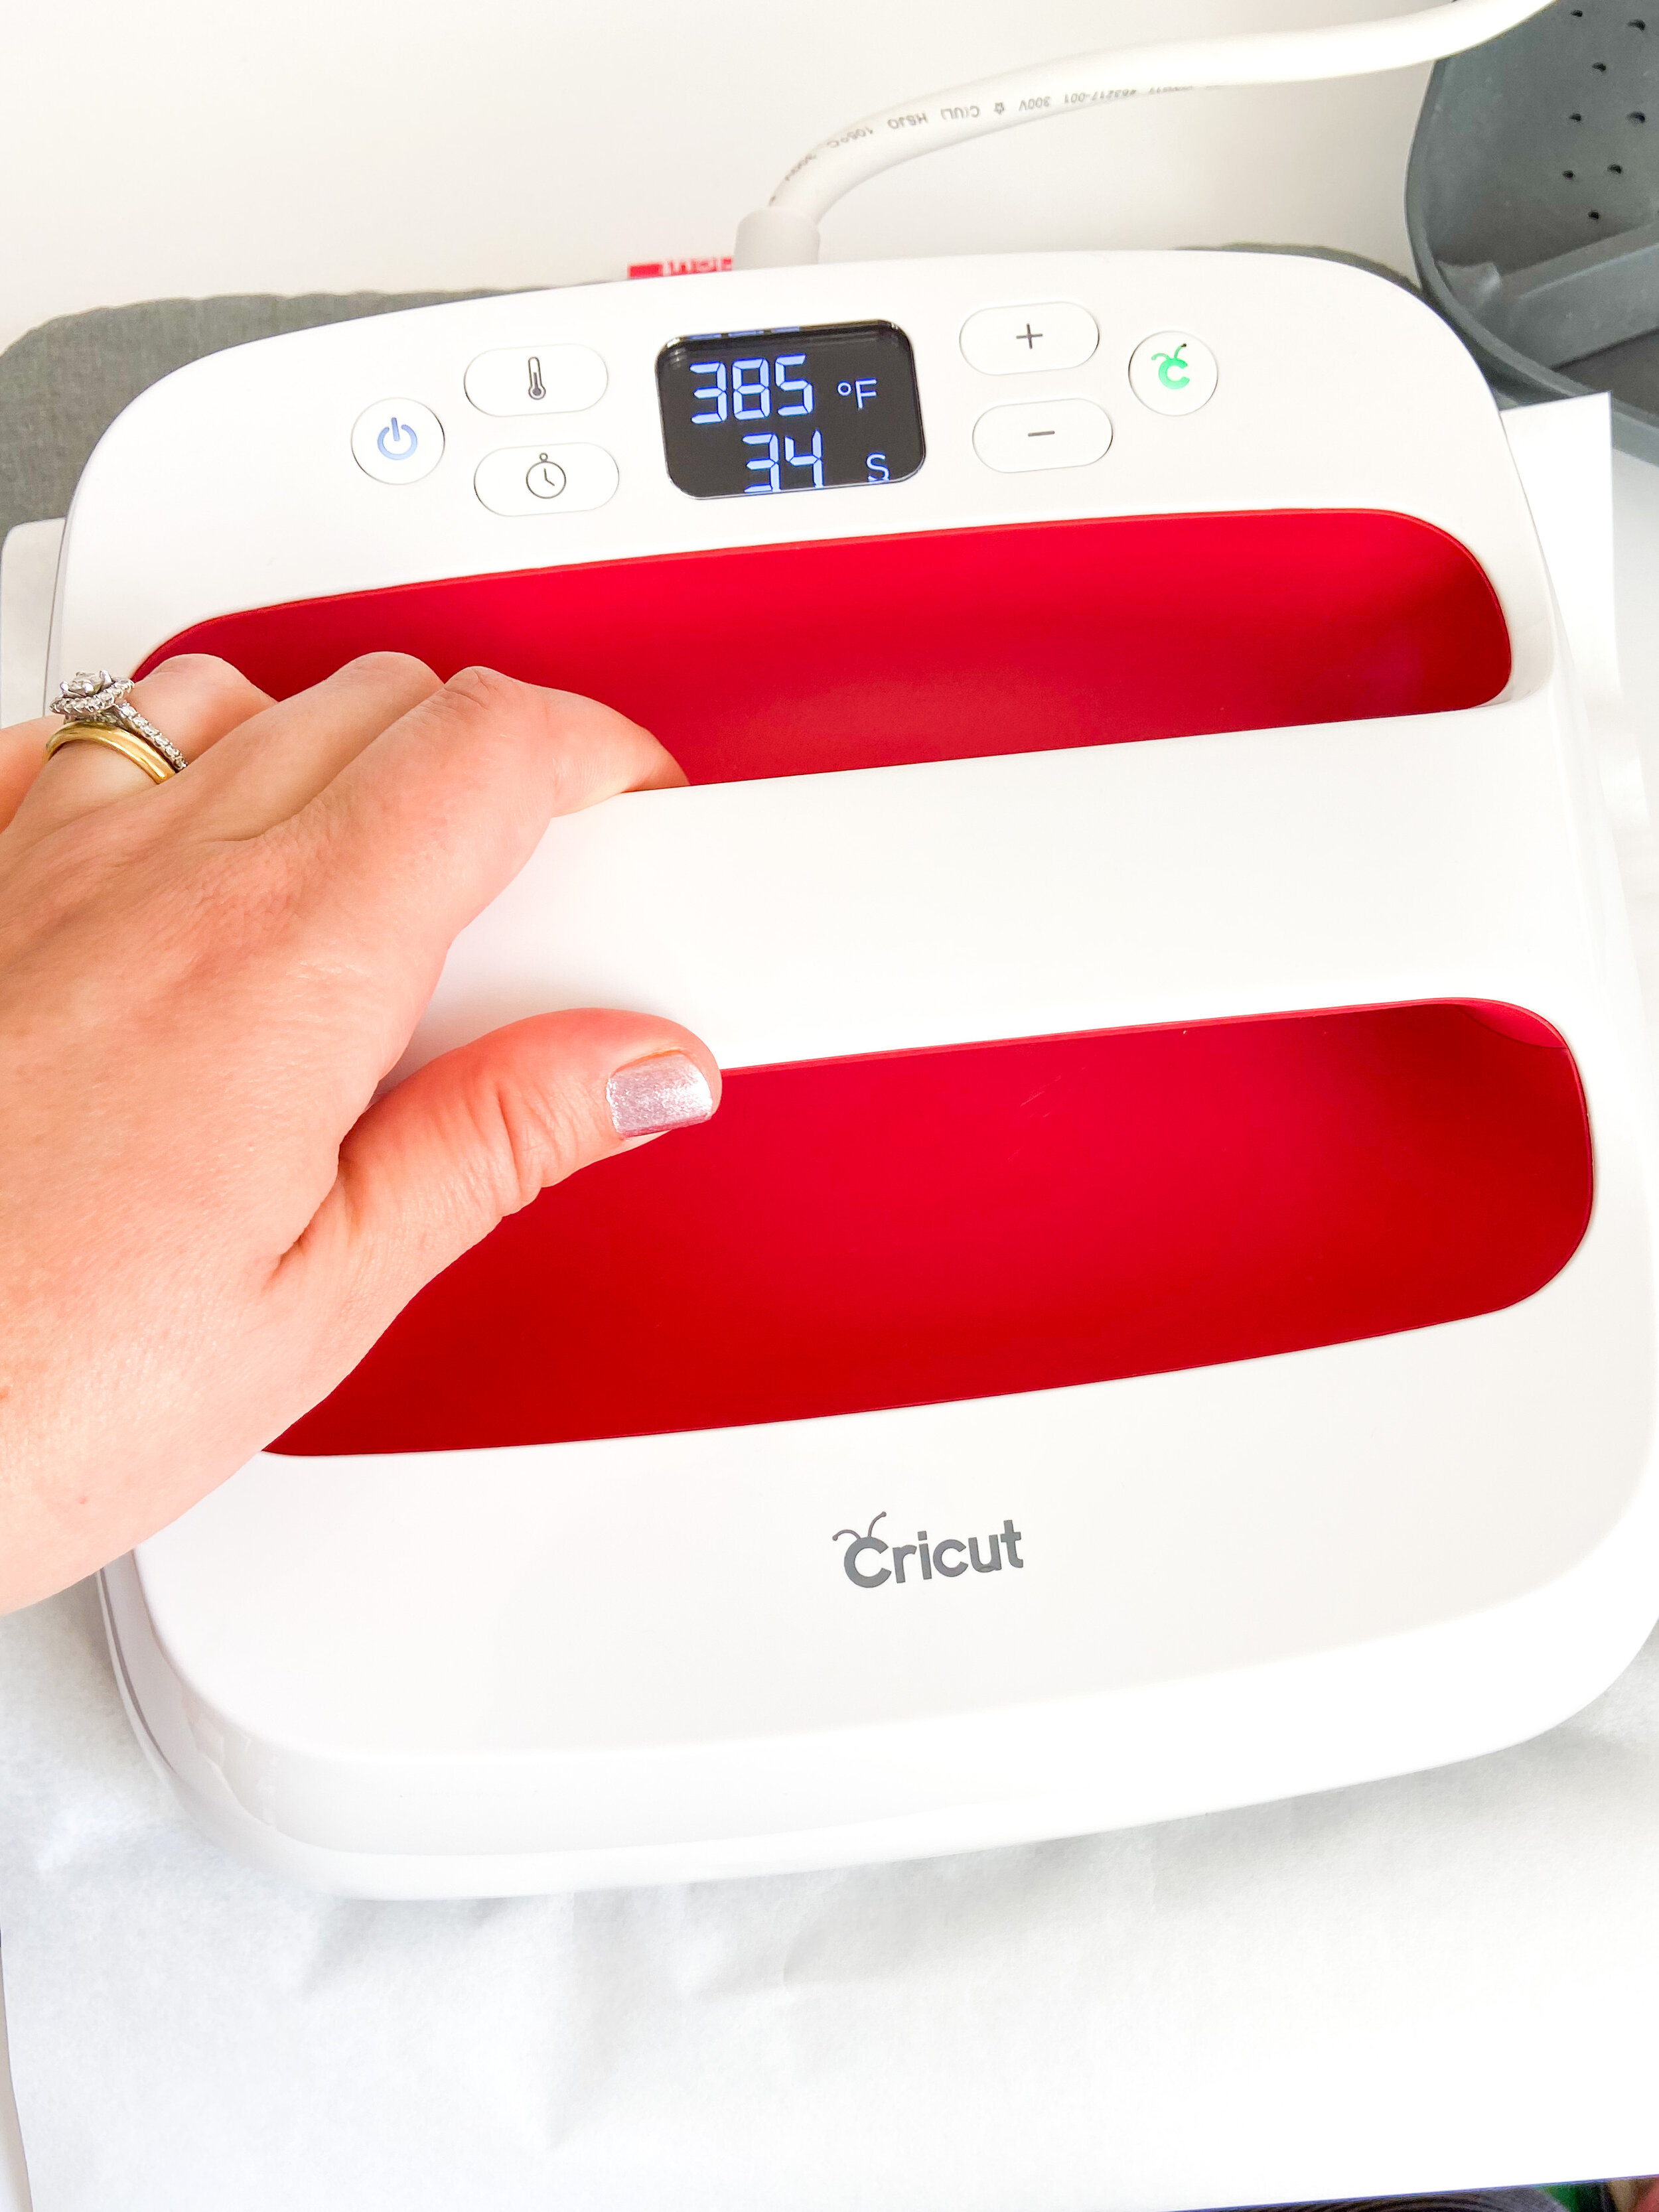
Step 5
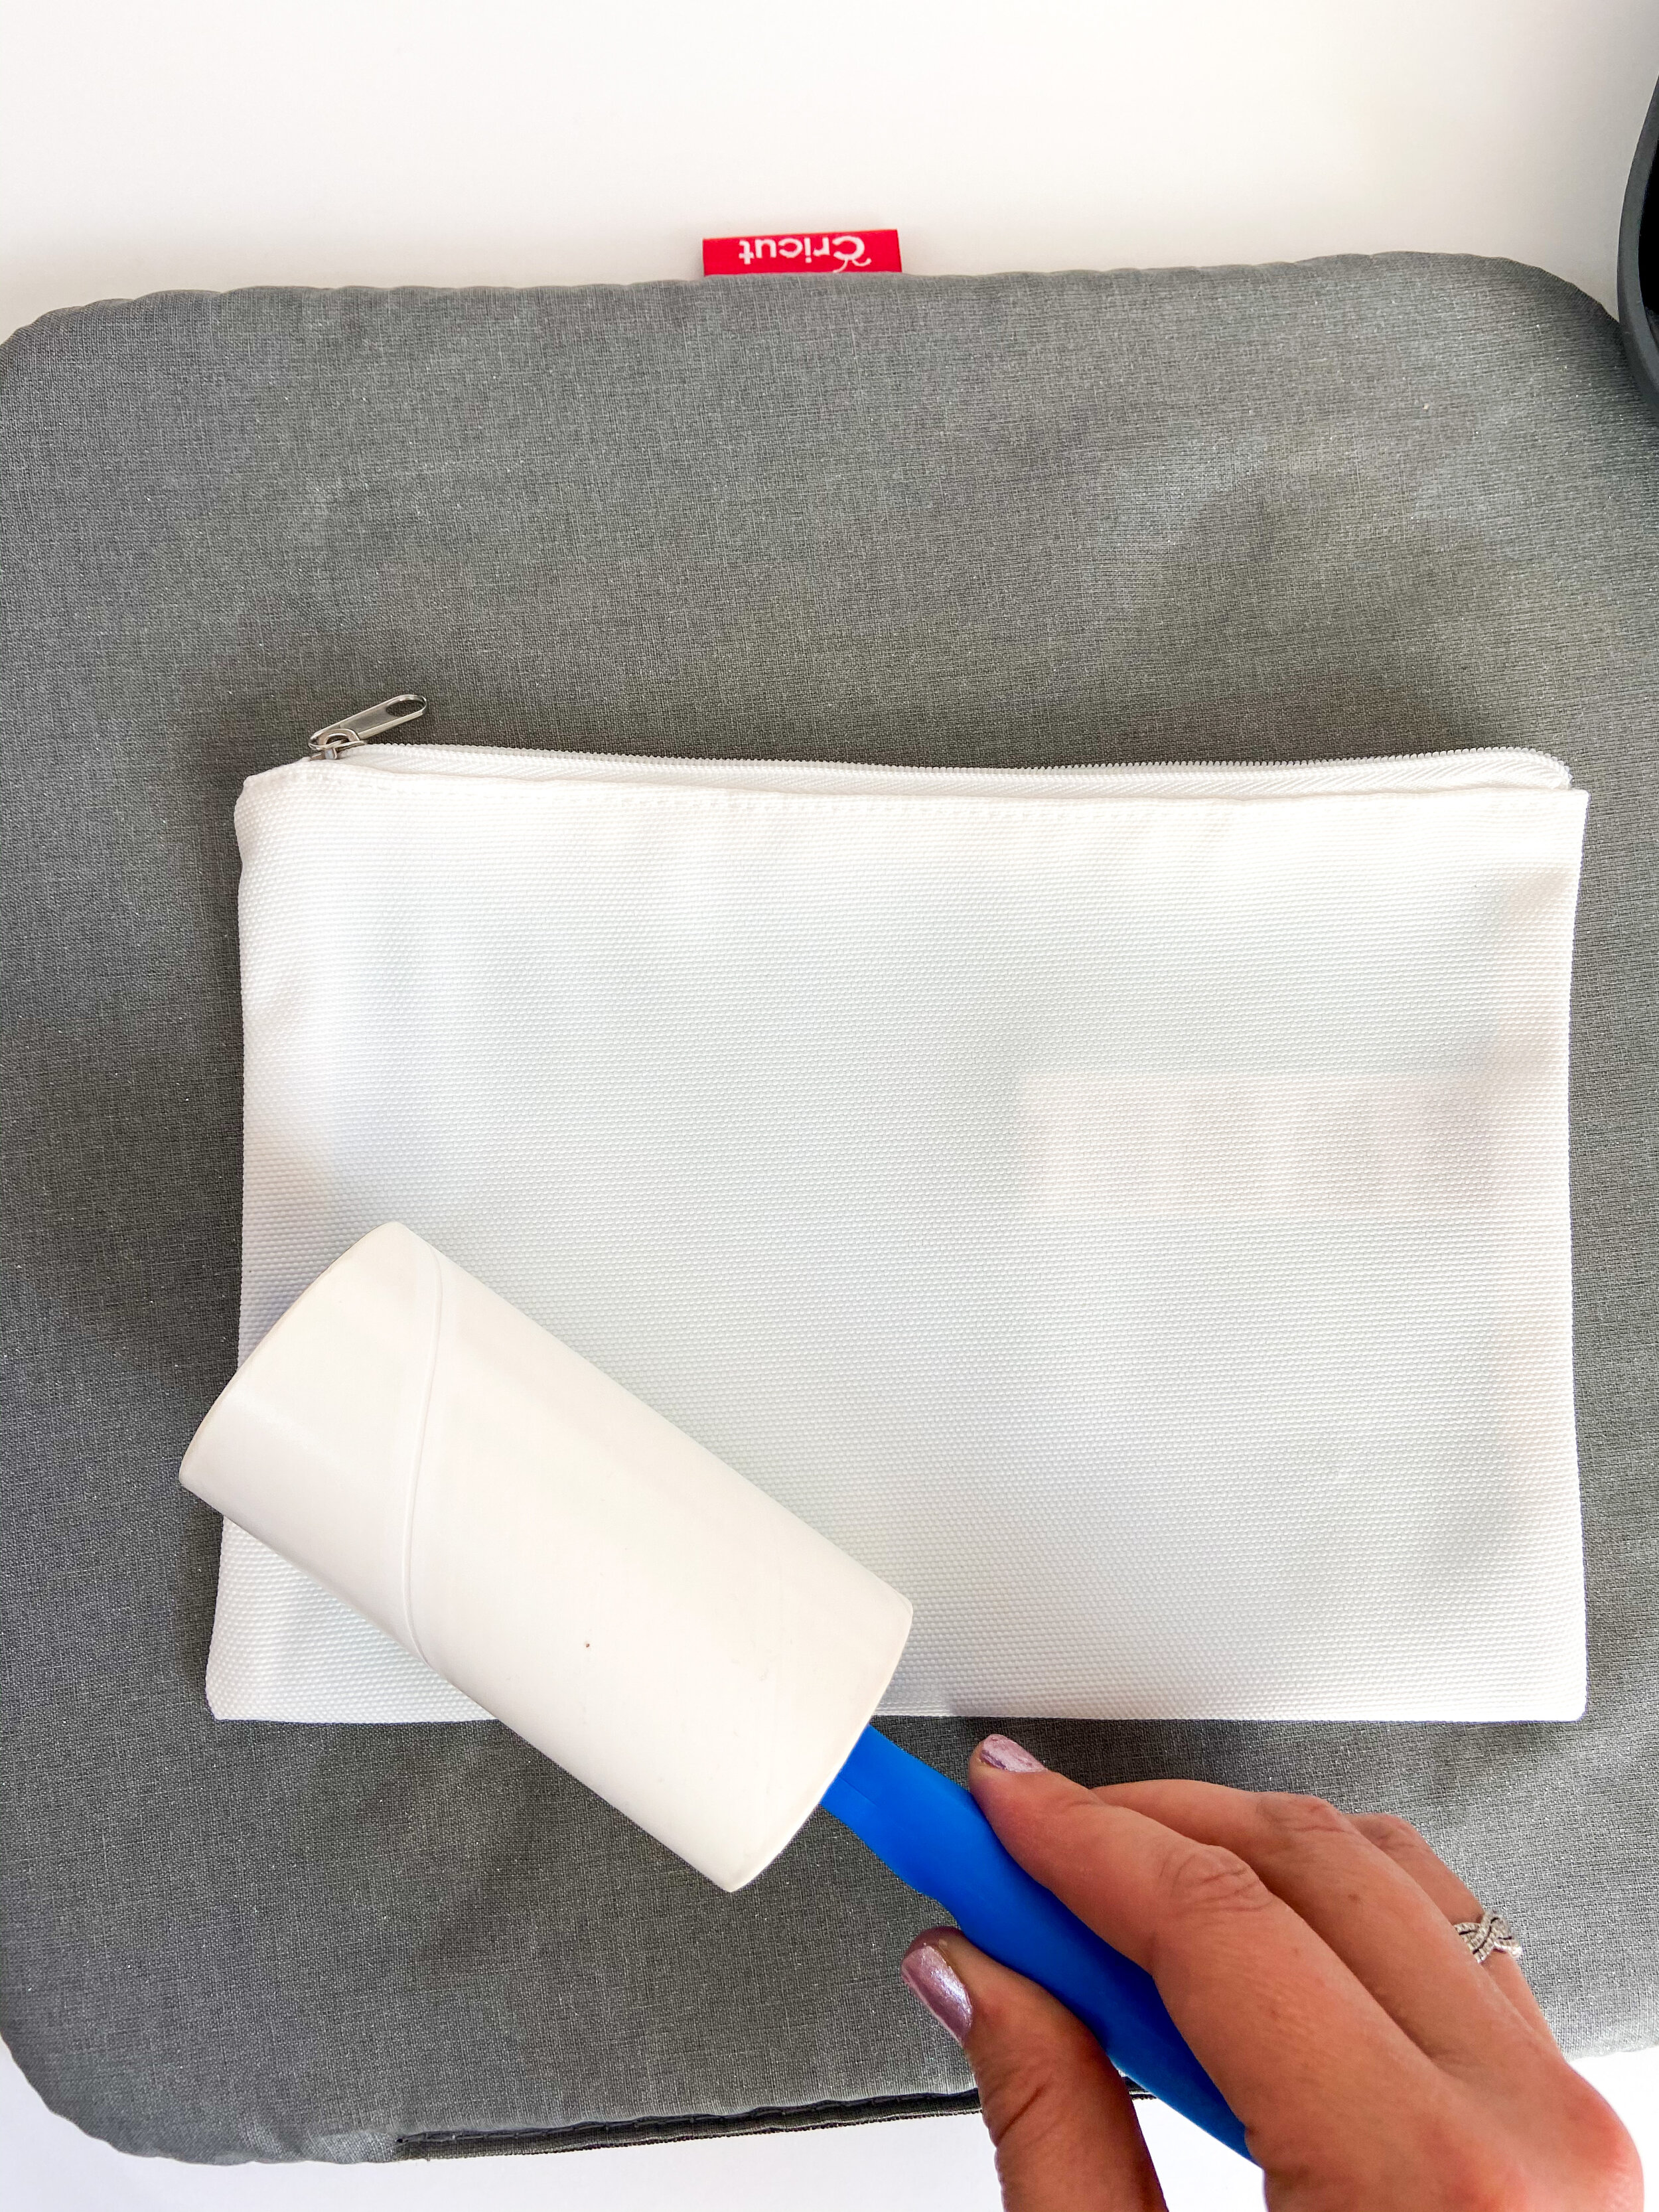
Once everything is cut, set your EasyPress to 385 F. Put a piece of cardstock inside your pouch so the letters don’t bleed to the other side.
And then, use a lint roller on both sides of the pouch. Don’t skip this step if you want a very clean final look.
Step 6
Use your EasyPress for 35 seconds on your empty pouch to get rid of wrinkles. Once you’ve done that, here’s where the heat resistant tape comes in. Because you’re doing the pens/markers on copy paper, it won’t stick to the pouch. So it doesn’t move while you press it, add heat resistant tape on both sides.
Use the parchment paper that comes with your Infusible Ink Transfer Sheets on top of the design and press it with your EasyPress on 385 F for 45 seconds. Take off the paper with tweezers, it’ll be hot!
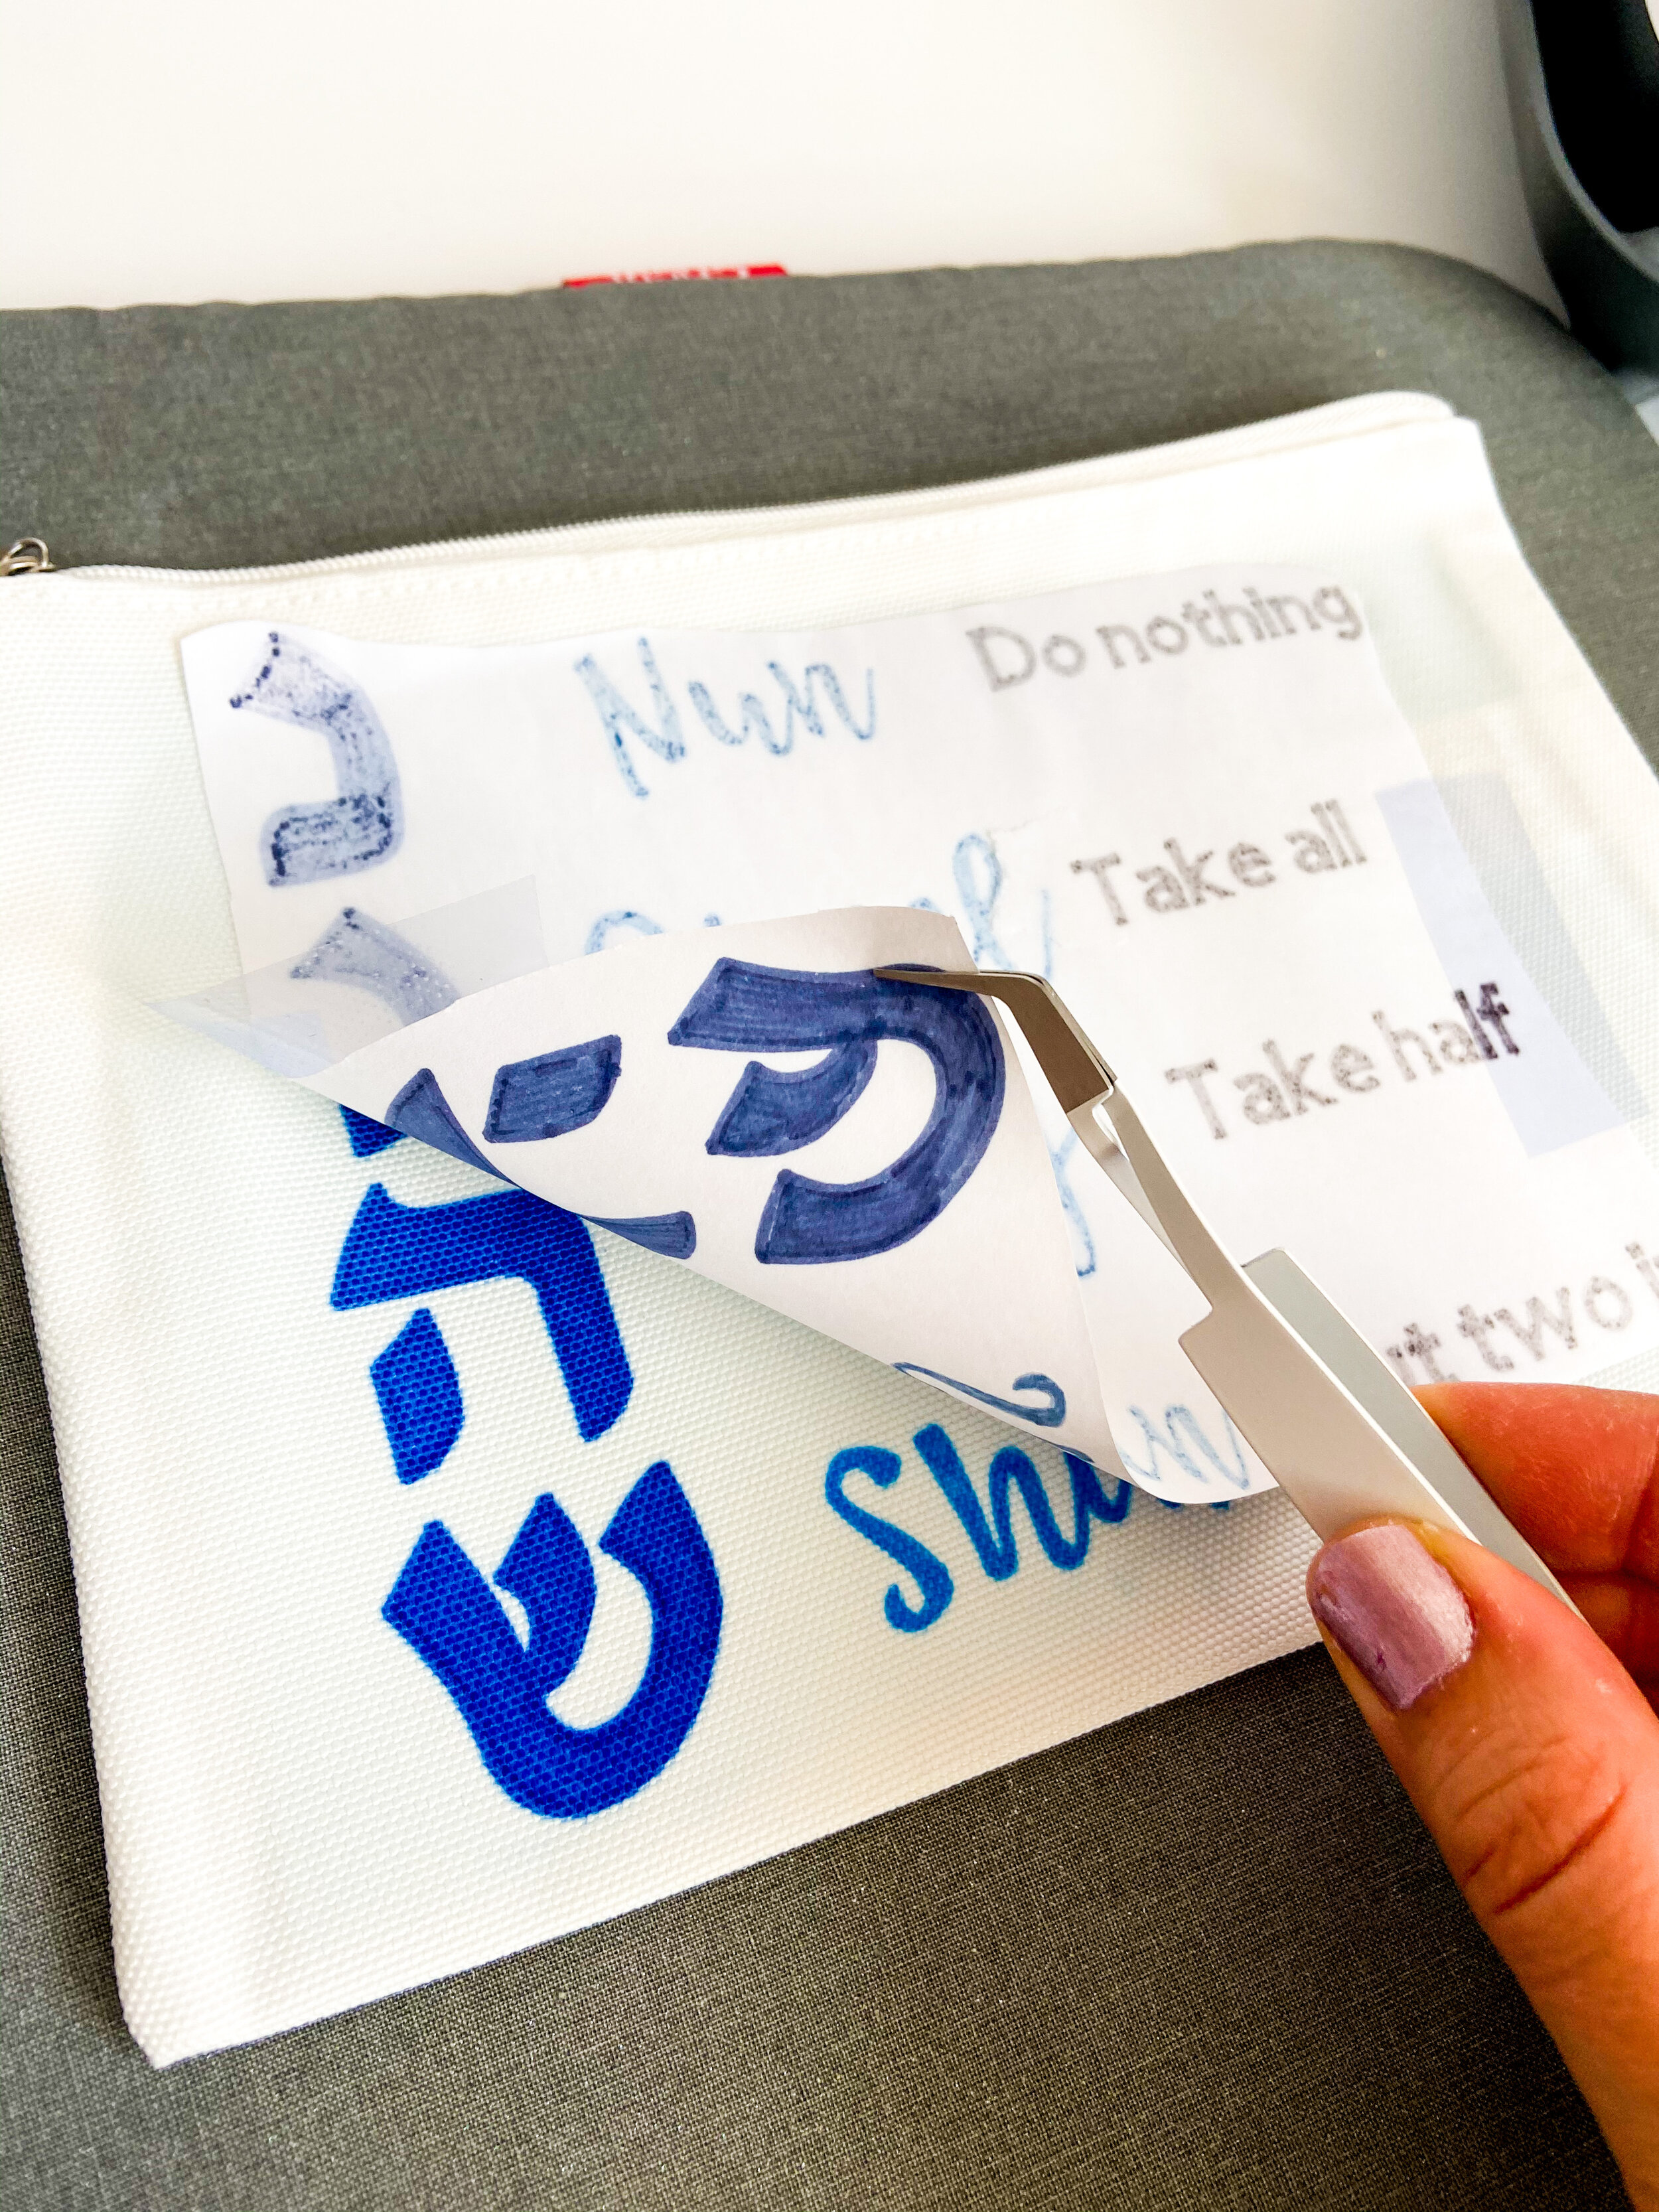
Step 7
Repeat the step above on the other side with the rest of your design. I like to add parchment paper on both sides just in case the side you just did bleeds, you don’t want it to stain your EasyPress Mat.

Hope you liked this tutorial. I’m obsessed with Infusible Ink, it gives such a professional look and the colors are so vibrant, it makes an amazing gift.
Happy Hanukkah!
Myri
please note that some of the links above are affiliate links and, at no cost to you, we earn a commission if you click through and make a purchase