
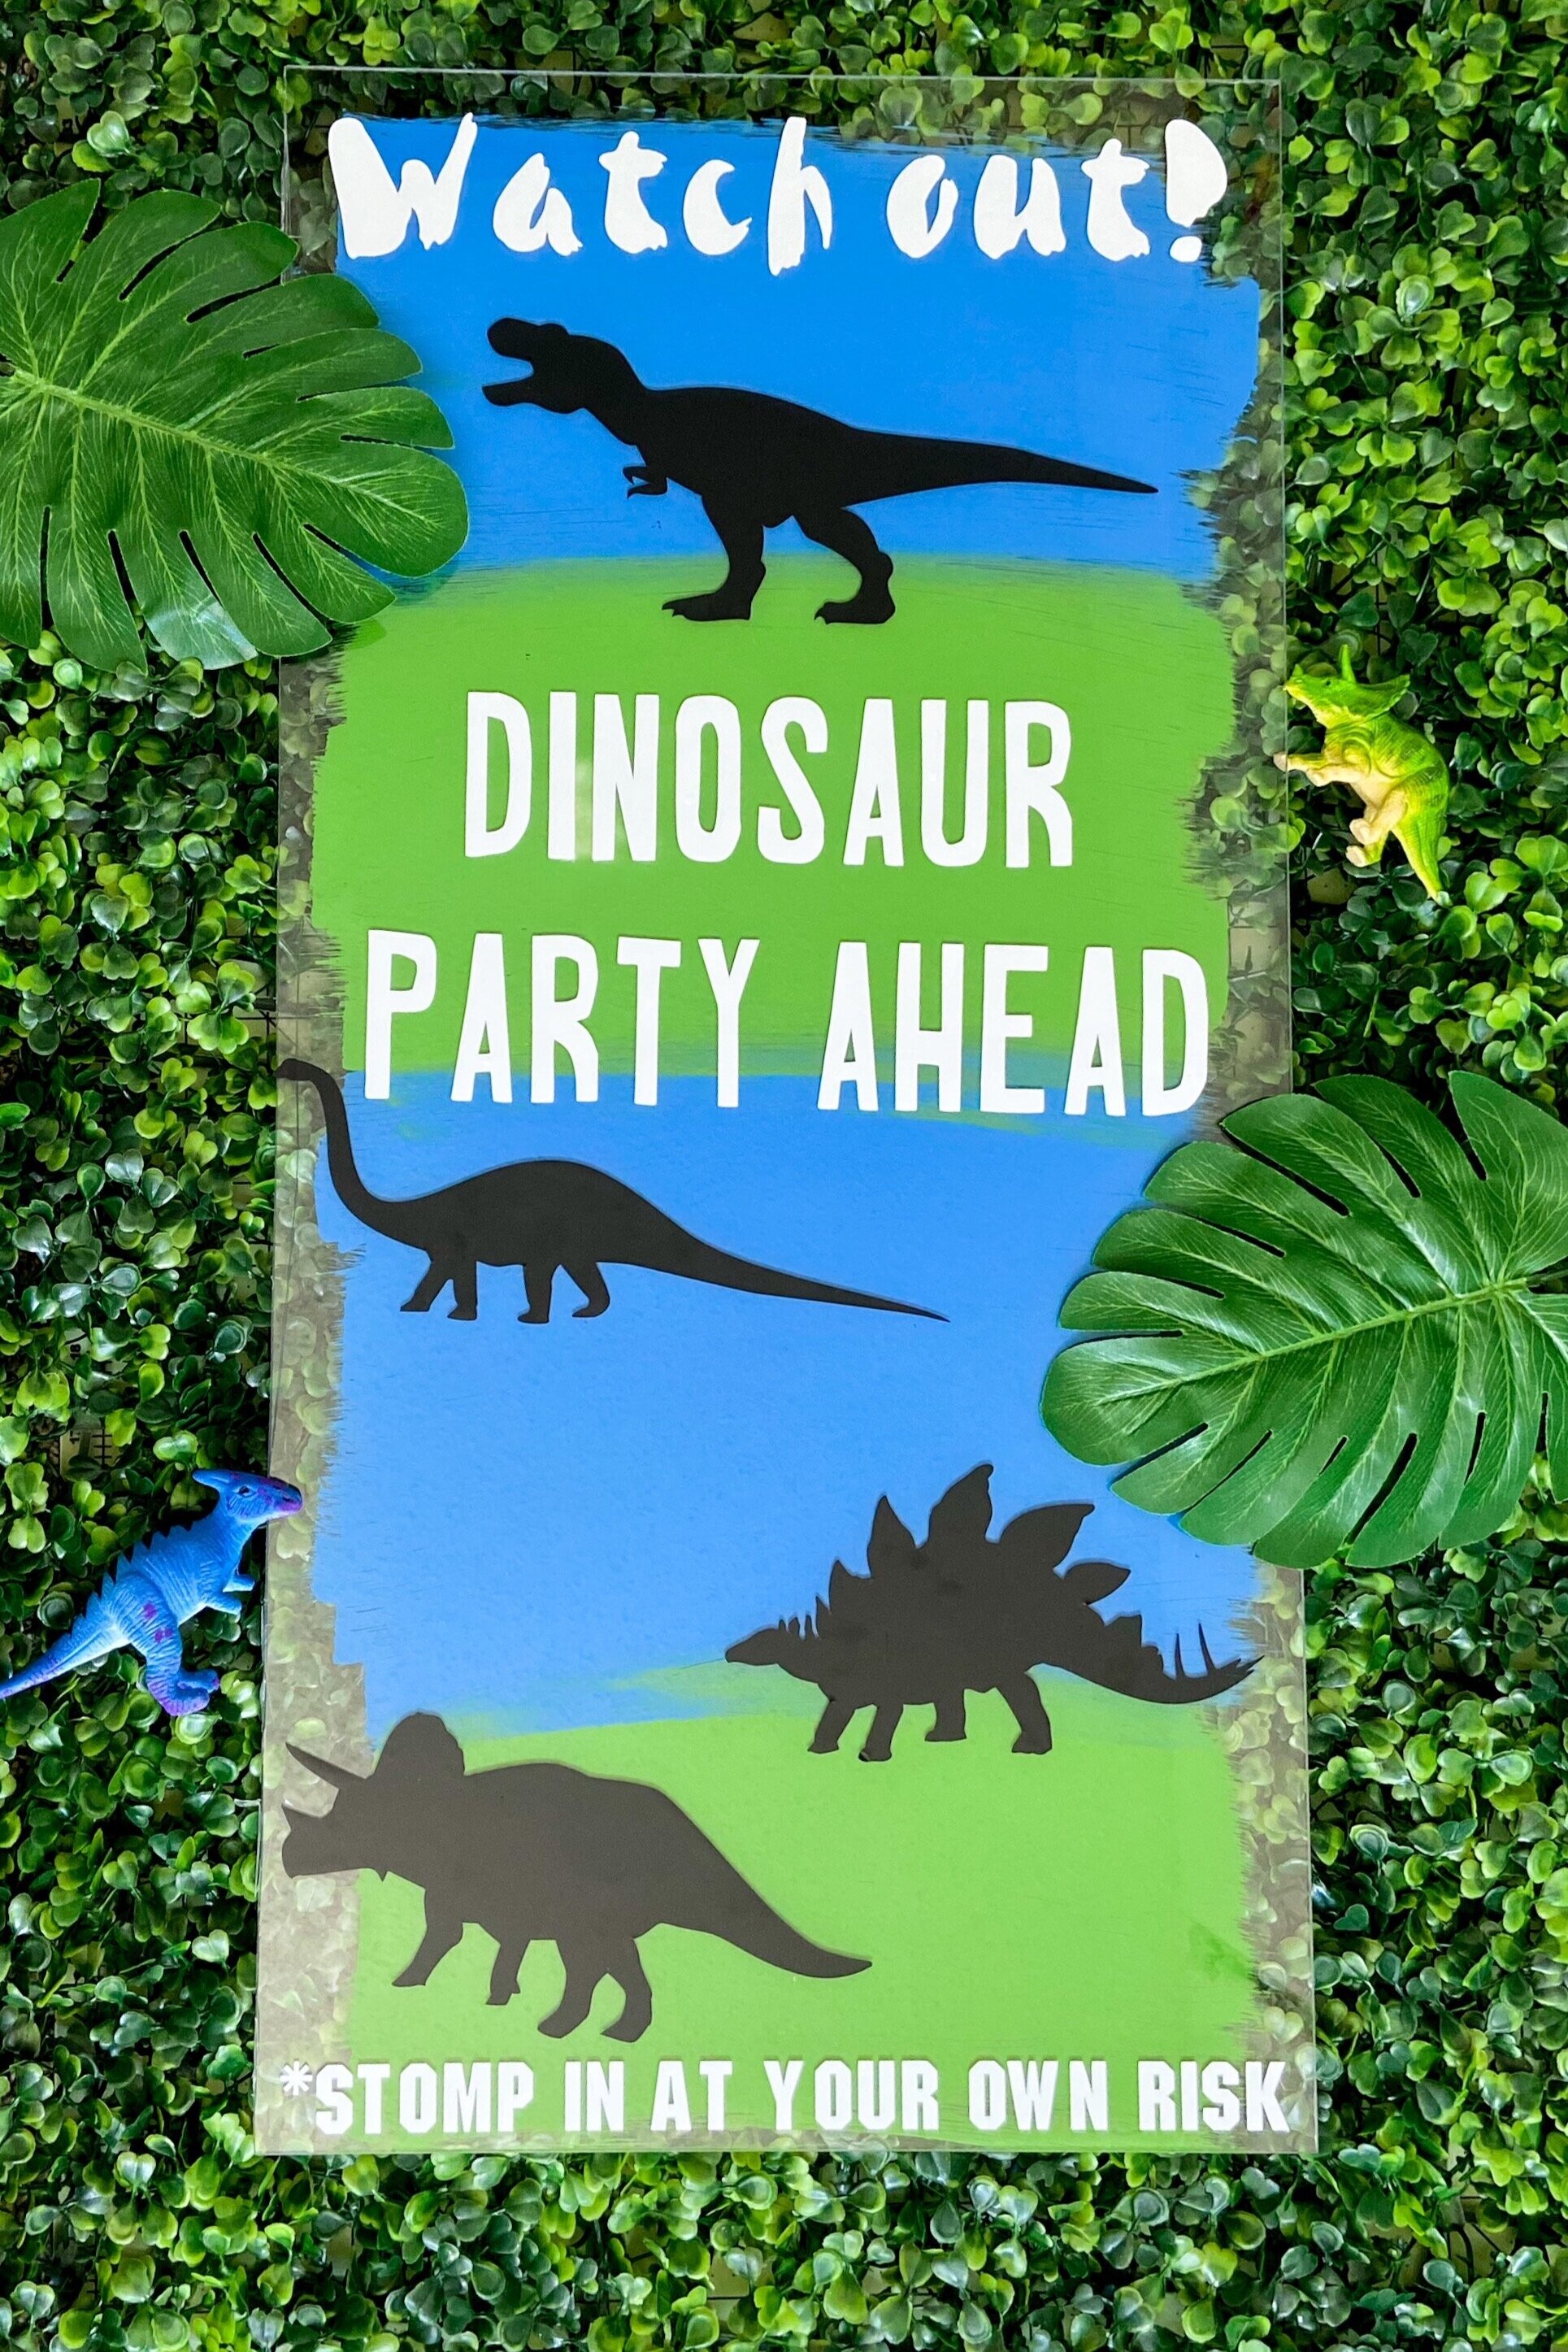
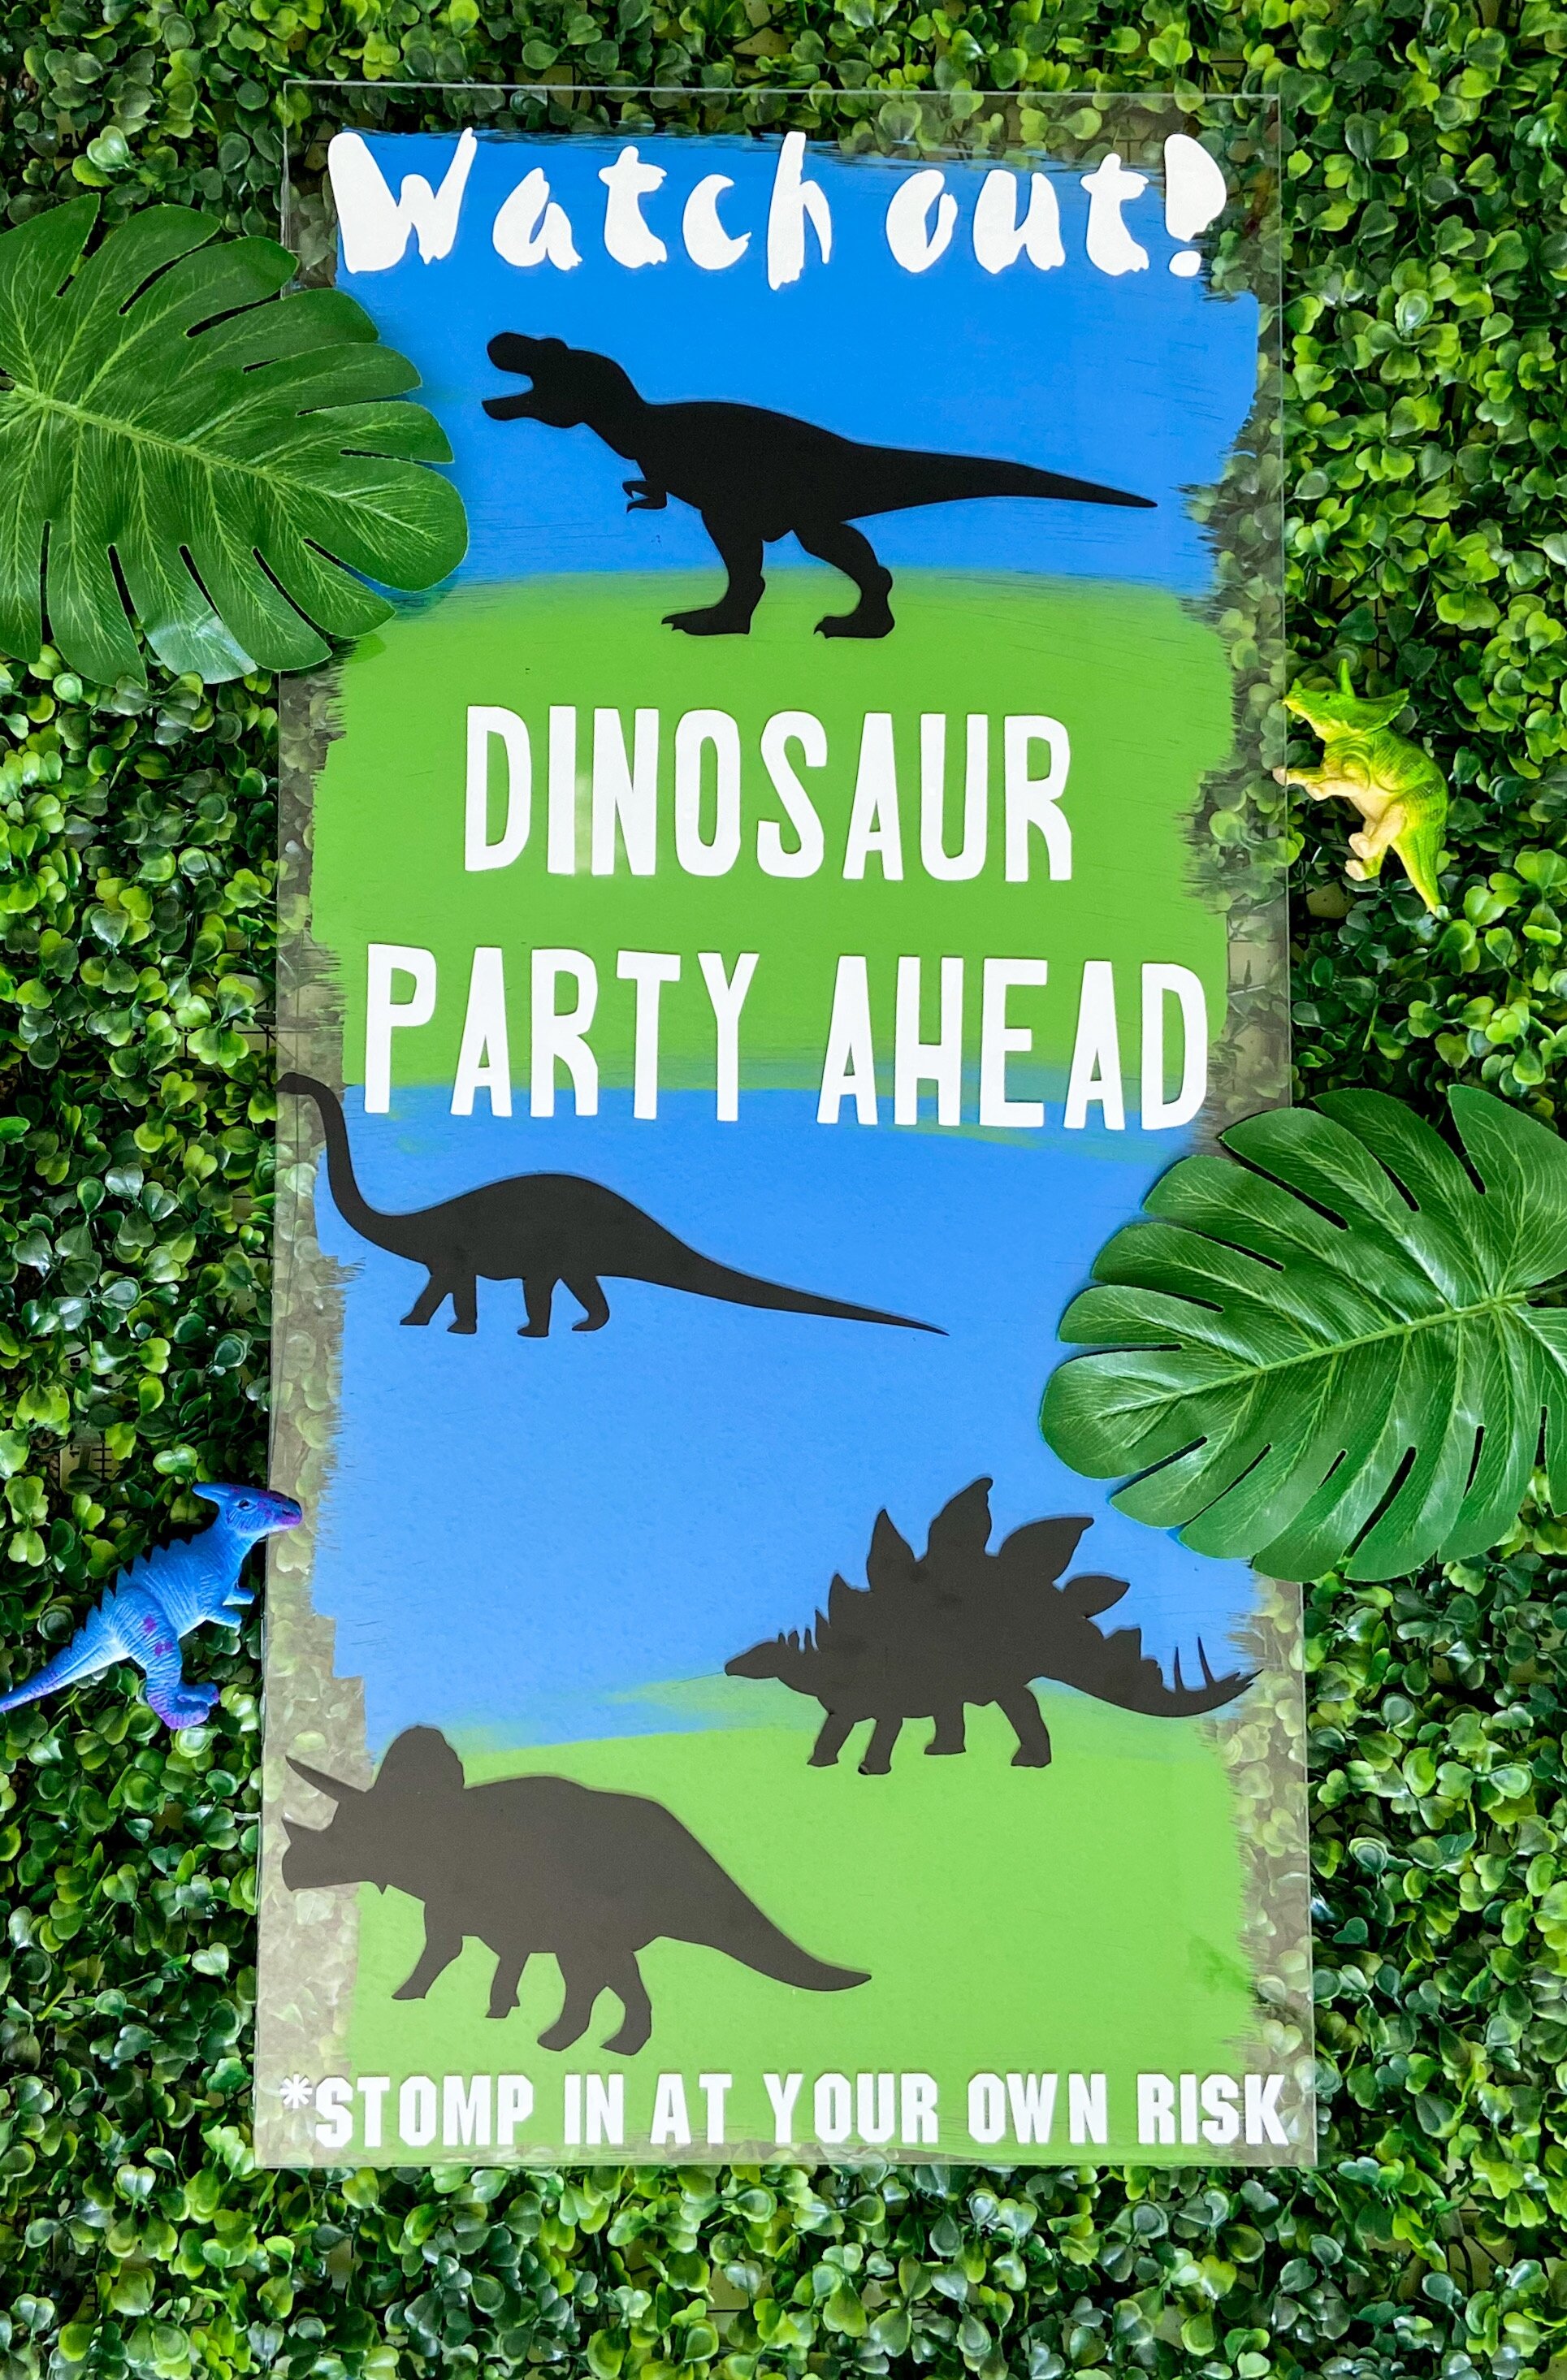
DIY Dinosaur Party Welcome Sign
Cricut sent me product to use. All thoughts and opinions are mine alone
If you’re reading this in real-time, you know that we’re all stuck at home for the time being. That’s why I have decided to start dreaming about my next party. My son’s birthday is at the end of May and he finally decided on his theme! He’s been obsessed with the show Dino Dana lately and has learned a surprising amount of dinosaur facts, it’s impressive. That’s why we’re going for a dinosaur theme. He specifically asked for a real dinosaur “no cute dino’s mommy”
I am so happy to be the proud owner of a new Cricut machine, I decided to go with the Explore Air 2, mainly because I want to see the differences with the machine I’ve been using for the last few years (Silhouette Cameo.
So far I have to say, I’m impressed! It’s far easier to use the Cricut, really user friendly. But that’s a post for another time, you’re here to learn how to make this welcome sign, so let’s get to it.

Materials you will need:
Acrylic sheet (Mine is 12x24) you can find it at any home improvement store
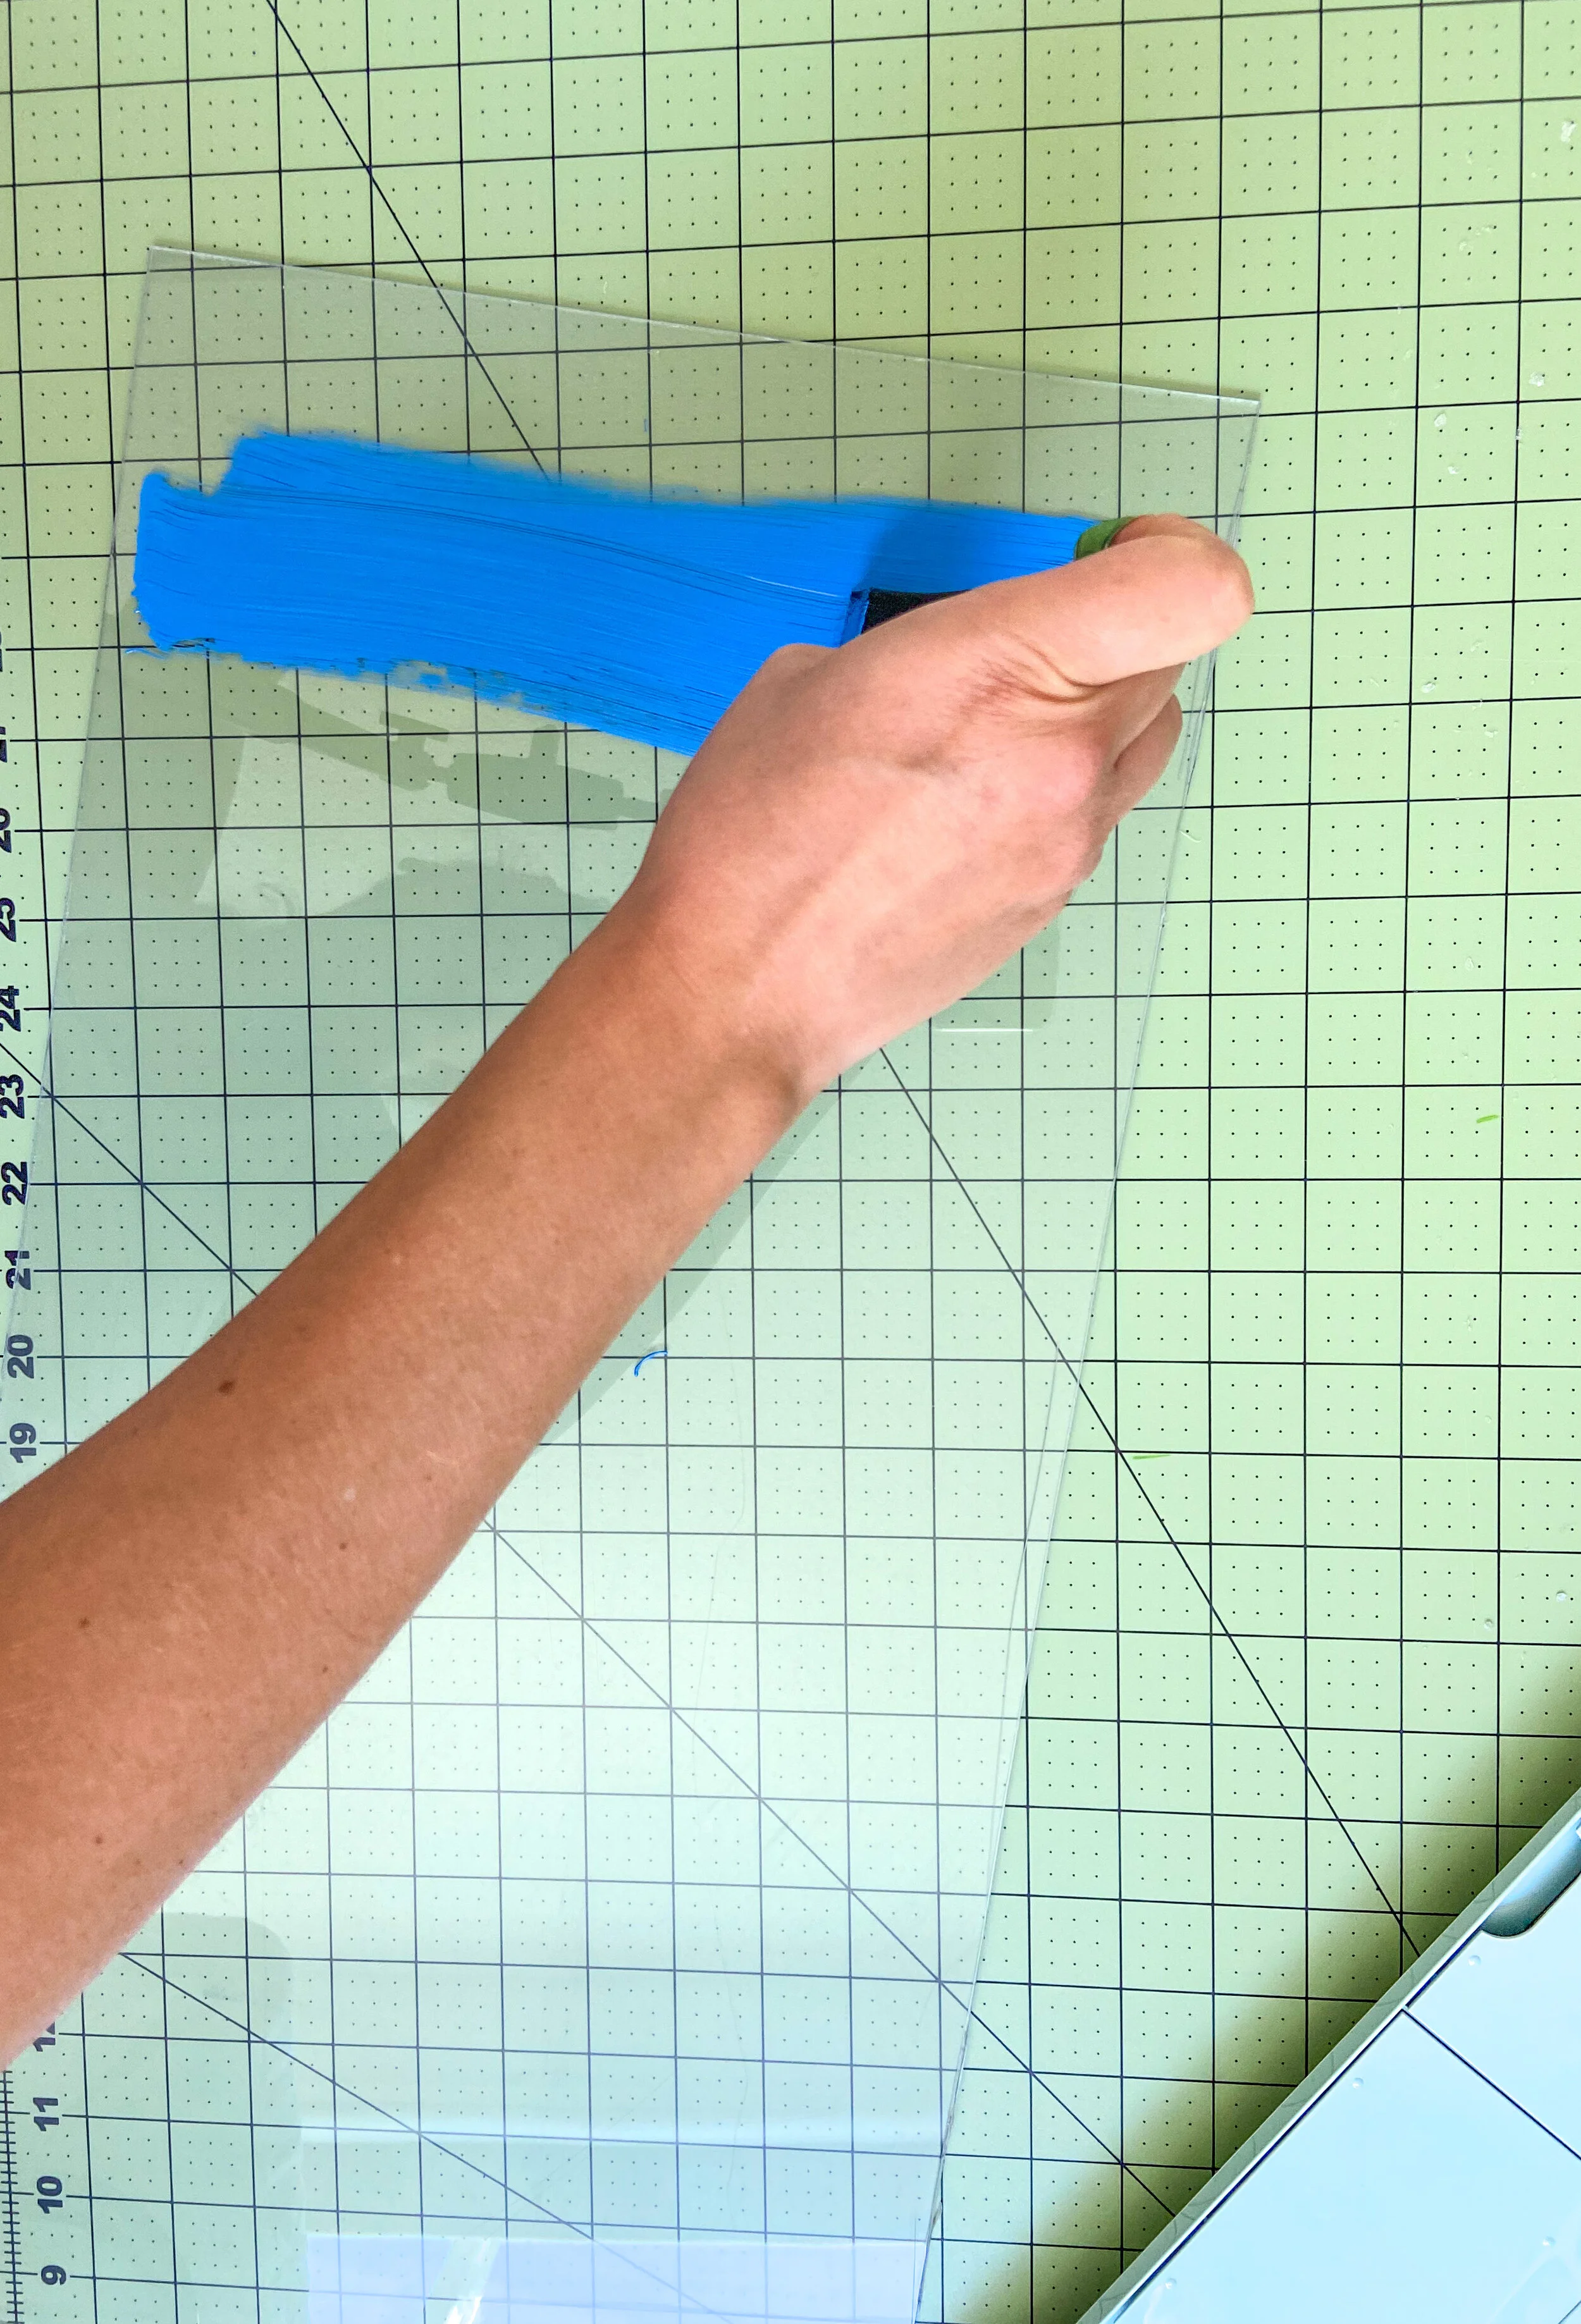
Paint, I used the Martha Stewart brand paint in Greek Tile blue and Scottish Highlands green
Foam brushes
Cricut Vinyl in black and white (I got the vinyl starter kit and it came with everything I needed)
LightGrip Mat (if using the Explore Air 2)
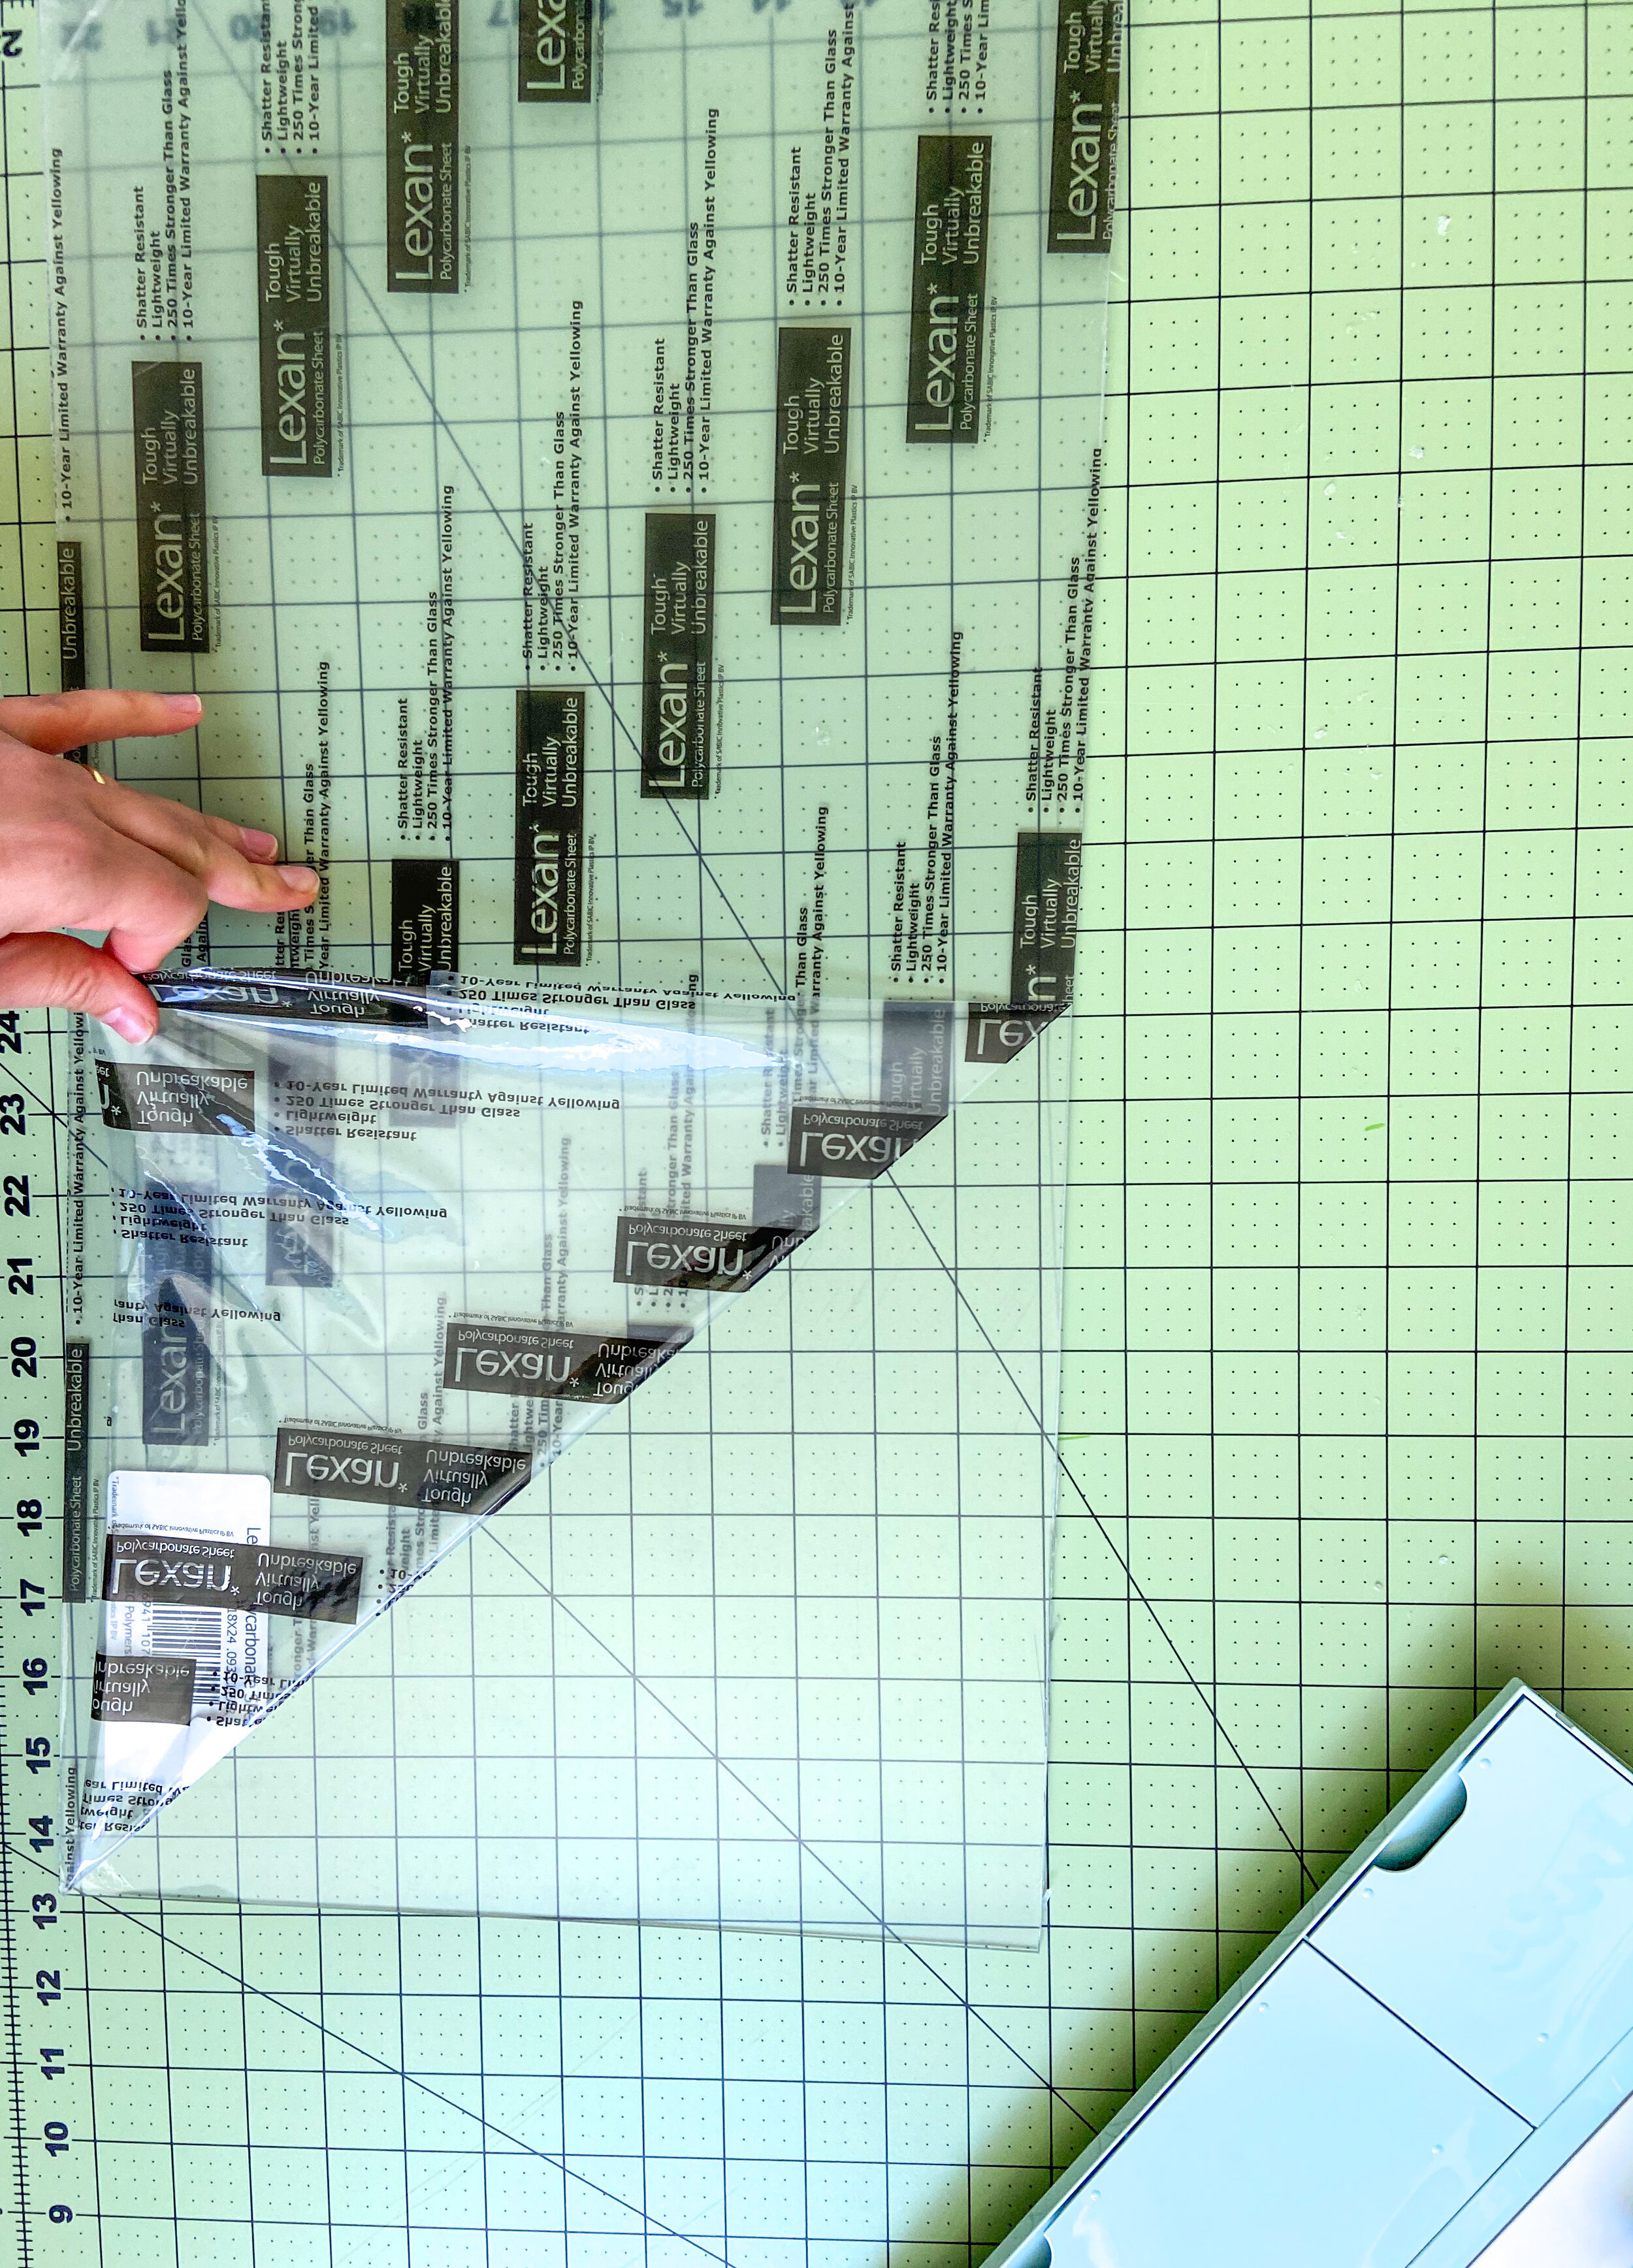
1- First you will need to take the protective film on one side of the acrylic sheet (it’s very important that you only take it from the side you’ll paint or you can scratch the other side while painting)
2- Paint the acrylic. I just dumped a bit of paint where I wanted to paint and start spreading it around with one of the foam brushes. You can see a short video on my Instagram highlights to see how I painted it.
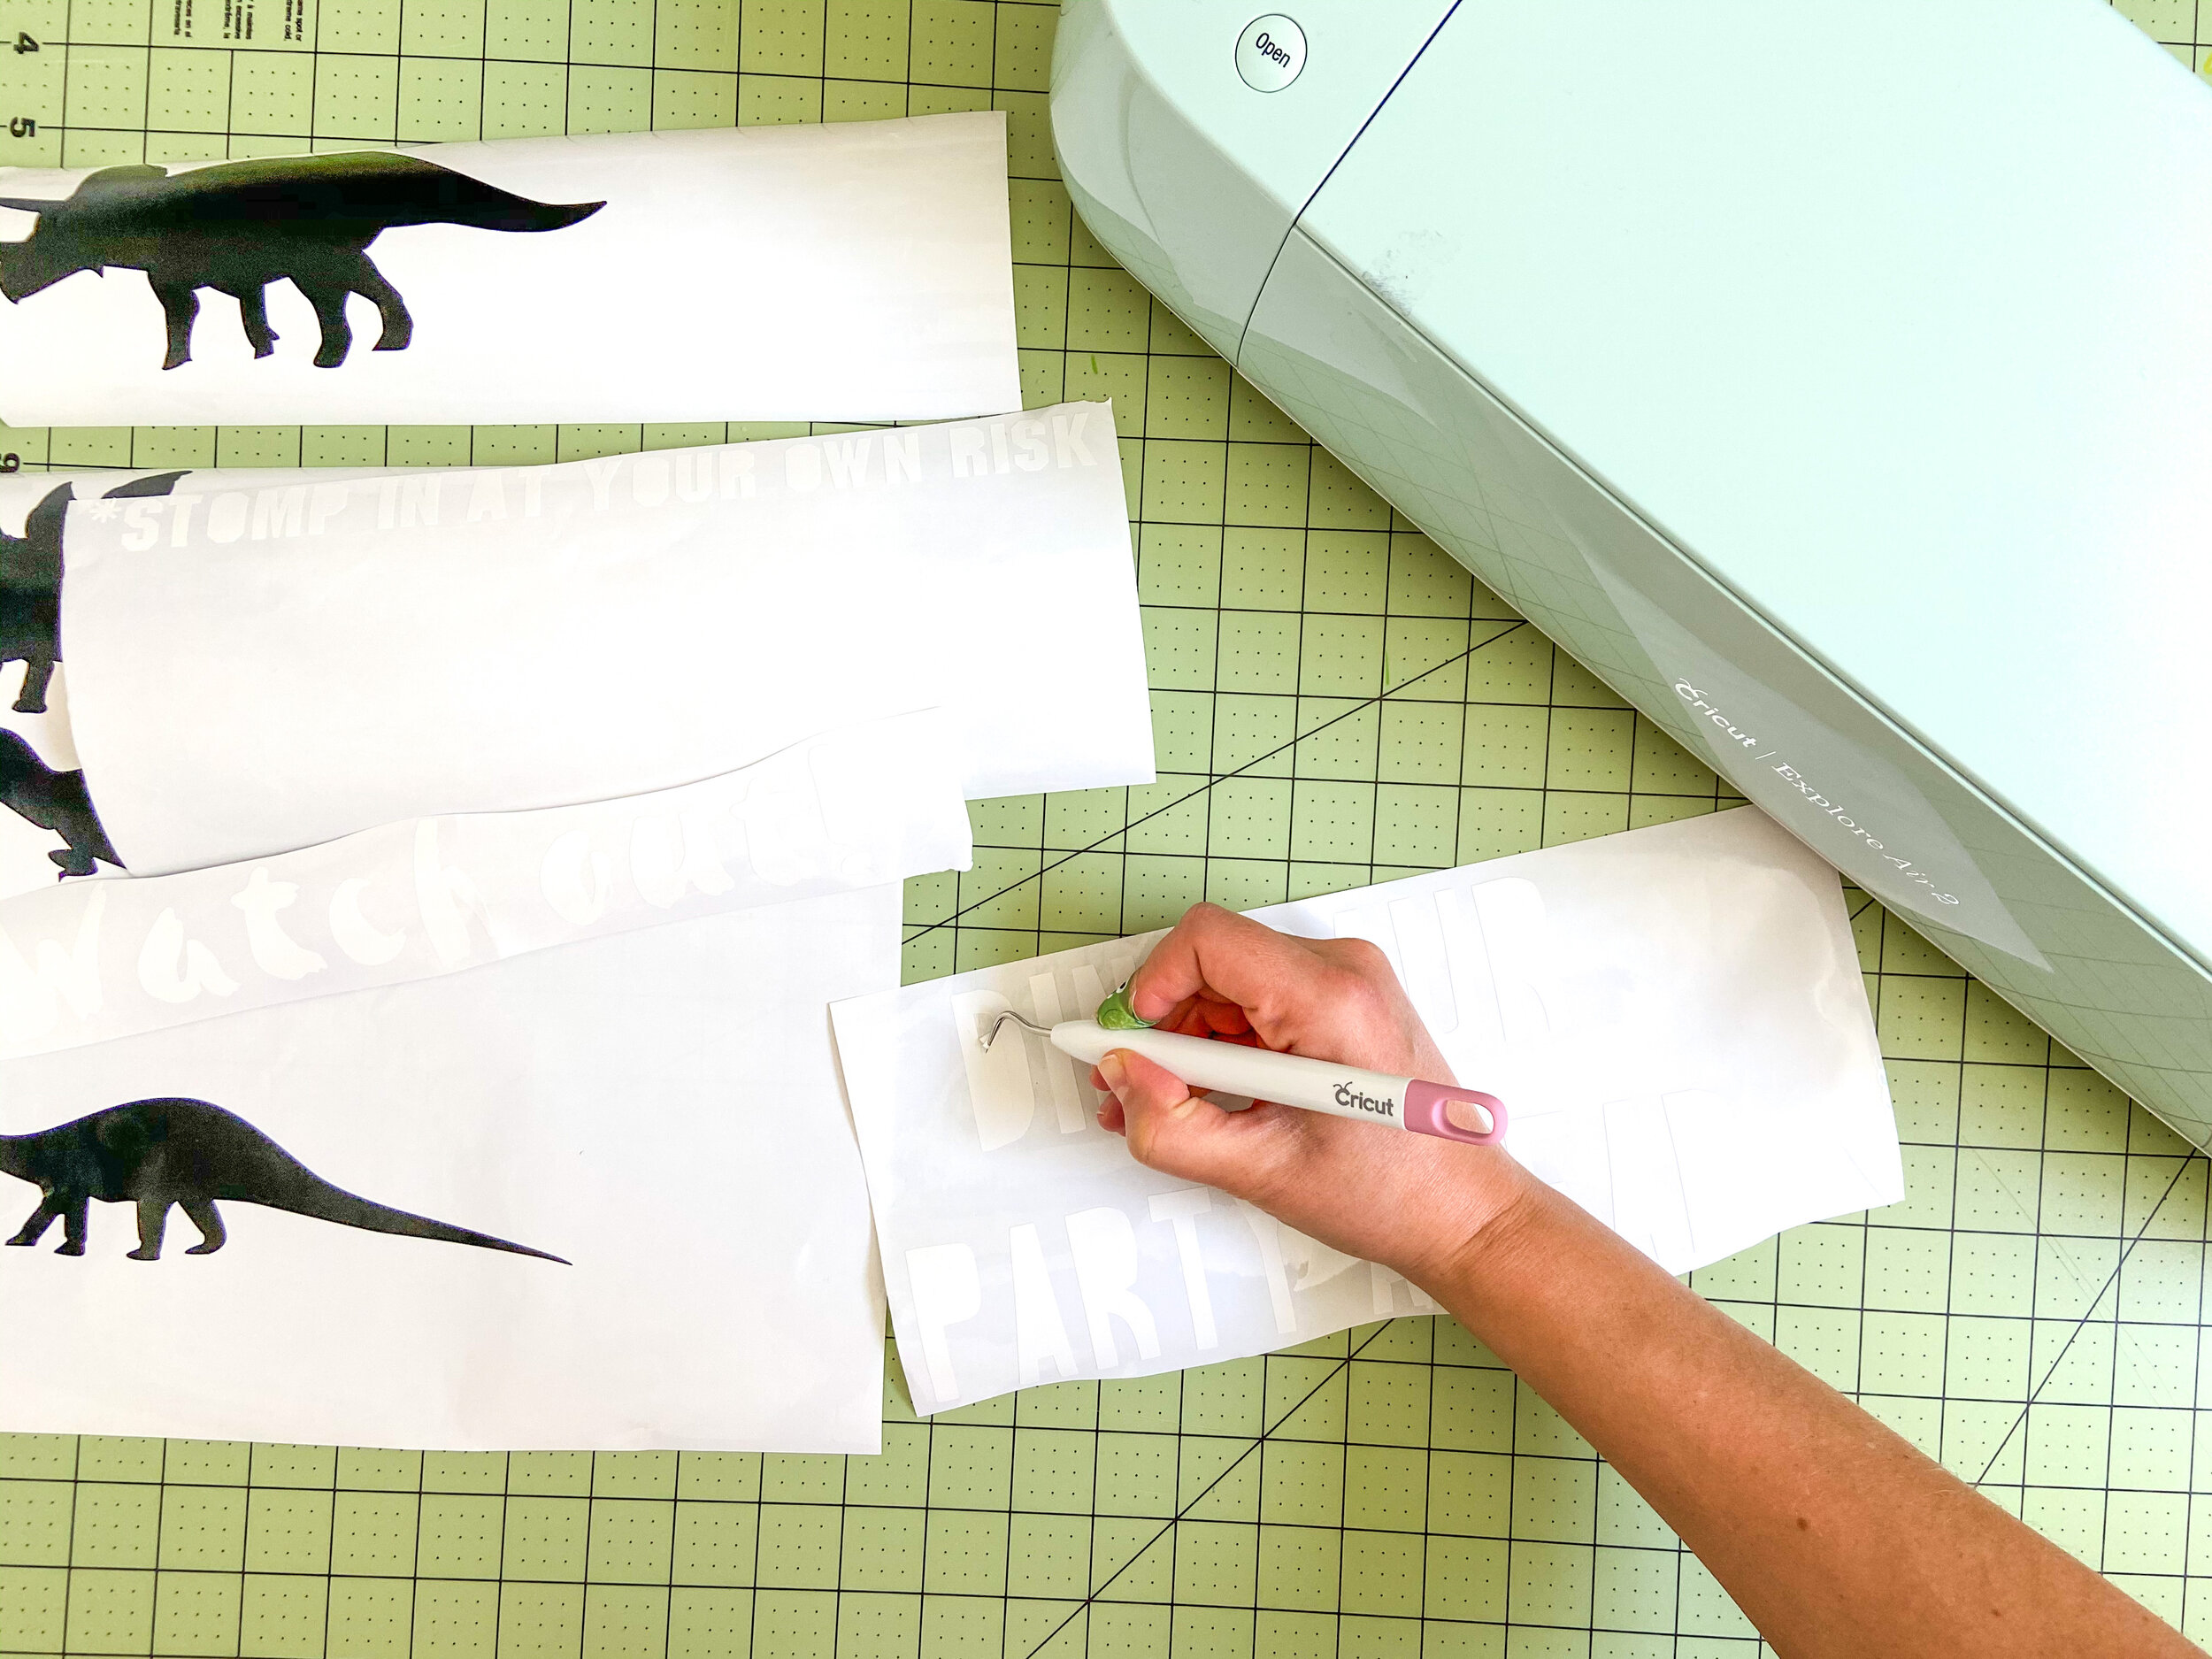

3- While the paint is drying you start cutting. Just press Make on Cricut Design Space and it’ll group everything that’s supposed to be the same color together so it’s easier to cut. If you’re using the Explore Air 2, you will need to use the LightGrip mat
4- Weed your vinyl, there are lots of little pieces so make sure you take them all off
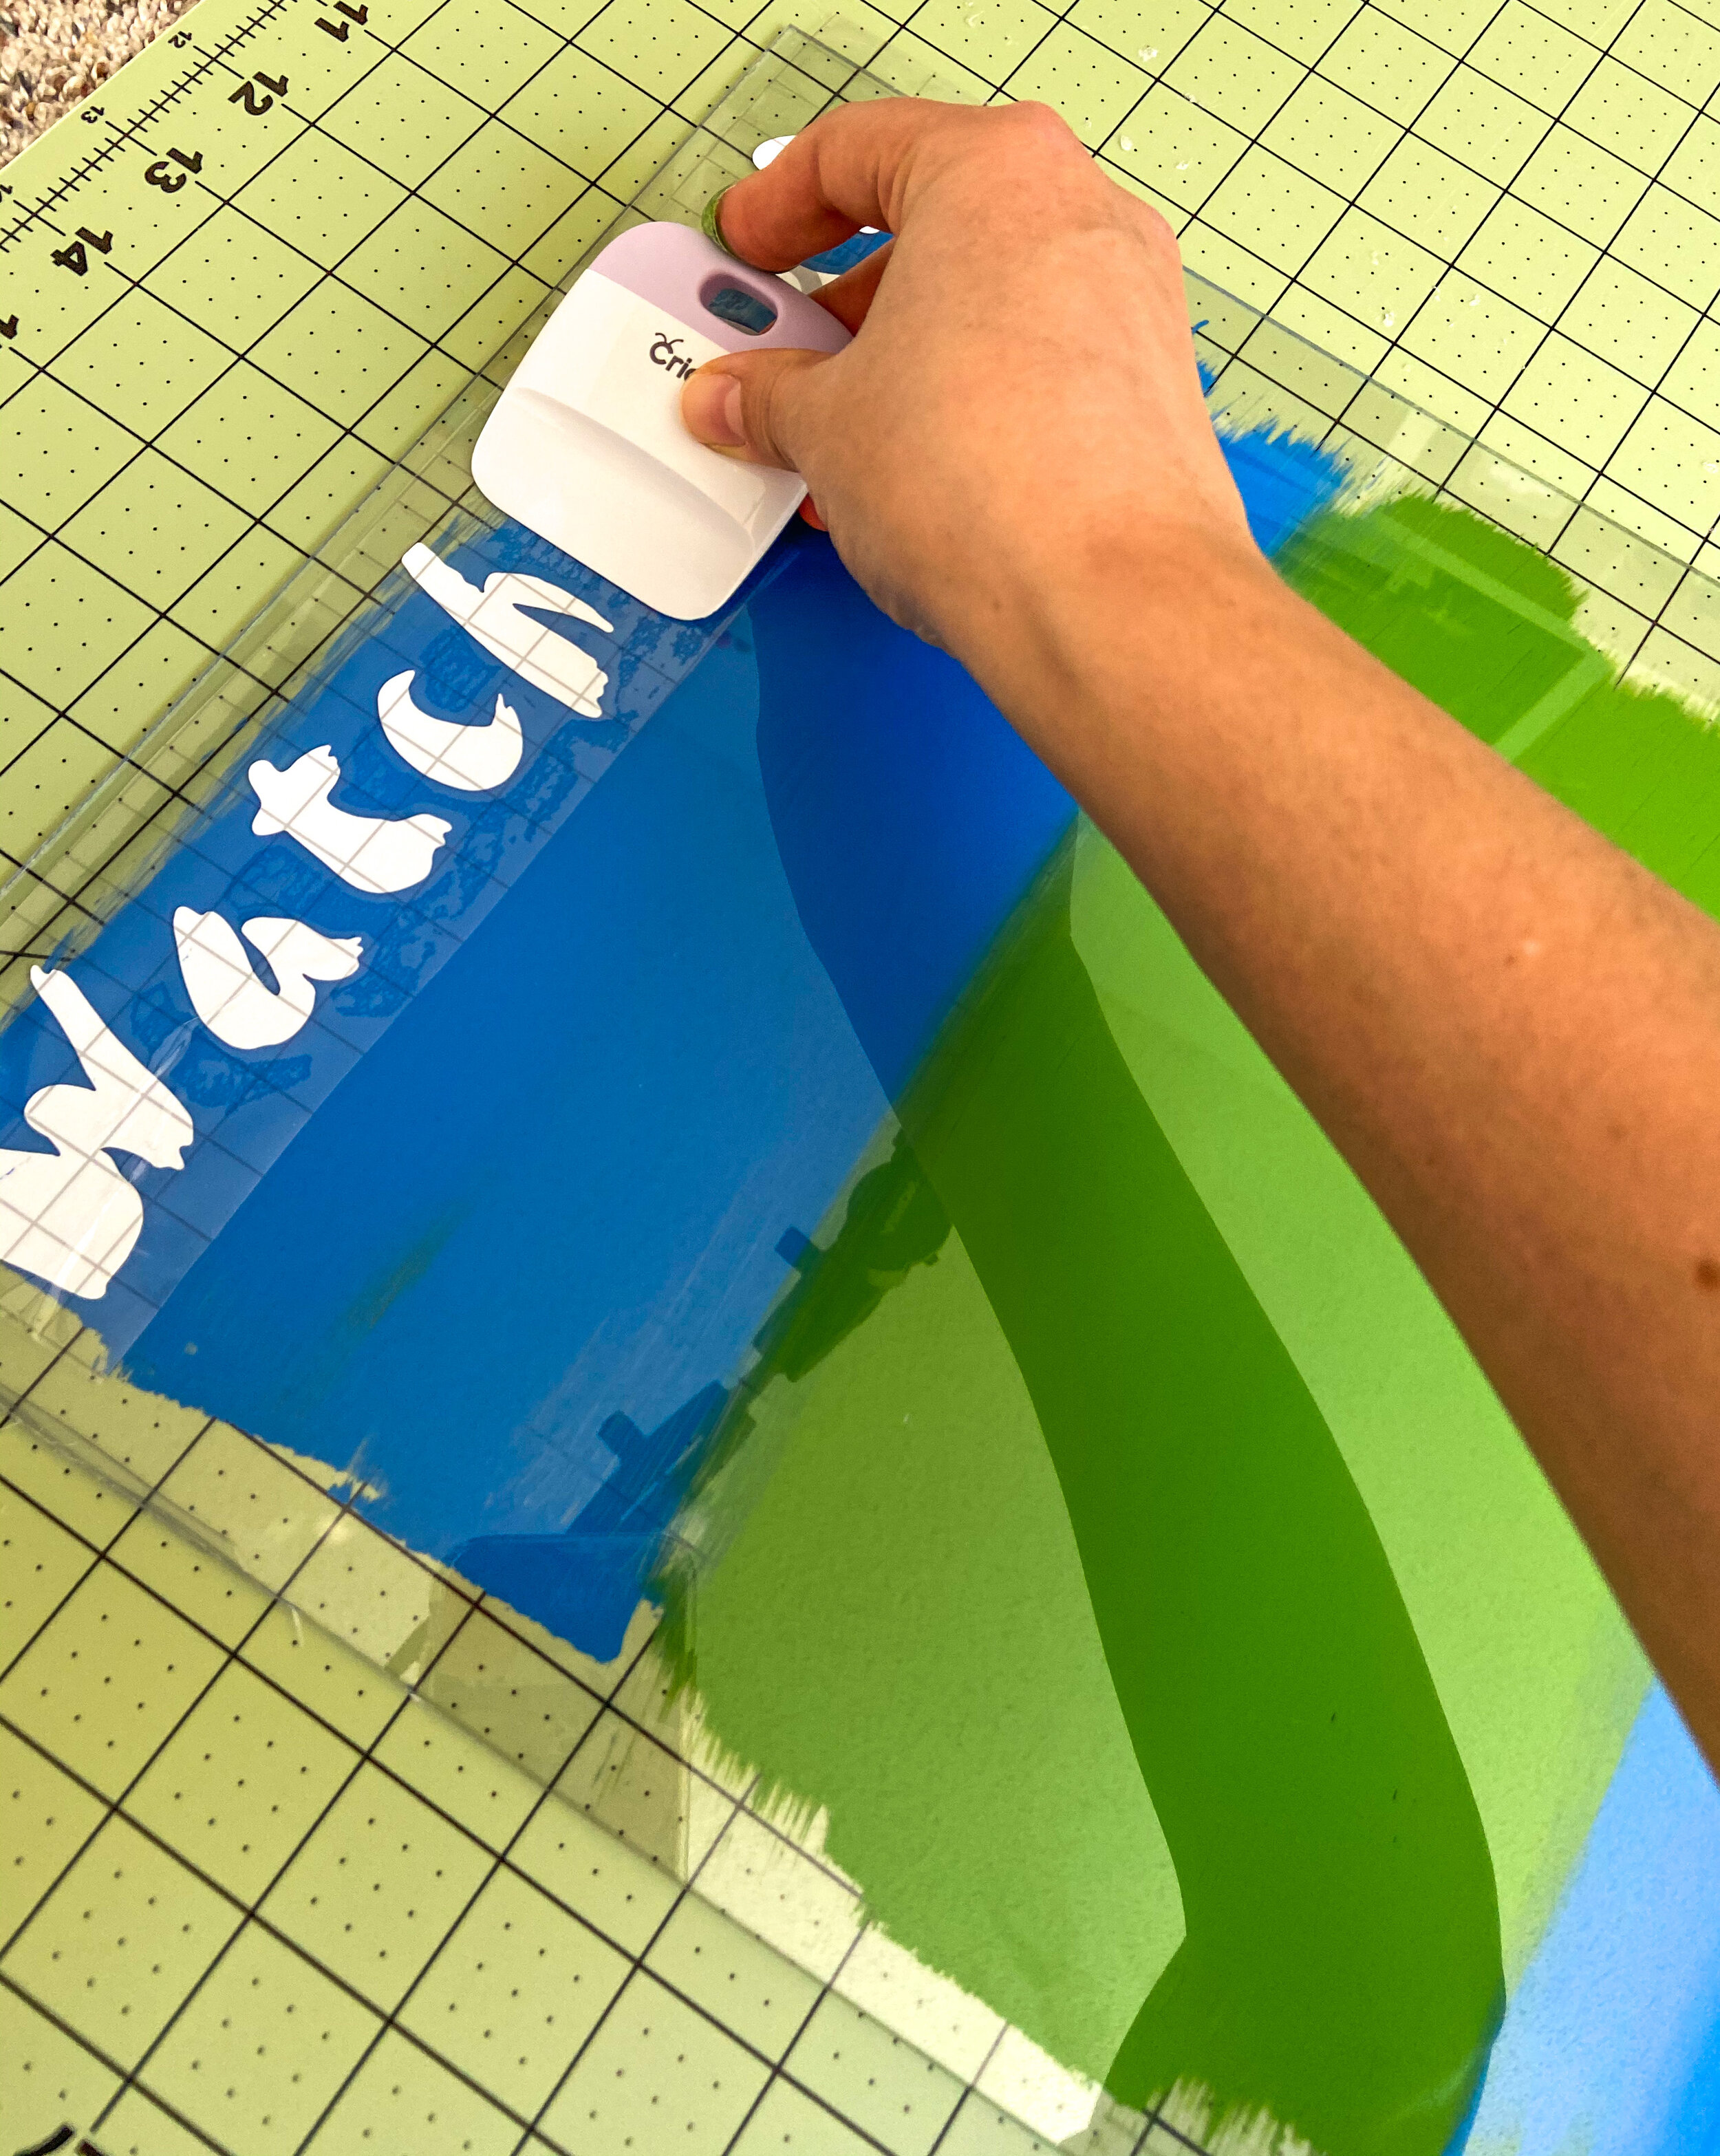
5- Put transfer paper over your designs. I didn’t use transfer tape for the dinosaurs, just the lettering, but if you don’t have a lot of experience with vinyl it’ll be easier to use transfer tape on them too.
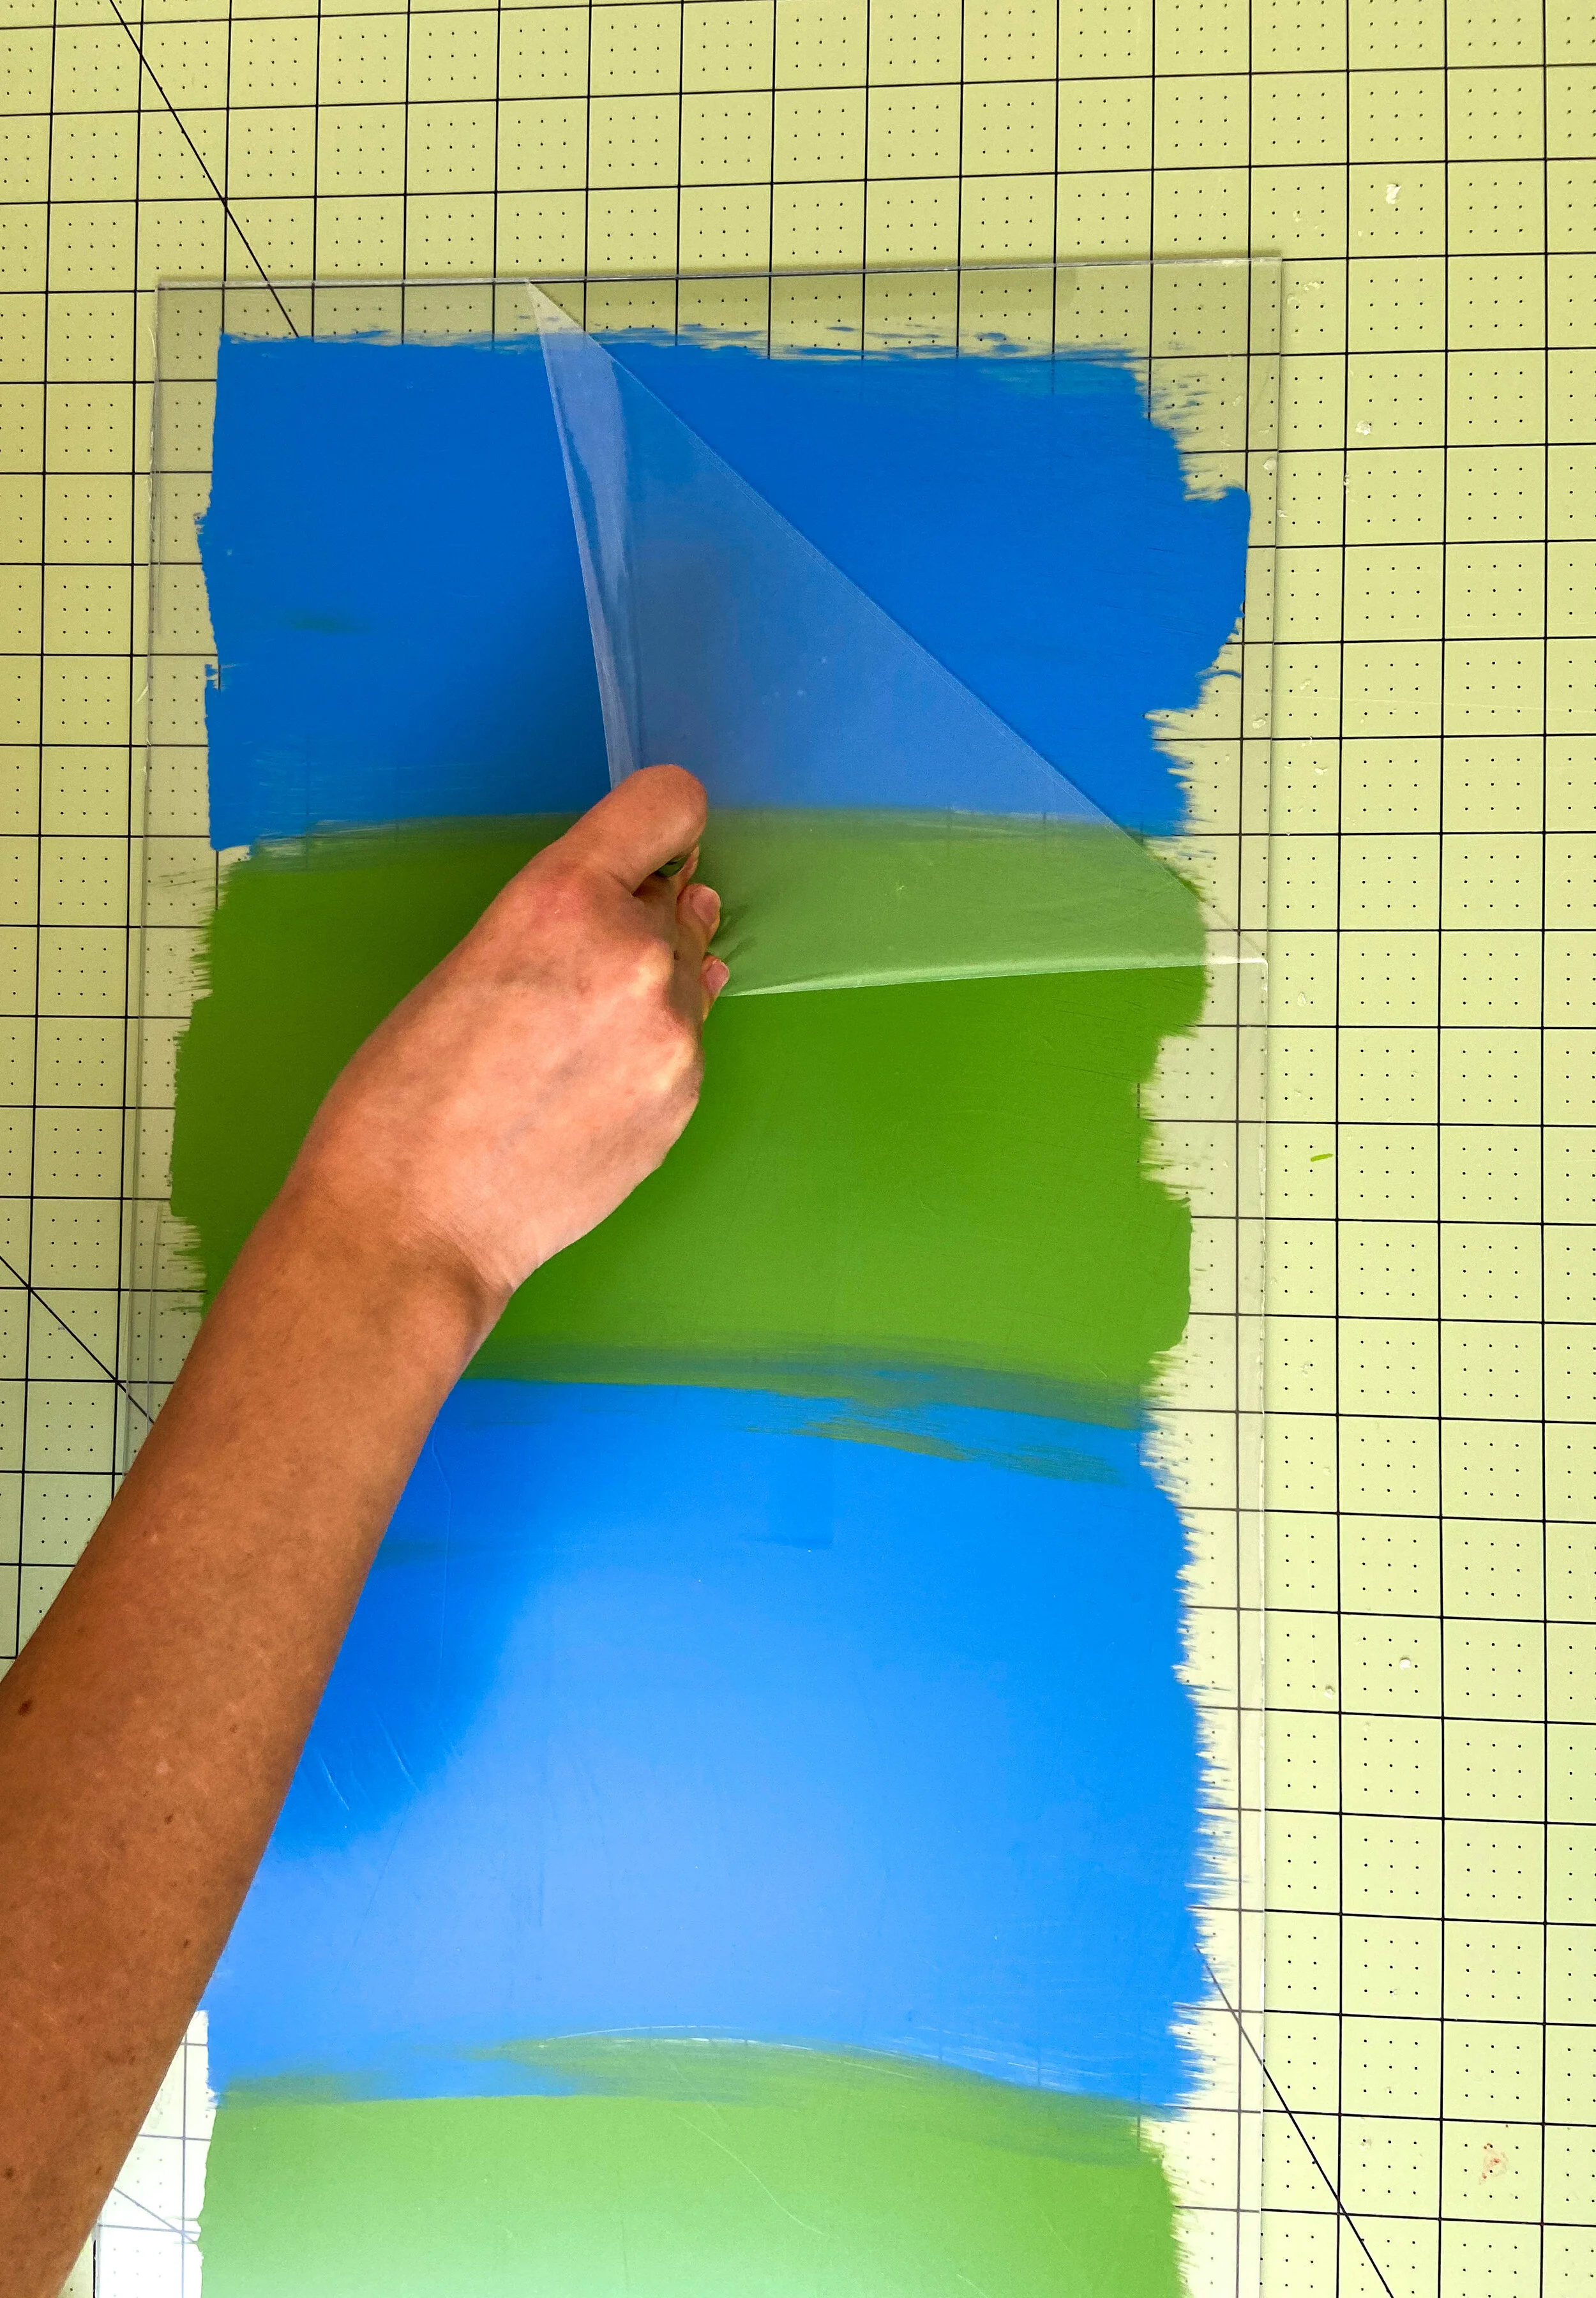

6- After your paint is dry (I used a blow dryer to speed up the process) turn your acrylic sheet around and take off the protective film
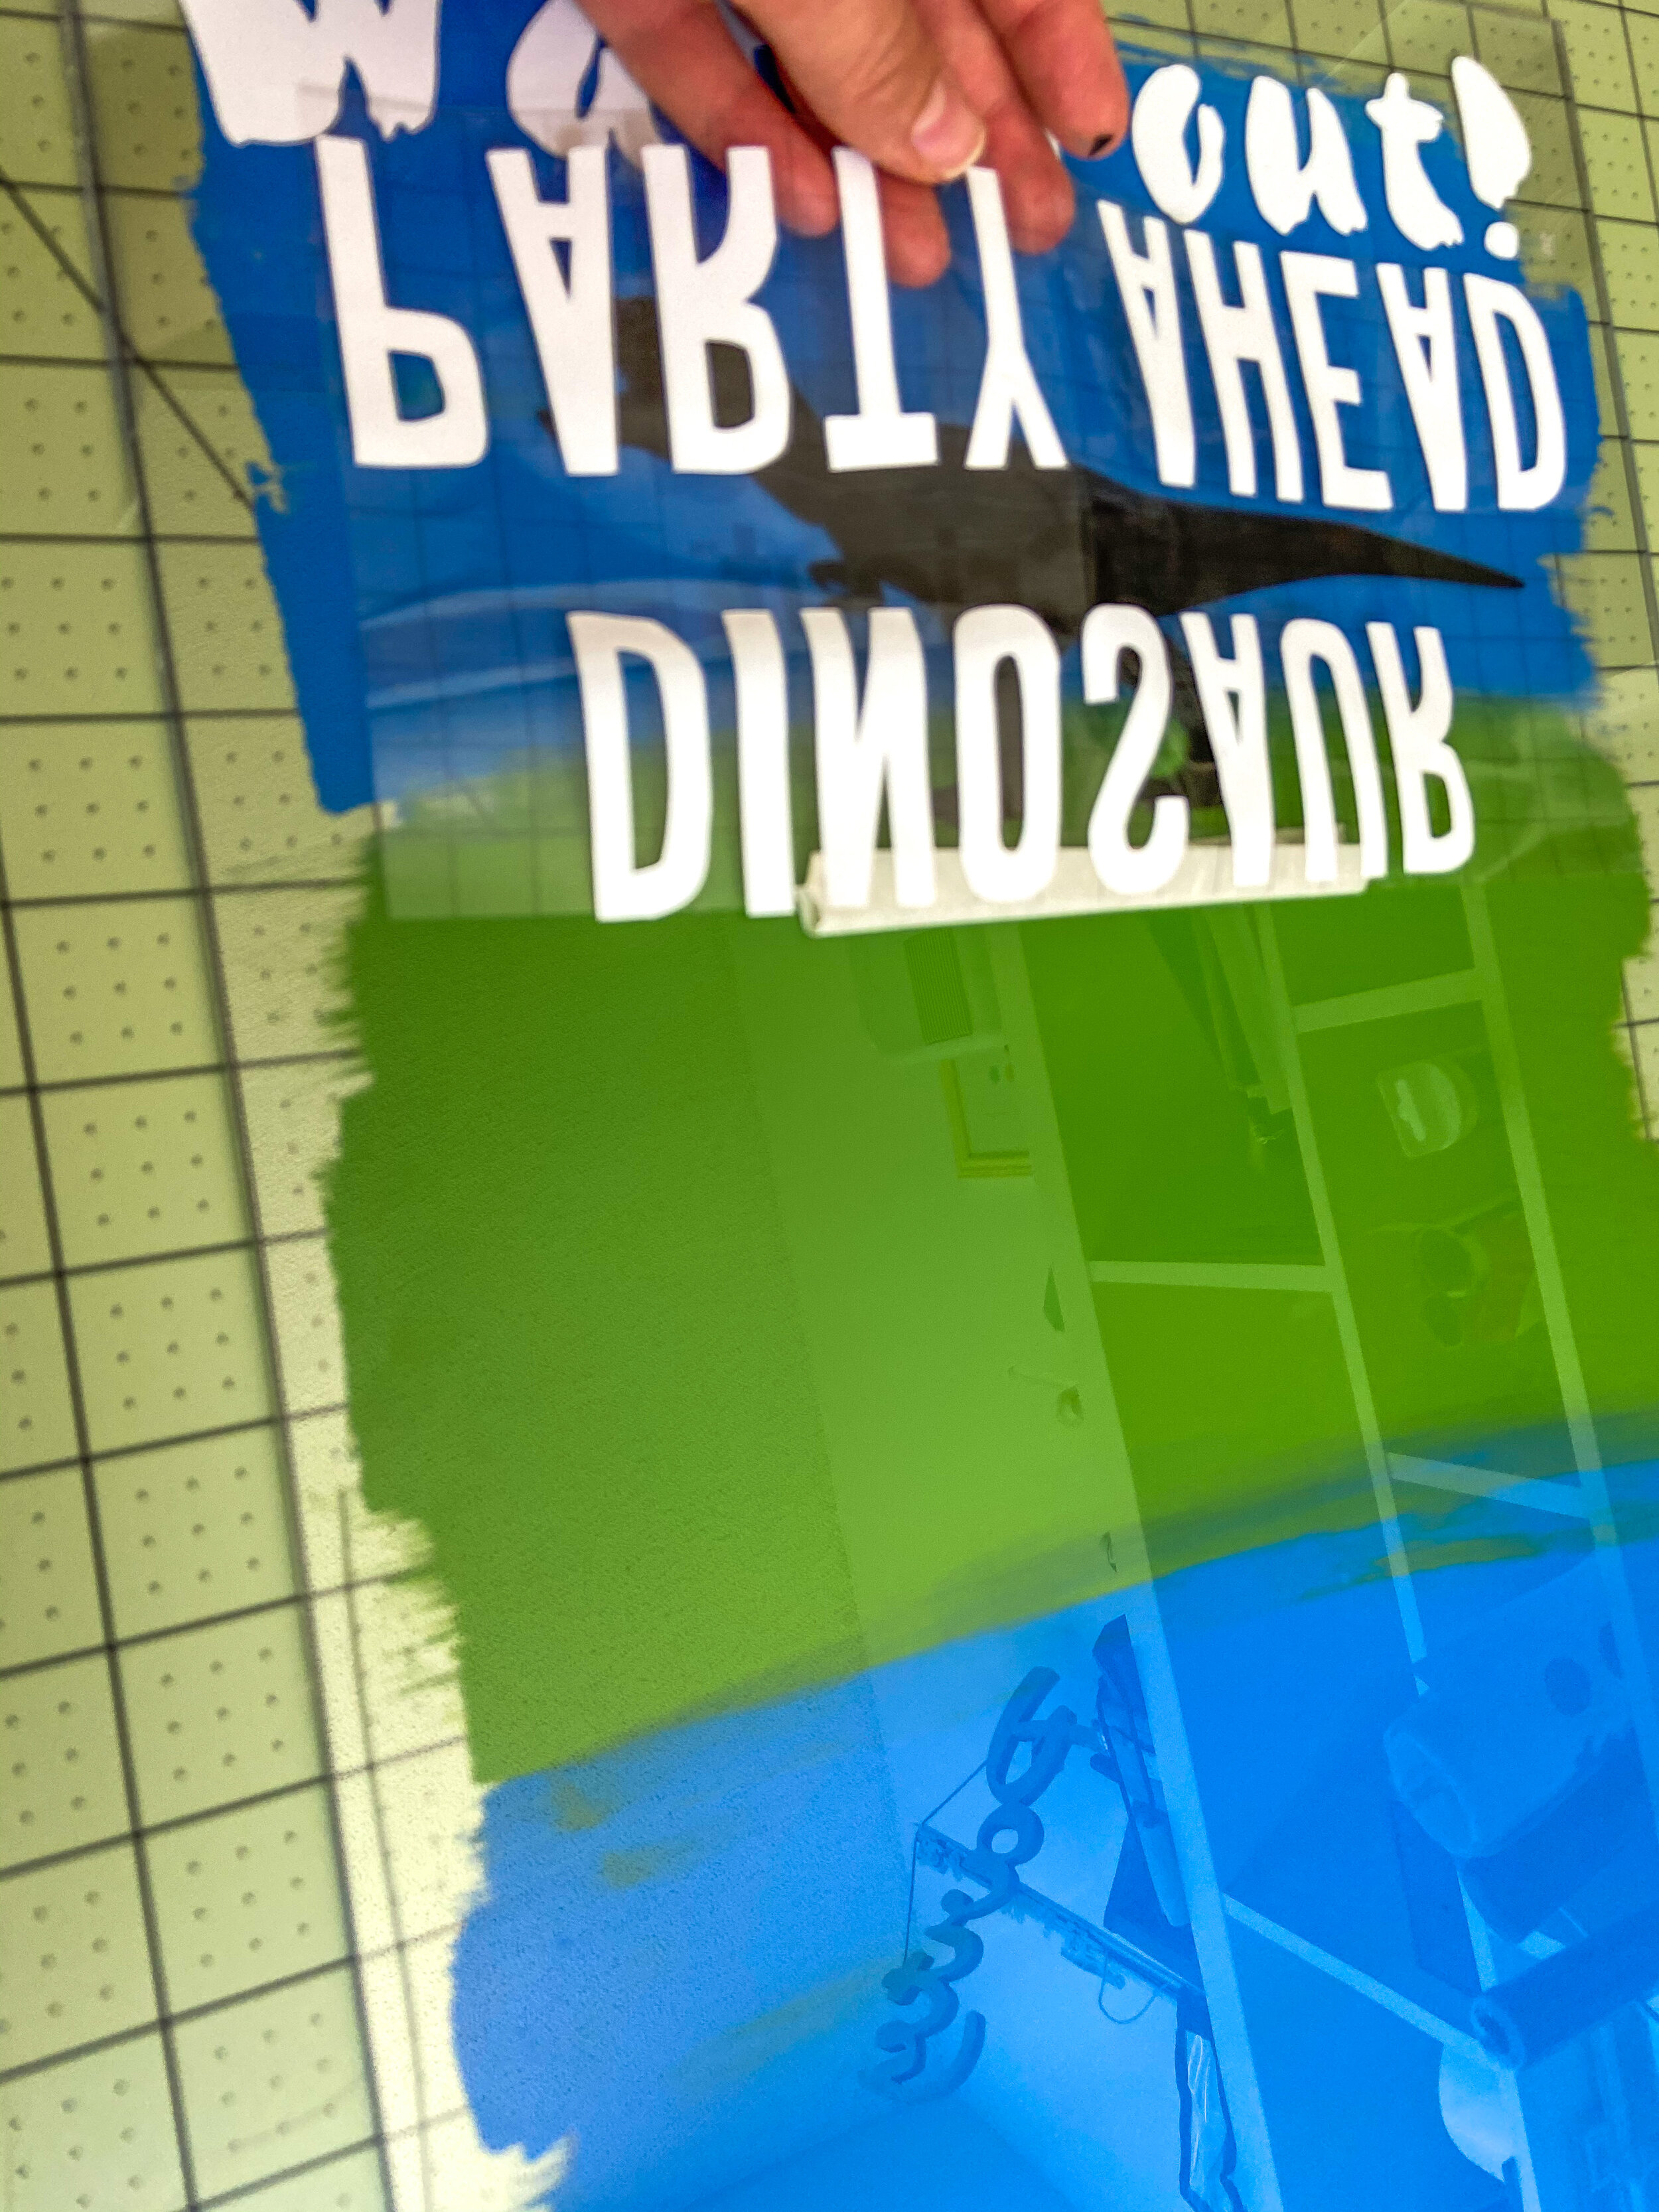
7- Start applying your vinyl, making sure you’re doing it straight and aligned. You can see my trick for this in the two pictures above. I add a small piece of masking tape and make sure its straight and aligned, after that I peel the backing off the vinyl without taking the masking tape off. Then you just lay it down carefully and use the scraper to make sure it’s applied before taking the transfer tape off.
And you’re done!
Party on!
Myri
please note that some of the links above are affiliate links and, at no cost to you, we earn a commission if you click through and make a purchase